
Layering necklaces is a timeless way to elevate any outfit, adding depth, texture, and personality to your look. Whether you're dressing up for an evening out or enhancing a casual ensemble, a well-layered stack can make a bold fashion statement. However, one persistent challenge undermines even the most thoughtfully curated combinations: tangling. When delicate chains twist and knot, not only does it ruin the aesthetic, but it also risks damaging your pieces. The good news is that with the right techniques, organization, and a bit of planning, you can enjoy layered elegance without the frustration.
Understanding the Causes of Necklace Tangling
Tangling doesn’t happen randomly—it’s the result of specific factors related to how necklaces are worn, stored, and constructed. Recognizing these causes is the first step in preventing them.
The primary culprit is movement. As you walk, turn your head, or shift clothing, necklaces naturally sway and rub against each other. Longer chains tend to drape over shorter ones, creating loops that catch and twist. Additionally, lightweight chains—especially those made from fine materials like 14k gold or delicate silver—are more prone to kinking due to their flexibility.
Storage plays a critical role as well. Throwing multiple necklaces into a drawer or tossing them into a cluttered jewelry box dramatically increases the chances of knots forming overnight. Without proper separation, even simple chains become intertwined by morning.
Material and clasp design also contribute. Spring ring clasps, while common, are thinner and more likely to slip through links than lobster clasps. Similarly, chains with intricate patterns—like figaro or cable designs—have more surface area where adjacent chains can snag.
Strategic Layering: Choosing the Right Combinations
The foundation of tangle-free layering lies in thoughtful selection. Not all necklaces are meant to be layered together, and understanding compatibility helps avoid both visual chaos and physical entanglement.
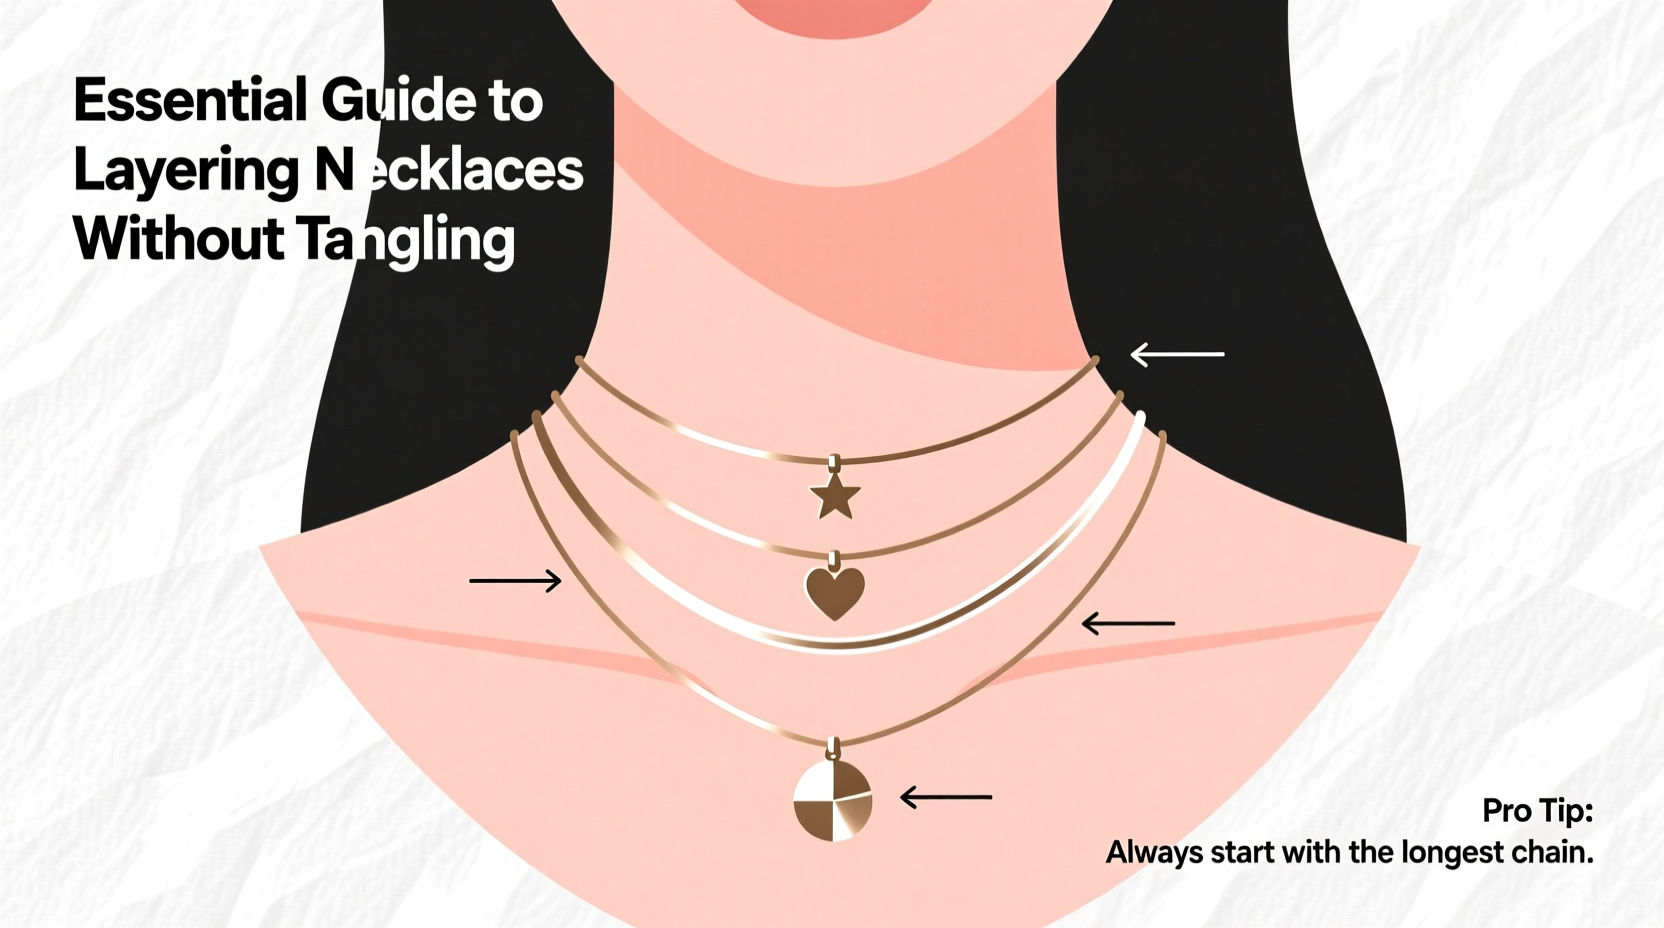
Start by varying lengths. A classic rule is to space each necklace at least 2 inches apart in length. For example, pair a 16-inch choker with an 18-inch pendant and a 20-inch chain. This staggered approach allows each piece to rest cleanly on the collarbone or chest without overlapping excessively.
Next, consider thickness. Combine different gauges—a delicate 1mm chain with a bolder 3mm rope chain—to create contrast that naturally separates layers. Thick chains act as anchors, reducing the chance of finer chains slipping underneath and twisting.
Pay attention to weight distribution. Heavier pendants should be placed on longer chains so they hang lower and don’t pull shorter necklaces out of alignment. Avoid clustering multiple pendants at similar levels, which encourages rubbing and friction.
“Balance isn’t just visual—it’s structural. When layering, think about how each piece moves in relation to the others.” — Lena Torres, Jewelry Stylist & Consultant
Do’s and Don’ts of Necklace Pairing
| Do | Don’t |
|---|---|
| Vary lengths by at least 2 inches between layers | Wear three 18-inch chains together |
| Mix chain thicknesses (e.g., fine + medium + bold) | Combine multiple ultra-fine chains |
| Use lobster clasps for secure closure | Rely solely on spring ring clasps |
| Limit layering to 3–4 pieces max | Stack five or more necklaces haphazardly |
| Place heavier pendants on longer chains | Hang large charms on short, fragile chains |
Step-by-Step Guide to Tangle-Free Layering
Follow this practical sequence to put on your necklaces efficiently and safely every time.
- Start with the longest chain. Begin by securing the deepest layer first. This prevents shorter necklaces from falling over it and getting caught during adjustment.
- Fasten the clasp securely. Use both hands to ensure the closure clicks fully. Check that the chain lies flat before moving on.
- Add mid-length pieces next. Slide the second necklace over your head, guiding it gently into place. Adjust positioning so it rests slightly above the first chain.
- Finish with the shortest necklace. Place the choker or collar-level chain last to avoid interference.
- Adjust carefully. Gently tug each chain downward to settle its natural drape. Avoid pulling sideways, which can cause twisting.
- Check movement. Turn your head side to side and simulate normal motion to ensure stability.
Smart Storage Solutions to Prevent Overnight Tangles
How you store your necklaces when not in use is just as important as how you wear them. Poor storage leads to daily detangling sessions that wear down metal and increase breakage risk.
Invest in a vertical jewelry stand with individual hooks. This keeps each chain separated and hanging freely, mimicking its natural wearing position. Alternatively, use a lined drawer organizer with padded compartments or fabric-lined trays that prevent chains from sliding together.
If traveling, never toss necklaces loose into a bag. Instead, roll them around a cardboard tube or use a travel roll with designated slots. Another effective trick is to thread each chain through a drinking straw before closing the clasp—this creates a rigid barrier that stops links from looping.
For long-term storage, wrap each necklace in soft cloth or acid-free tissue paper. Store in a dry, cool place away from humidity, which accelerates tarnishing and weakens metal joints.
Jewelry Storage Comparison
| Storage Method | Best For | Tangle Prevention Level |
|---|---|---|
| Vertical hook stand | Daily wear, multiple chains | ★★★★★ |
| Fabric-lined tray | Sensitive finishes, gemstone chains | ★★★★☆ |
| Travel roll with slots | On-the-go, frequent travelers | ★★★★☆ |
| Straw method (chain through straw) | Short-term, single-piece protection | ★★★☆☆ |
| Loose in a pouch | Single items only | ★☆☆☆☆ |
Real-Life Example: How Sarah Solved Her Layering Struggles
Sarah, a marketing professional in Chicago, loved accessorizing with layered necklaces but grew frustrated after snapping her favorite gold chain twice due to repeated tangles. She often wore a 17-inch initial pendant, a 20-inch cross, and a 22-inch nameplate together—but they constantly twisted during her commute.
After researching best practices, she restructured her routine. First, she replaced the spring ring clasps with lobster clasps for added security. Then, she adjusted the lengths to 16\", 19\", and 22\" to create clearer separation. She began using a tabletop jewelry tree at home and adopted the straw method for workday wear.
Within weeks, Sarah noticed a dramatic difference. Her necklaces stayed aligned throughout the day, and she no longer spent mornings untangling knots. More importantly, her pieces lasted longer and maintained their luster. “It’s amazing how small changes made such a big impact,” she said. “Now my layers look intentional, not messy.”
Jewelry Care Checklist for Tangle Prevention
- ✅ Choose necklaces with varied lengths (at least 2” apart)
- ✅ Mix chain thicknesses to create natural separation
- ✅ Use lobster clasps instead of spring rings for better hold
- ✅ Put on longest necklace first, shortest last
- ✅ Store chains individually using hooks or compartments
- ✅ Avoid wearing too many layers at once (limit to 3–4)
- ✅ Clean necklaces regularly to prevent grime buildup in links
- ✅ Inspect clasps and jump rings monthly for wear
- ✅ Use the straw method when traveling or storing temporarily
- ✅ Keep jewelry away from perfumes, lotions, and sweat
Frequently Asked Questions
Can I layer necklaces of the same length?
It’s possible, but not recommended for everyday wear. Chains of identical length will overlap and rub constantly, increasing tangling and wear. If you must, choose one very fine chain and one thicker, textured chain to reduce contact points. Also, limit wear time and inspect for snags frequently.
How do I untangle a knotted necklace safely?
Start by laying the necklace flat on a clean surface under good lighting. Use a pin or needle to gently loosen the outer loops of the knot. Work slowly from the outside in, never pulling hard. Apply a drop of baby oil or specialized jewelry lubricant to help loosen tight spots. If the knot is deep or near the clasp, consider taking it to a jeweler to avoid breaking the chain.
Are certain chain types less likely to tangle?
Yes. Rigid or structured chains like box, snake, or wheat weaves are less prone to twisting than fluid styles like cable or trace chains. Rope chains naturally coil but resist kinking due to their interlocking design. For layering, combine a rigid base chain with one or two flexible accent pieces for balance.
Final Thoughts: Style Shouldn’t Come at the Cost of Sanity
Layering necklaces is an art form that blends personal expression with technical precision. While the goal is aesthetic appeal, achieving it requires attention to detail beyond mere fashion sense. By selecting compatible pieces, adopting smart wearing habits, and committing to proper storage, you preserve both the beauty and longevity of your collection.
Remember, the most stylish look is one that lasts. A tangle-free stack isn’t just easier to manage—it reflects care, intention, and respect for your accessories. With these strategies in place, you can confidently experiment with new combinations, knowing each layer will stay in place exactly where it belongs.


 浙公网安备
33010002000092号
浙公网安备
33010002000092号 浙B2-20120091-4
Comments
No comments yet. Why don't you start the discussion?