
Stair handrails are more than just functional—they’re a critical component of home safety and an opportunity to enhance interior design. Whether you're renovating an older home or building a new staircase, properly measuring and installing a handrail ensures stability, meets building codes, and complements your space. A poorly fitted rail can be uncomfortable, unsafe, or visually jarring. This guide walks through every stage of the process with precision-focused advice, real-world examples, and practical tools to help you achieve a secure and stylish outcome.
Understanding Building Codes and Safety Standards
Before any measurement begins, it’s essential to understand local building regulations. Handrail requirements vary by region but generally follow guidelines from standards like the International Residential Code (IRC). These rules exist to prevent falls and ensure accessibility.
Key IRC requirements include:
- Handrails must be installed on stairs with four or more risers.
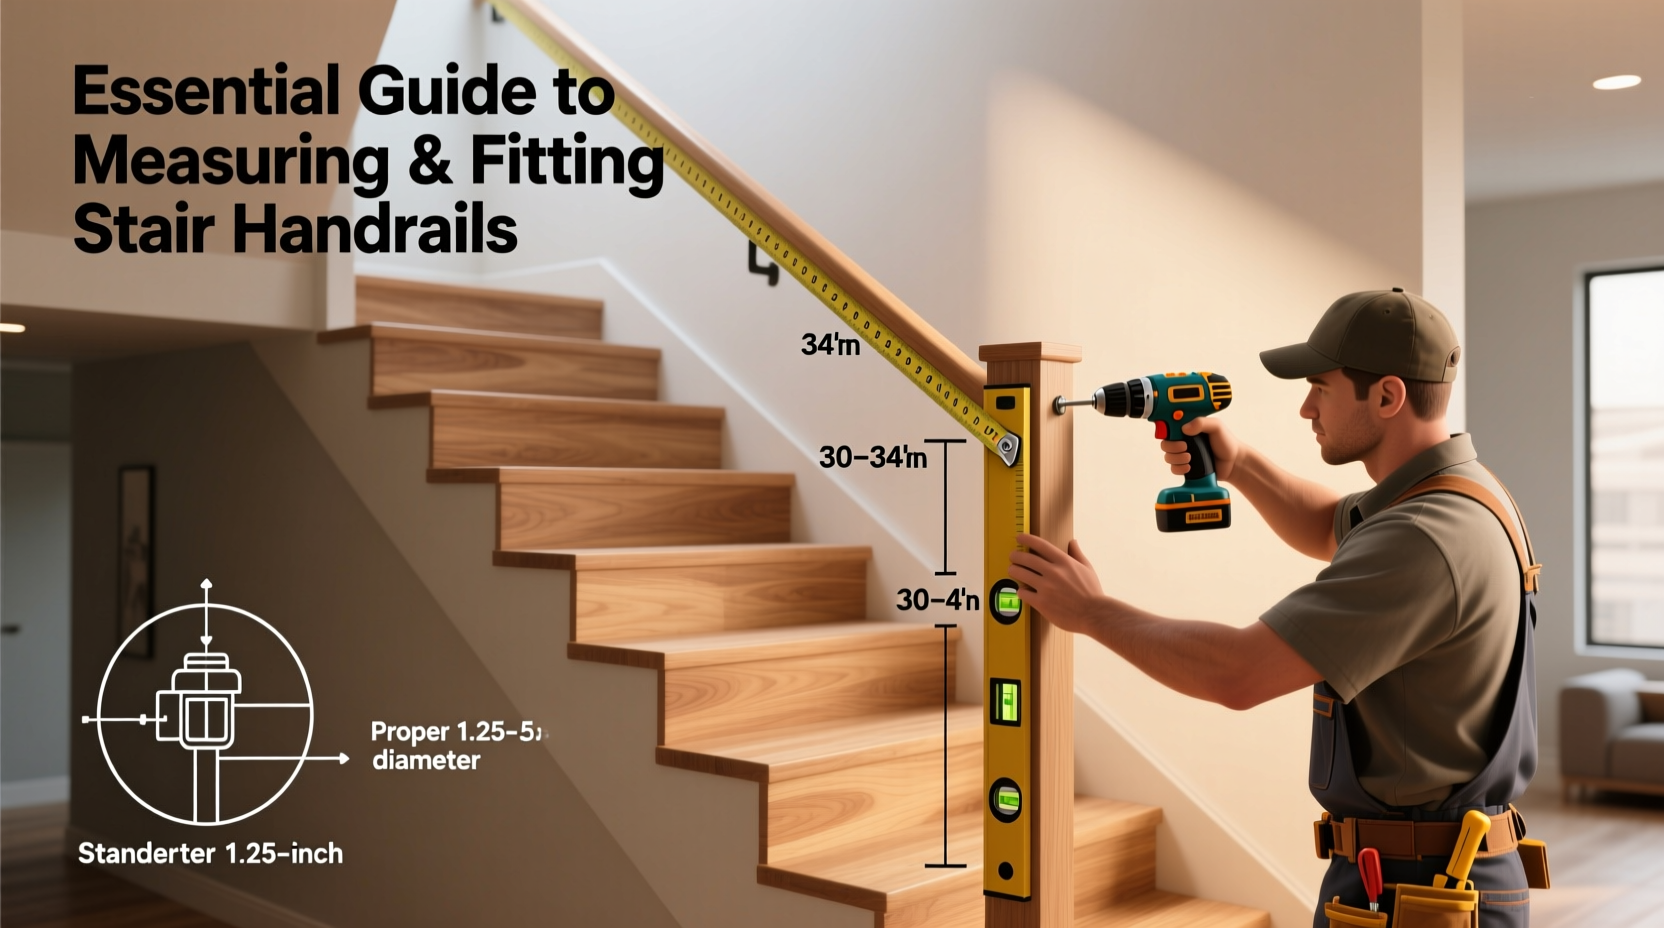
- The height should measure between 34” and 38” from the leading edge of the tread to the top of the rail.
- Rails must be continuous along the full length of the stairs, starting at the top riser and ending at the bottom.
- Grip size matters: the ideal cross-section is 1¼” to 2” in diameter, or shaped for comfortable graspability.
- Clearance between the rail and wall should be at least 1½” to allow fingers to slide underneath.
“Safety isn’t optional when it comes to stairways. A compliant handrail reduces fall risk by up to 70%, especially for children and seniors.” — David Langston, Structural Safety Consultant
Step-by-Step Guide to Measuring Your Staircase
Accurate measurements are the foundation of a well-fitted handrail. Follow this sequence to capture all necessary dimensions.
- Count the Risers and Treads: Measure the number of steps. Each vertical rise (riser) and horizontal surface (tread) affects the total run.
- Determine Total Rise: Use a tape measure from the floor at the bottom to the floor at the top. This gives the overall vertical distance.
- Calculate Stair Angle: Use a level and tape measure to find the run (horizontal distance) of one step. Divide rise by run, then use arctangent to determine the angle. Alternatively, use a digital angle finder for accuracy.
- Measure the Run Length: From the front edge of the top tread to the front edge of the bottom tread, measure along the incline. This determines the rail’s linear length.
- Check Wall Clearance: If mounting against a wall, confirm there’s enough space behind where the rail will sit for brackets and fasteners.
- Mark Start and End Points: Identify exactly where the rail begins and ends. Include extensions beyond the first and last steps if required by code.
Tools You’ll Need
- Tape measure (25 ft minimum)
- Level (laser or bubble)
- Digital angle finder or protractor
- Notepad and pencil
- Chalk line (for marking bracket positions)
Selecting the Right Materials and Style
A handrail’s material impacts both durability and design. Common options include wood, metal (stainless steel, iron), and composite materials. Each has pros and cons depending on environment and aesthetic goals.
| Material | Pros | Cons | Best For |
|---|---|---|---|
| Hardwood (oak, walnut) | Warm look, easy to stain, classic appeal | Requires maintenance, can scratch | Traditional interiors, living areas |
| Stainless Steel | Durable, modern, low maintenance | Cold to touch, higher cost | Contemporary homes, outdoor use |
| Wrought Iron | Strong, ornamental designs possible | Heavy, complex installation | Entryways, decorative focal points |
| Composite/PVC | Maintenance-free, weather-resistant | Less structural rigidity | Outdoor decks, humid climates |
Style choices should align with your home’s architecture. A minimalist floating rail suits modern lofts, while carved wooden balusters complement Victorian homes. Consider finish consistency—match rail hardware to door handles or lighting fixtures for cohesion.
Installation Process: Precision Matters
Once measured and selected, proper installation ensures long-term performance.
- Prepare the Bracket Layout: Using your angle measurement, mark bracket locations along the wall. Spacing should not exceed 4 feet apart for support.
- Install Mounting Blocks (if needed): In drywall-only situations, insert wooden backing blocks secured into studs to anchor brackets firmly.
- Attach Brackets: Secure each bracket using appropriate screws or anchors. Confirm alignment with a level.
- Cut and Fit the Rail: Cut the handrail at the correct angle using a miter saw. Test-fit before final attachment.
- Secure the Rail: Fasten the rail to the brackets using provided hardware. Avoid overtightening to prevent cracking or warping.
- Finish and Inspect: Sand rough edges, apply finish if wood, and test for wobble or instability.
Mini Case Study: Retrofitting a 1920s Home Staircase
In Portland, Oregon, homeowner Maria Lopez renovated her historic bungalow’s narrow staircase. The original stairs lacked rails, posing a hazard for her two young children. She opted for a dark-stained oak rail with forged iron brackets to preserve period charm.
Challenges included uneven treads and plaster walls hiding stud locations. By using a stud finder and installing hidden backing plates, she achieved secure bracket placement without damaging the walls. The finished rail met code at 36” height and extended past the top and bottom steps as required. Neighbors later asked for her contractor’s contact info—the result was so seamless it looked original to the home.
Frequently Asked Questions
Can I install a handrail on only one side of the stairs?
Yes, building codes typically require at least one handrail on stairs with four or more risers. However, installing rails on both sides increases safety, especially in high-traffic or multi-user homes.
What if my stairs are curved or spiral?
Curved stairs require custom-fabricated rails, often made from laminated wood or bent metal. These are more expensive and may need professional installation. Templates or 3D scans help manufacturers produce accurate curves.
Do I need a permit to install a stair handrail?
In most jurisdictions, yes—especially if it’s part of a larger renovation. Permits ensure compliance with safety codes and are often required for resale inspections. Check with your local building department before starting work.
Final Checklist Before You Begin
- ✅ Verified local building code requirements
- ✅ Measured total rise, run, and angle accurately
- ✅ Selected appropriate material and style for your space
- ✅ Purchased compatible brackets and fasteners
- ✅ Confirmed stud locations or prepared wall inserts
- ✅ Scheduled inspection (if required)
Conclusion: Safety Meets Design
A well-measured and correctly installed handrail does more than satisfy regulations—it enhances everyday usability and elevates your home’s interior. From choosing warm hardwoods that age gracefully to sleek metal rails that define modern spaces, the right handrail balances form and function. With careful planning, attention to detail, and respect for structural integrity, your staircase can become both safer and more beautiful.


 浙公网安备
33010002000092号
浙公网安备
33010002000092号 浙B2-20120091-4
Comments
No comments yet. Why don't you start the discussion?