
Cutting out images—removing a subject from its background—is a fundamental skill in digital design, photography, and content creation. Whether you're preparing product photos for an e-commerce site, designing marketing materials, or editing personal images, precision matters. A clean, accurate cutout enhances professionalism and visual appeal. While the task may seem daunting at first, modern tools and proven techniques make it accessible to everyone—from beginners to seasoned designers.
Understanding the Tools of the Trade
Different software offers unique features tailored to image extraction. Choosing the right tool depends on your technical comfort, desired output quality, and project scale.
| Software | Best For | Learning Curve | Cost |
|---|---|---|---|
| Adobe Photoshop | Precision editing, complex selections | Moderate to high | Paid (subscription) |
| GIMP | Free alternative with advanced tools | Moderate | Free |
| Figma | Web-based UI/UX workflows | Low to moderate | Free tier available |
| Remove.bg | Quick automated background removal | Very low | Freemium |
| Canva | Beginners, social media graphics | Low | Freemium |
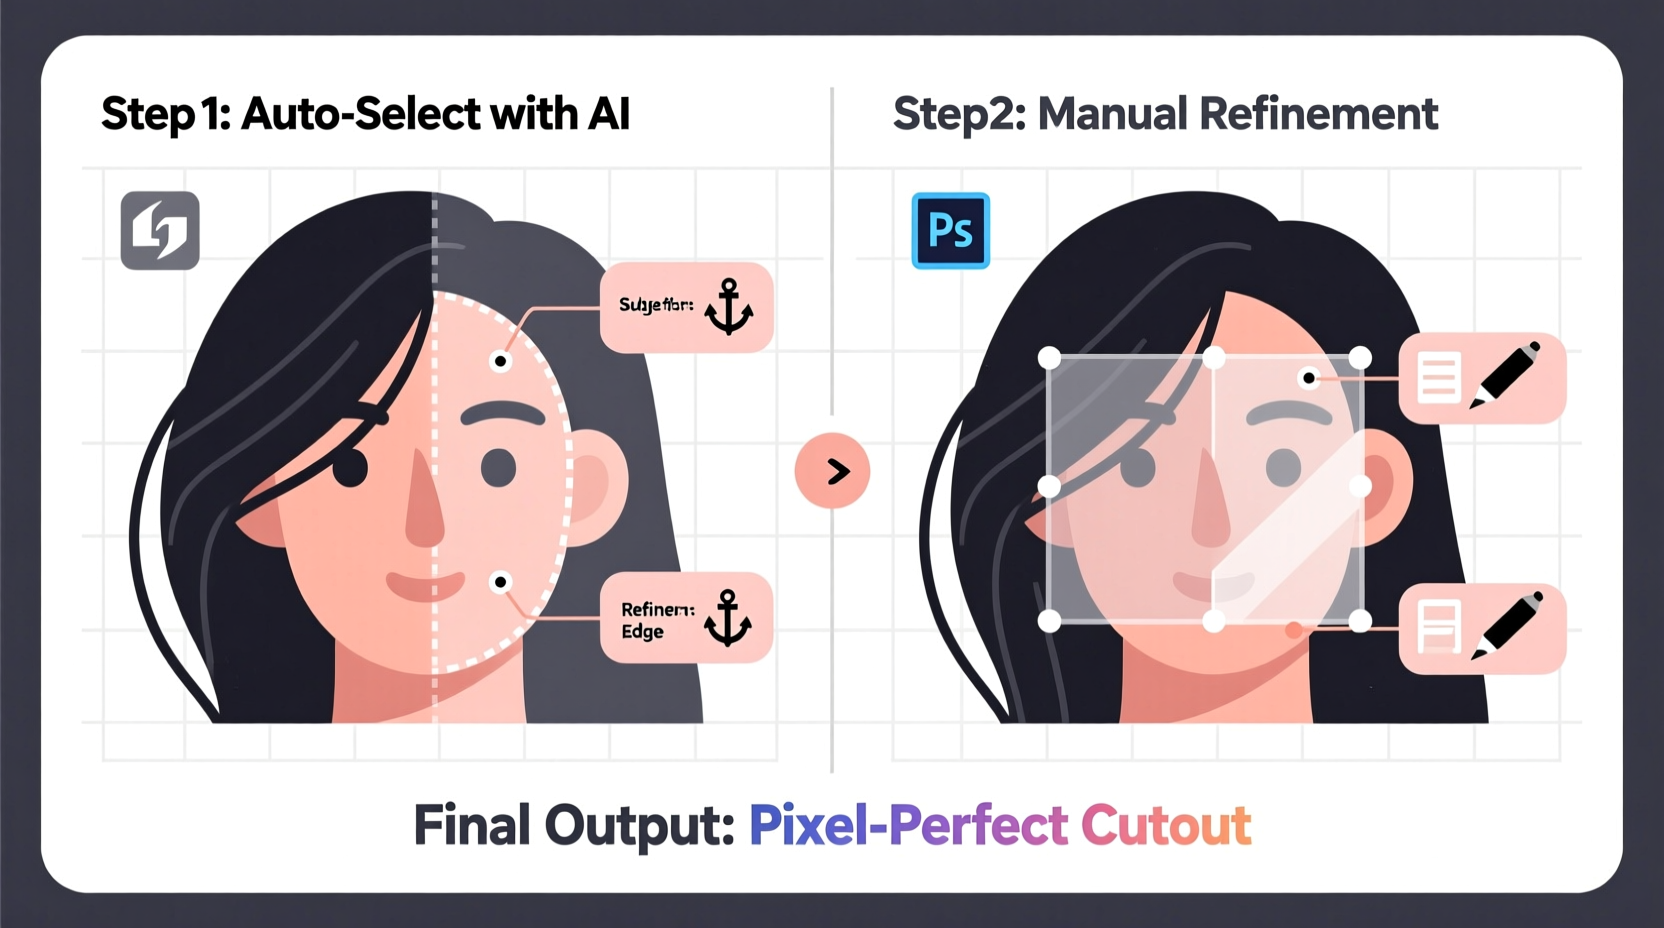
While automated tools like Remove.bg deliver fast results, they often lack fine control around intricate edges such as hair, fur, or transparent fabrics. For full precision, manual selection tools in Photoshop or GIMP remain industry standards.
Step-by-Step: Mastering Manual Cutouts in Photoshop
When automation falls short, manual selection ensures pixel-perfect results. Follow this structured approach using Adobe Photoshop’s Pen Tool—one of the most precise methods available.
- Open your image in Photoshop and duplicate the background layer (Ctrl+J / Cmd+J).
- Select the Pen Tool (P) from the toolbar. Choose “Path” mode in the top options bar.
- Zoom in (Ctrl++ / Cmd++) on the subject’s edge. Begin placing anchor points along the outline, clicking and dragging to create curves where needed.
- Work slowly around complex areas like hair or fringes. Use fewer points and rely on Bezier handles for smooth transitions.
- Once the entire subject is outlined, right-click inside the path and choose “Make Selection.” Set feather radius to 0px for sharp edges.
- Press Ctrl+Shift+I (Cmd+Shift+I) to invert the selection if needed, then press Delete to remove the background.
- Add a new solid layer beneath to verify the cutout’s cleanliness.
Alternative Methods for Faster Results
Not every project demands surgical precision. For time-sensitive tasks, leverage faster—but still effective—techniques.
- Quick Selection Tool: Drag over the subject; Photoshop automatically detects edges. Refine with “Select and Mask” for smoother borders.
- Magic Wand: Ideal for uniform backgrounds. Adjust tolerance to control selection sensitivity.
- Object Selection Tool (AI-powered): Draw a rectangle around the subject; let AI detect and select it automatically.
- Channel Masking: Advanced method using color channels to isolate high-contrast subjects (e.g., dark hair on light background).
The “Select and Mask” workspace is critical regardless of your starting tool. It allows refinement of edges, smoothing, shifting edges, and reducing color fringing—ensuring seamless integration into new backgrounds.
Mini Case Study: E-Commerce Product Image Cleanup
A small online jewelry store struggled with inconsistent product photos taken against cluttered home backgrounds. The owner used Canva’s background remover initially, but fine metal chains and gem reflections were poorly handled. Switching to Photoshop’s Pen Tool, she spent about 15 minutes per image but achieved crisp, professional-grade cutouts. After uploading the refined images, customer inquiries increased by 30% within two weeks. The investment in precision directly improved perceived product quality.
“Hand-cutting product images with the Pen Tool might take longer, but it pays off in conversion rates. Customers trust clean visuals.” — Lena Torres, Digital Art Director at StudioForma
Checklist: Preparing a Flawless Cutout
Follow this checklist before finalizing any image extraction:
- ✅ Work on a duplicate layer to preserve the original.
- ✅ Zoom in to 100–200% for detailed edge inspection.
- ✅ Use non-destructive methods (e.g., layer masks instead of deletion).
- ✅ Check for halos or leftover background pixels along edges.
- ✅ Test the cutout on multiple background colors (white, gray, black).
- ✅ Save in appropriate format: PNG for transparency, JPEG for solid backgrounds.
- ✅ Maintain consistent resolution and dimensions across similar assets.
Avoiding Common Pitfalls
Even experienced editors can fall into traps that compromise image quality. Recognize and avoid these mistakes:
- Over-smoothing edges: Excessive feathering blurs detail and creates an unnatural glow.
- Relying solely on auto-tools: AI can misjudge fine textures; always inspect and refine manually.
- Neglecting anti-aliasing: Turn it on for smooth curves, but disable it when creating hard-edged graphics.
- Ignoring zoom level: Working at less than 100% magnification leads to inaccurate selections.
- Forgetting shadows: Removing a subject also removes natural drop shadows. Recreate them if realism is required.
FAQ
Can I cut out images on a smartphone?
Yes. Apps like Adobe Photoshop Express, Snapseed, and PixelCut offer decent cutout tools optimized for mobile. While not as precise as desktop software, they’re suitable for social media content and quick edits.
Why does my cutout look jagged?
Jagged edges usually result from low-resolution images, improper zoom during editing, or insufficient anti-aliasing. Always work at native resolution and use the “Smooth” function in “Select and Mask” to correct stair-step effects.
Is there a way to speed up batch cutouts?
For repetitive shapes or similar lighting conditions, use Photoshop Actions to record and replay your steps. Alternatively, services like PhotoScissors or Slazzer API support bulk processing with decent accuracy.
Conclusion
Cutting out images precisely doesn’t require magic—it requires the right blend of tools, technique, and attention to detail. Whether you're perfecting a single portrait or managing hundreds of product shots, mastering both manual and automated approaches gives you flexibility and control. Start with simple tools to build confidence, then gradually adopt advanced methods like the Pen Tool and channel masking as your skills grow. With practice, what once took hours will become second nature.


 浙公网安备
33010002000092号
浙公网安备
33010002000092号 浙B2-20120091-4
Comments
No comments yet. Why don't you start the discussion?