
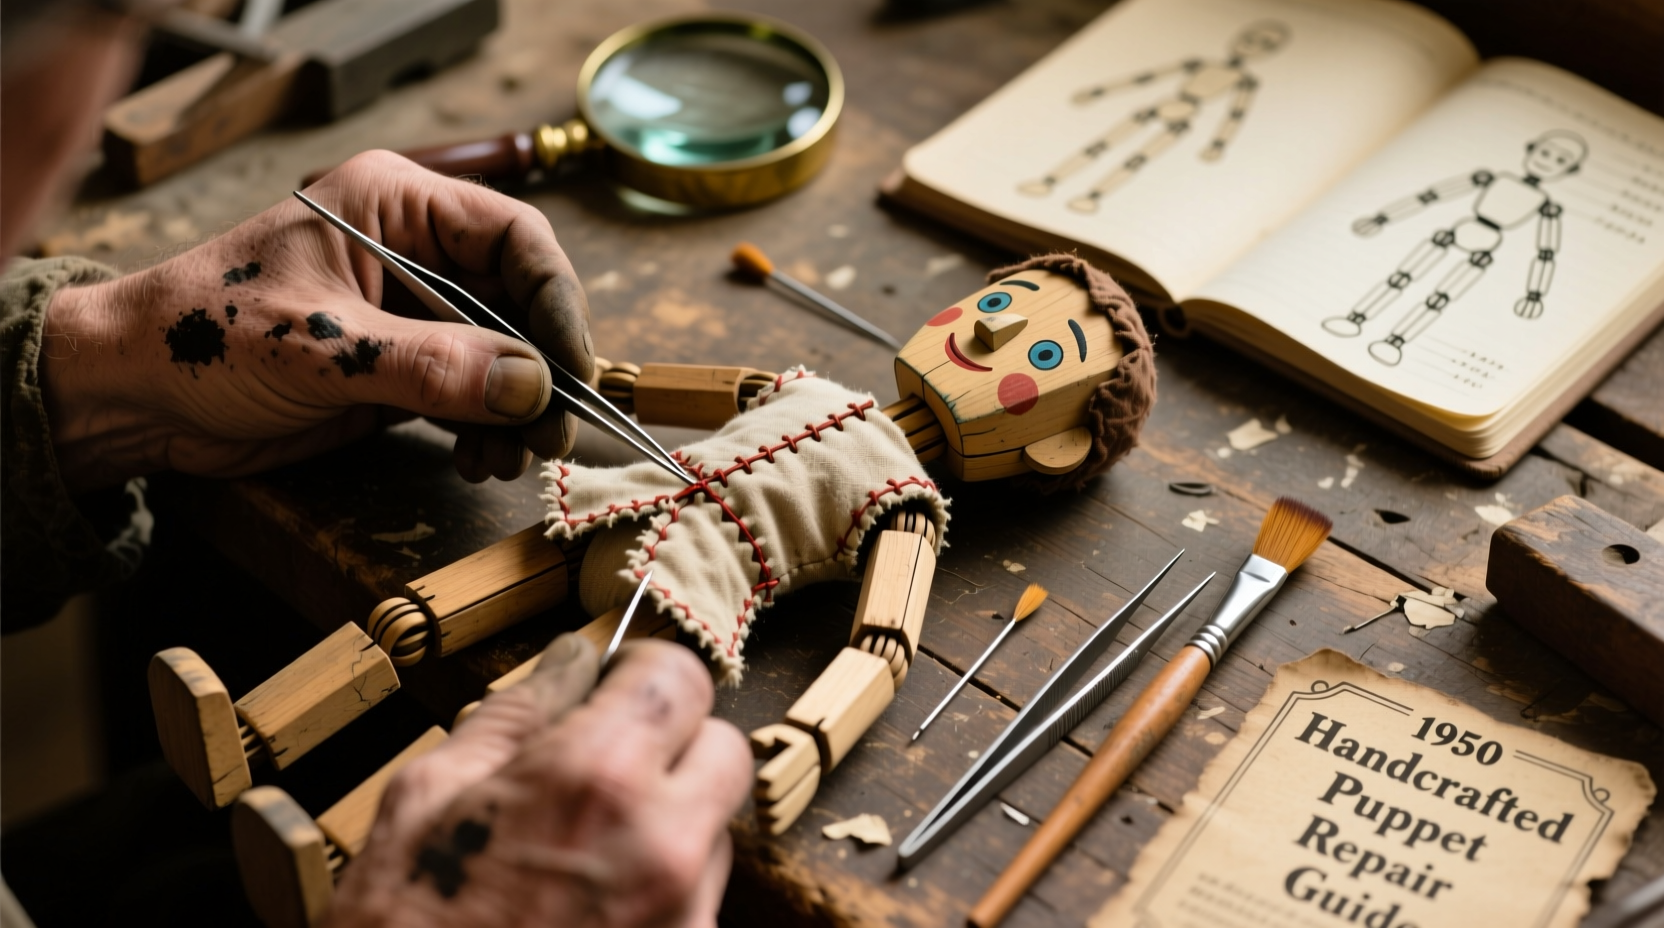
Handmade toy model puppets are more than playthings—they’re expressions of artistry, craftsmanship, and often, cherished memories. Whether crafted from wood, fabric, clay, or mixed media, these delicate figures are prone to wear, breakage, and structural fatigue over time. Restoring them requires patience, precision, and the right approach. Unlike mass-produced toys, handmade puppets demand individualized care that respects their original design and materials. This guide delivers professional insights into diagnosing damage, selecting appropriate repair methods, and preserving restored pieces for future enjoyment.
Assessing the Damage: Know What You’re Working With
The first step in any restoration project is a thorough evaluation. Begin by examining the puppet under good lighting, noting all visible issues: cracked joints, loose limbs, frayed strings, missing paint, or fabric tears. Categorize the damage as structural, cosmetic, or both. Structural flaws compromise the puppet’s integrity—such as a broken armature or split head—while cosmetic ones affect appearance but not function, like chipped paint or stained fabric.
Ask yourself: Was the puppet used frequently? Is it decades old? Has it been stored improperly? These factors influence material fragility. For example, older glue may have dried and become brittle, while natural fibers can weaken with humidity exposure. Never rush into repairs without understanding the root cause of the damage.
Essential Tools and Materials for Puppet Restoration
Successful repair hinges on using the correct tools and adhesives. General-purpose glues like white school glue or super glue can do more harm than good—especially on porous or flexible materials. Instead, stock a dedicated restoration kit tailored to common puppet components.
| Material Type | Recommended Adhesive | Tools Needed |
|---|---|---|
| Wood | Wood glue (aliphatic resin) | Sandpaper, clamps, toothpicks |
| Fabric/Cloth | Fabric glue or fray check | Needle & thread, small scissors |
| Paper Mache | White PVA glue diluted with water | Paintbrush, tissue paper patches |
| Clay/Polymer | Epoxy putty or liquid polymer | Sculpting tools, smoothing alcohol |
| String/Wire Control Lines | Nylon thread, brass fasteners | Tweezers, pliers |
Always test adhesives on an inconspicuous area first. Some glues can discolor or warp sensitive surfaces. Keep solvents like isopropyl alcohol and cotton swabs handy for cleaning residue without damaging finishes.
Step-by-Step Guide to Repairing Common Puppet Issues
Follow this structured approach to address frequent types of puppet damage:
- Disassemble if necessary. Carefully remove detachable parts like arms or control rods to access joints. Label each piece to avoid confusion during reassembly.
- Clean gently. Use a soft brush or microfiber cloth to remove dust. For grime, dampen a cotton swab slightly with distilled water—never soak the puppet.
- Reinforce weak joints. If a limb wobbles due to worn pegs, apply a small amount of adhesive to the joint pin before reinserting. Clamp lightly until dry.
- Fill cracks or gaps. For shallow surface cracks in wood or mache, mix PVA glue with sawdust or tissue pulp to form a paste. Press into the gap and sand smooth when dry.
- Reattach broken segments. Align broken edges precisely. Apply adhesive sparingly with a toothpick to avoid overflow. Hold in place with clips or rubber bands for 24 hours.
- Restore appearance. Touch up paint with artist-grade acrylics matched to the original color. Use thin layers to maintain texture.
- Re-string control mechanisms. Replace frayed strings with nylon monofilament or silk thread. Knot securely at anchor points and test movement.
Real Example: Reviving a 1950s Marionette from a Family Collection
A collector in Vermont inherited a walnut-headed marionette from her grandfather, a traveling puppeteer. The figure had a split jaw, one missing eye, and sagging shoulder strings. After initial inspection, she discovered the internal dowel was cracked near the neck joint—a critical structural flaw.
She stabilized the head by inserting a thin bamboo skewer coated in wood glue into the dowel cavity. Once set, she filled the external crack with a wood-PVA blend, sanded it flush, and repainted the seam with matching brown acrylic. The missing glass eye was replaced with a vintage-style replacement sourced from a puppet supply archive. Finally, she re-strung the shoulders using braided fishing line for durability and tested articulation stage-ready.
The restoration took nearly three weeks but preserved both functionality and sentimental value. “It wasn’t about making it look new,” she said later. “It was about honoring its history while ensuring it could still dance.”
“Restoration isn’t perfection—it’s continuity. A repaired puppet should still tell its story, not pretend it never broke.” — Rafael Mendez, Puppet Conservator at the National Marionette Archive
Preservation Checklist: Protect Your Repaired Puppet
- Store upright in a climate-controlled space away from direct sunlight
- Use acid-free tissue to wrap fabric elements and prevent yellowing
- Place in a ventilated display case with UV-filtering glass
- Avoid handling with bare hands; oils can degrade finishes over time
- Inspect annually for signs of pest activity or adhesive failure
- Keep a repair log noting materials and dates used for future reference
Frequently Asked Questions
Can I use super glue on a fabric puppet?
No—cyanoacrylate (super glue) tends to stiffen fabric and create brittle seams that crack under movement. Opt for flexible fabric glue or hand-stitching with polyester thread for durable, pliable repairs.
What if the original paint is flaking?
Do not peel or scrub loose paint. Stabilize it by applying a few drops of conservation-grade adhesive (like Paraloid B-72) beneath the flake using a fine syringe. Gently press down with a soft tool and let it cure flat.
How do I find replacement parts for antique puppets?
Specialty suppliers such as puppet restoration houses, theater prop archives, or online artisan communities often carry period-appropriate eyes, wigs, and hardware. Join forums like PuppetryTalk or the International Puppet Collectors Society for leads.
Final Thoughts: Honoring Craft Through Careful Repair
Restoring a handmade puppet is an act of respect—for the maker’s intent, the materials’ nature, and the object’s emotional resonance. Every mend should aim not for invisibility, but for integrity. By using appropriate techniques, respecting original construction, and prioritizing longevity over cosmetic perfection, you ensure these unique creations continue to move, inspire, and connect across generations.


 浙公网安备
33010002000092号
浙公网安备
33010002000092号 浙B2-20120091-4
Comments
No comments yet. Why don't you start the discussion?