
FaceTime screen recordings are a convenient way to capture important calls, share tutorials, or save memorable moments. But when the recording plays back with no audio, the entire purpose is undermined. This issue affects many iPhone and iPad users, often leaving them frustrated and unsure of what went wrong. The good news is that in most cases, the problem isn’t permanent—it’s fixable. Understanding why audio fails during FaceTime screen recordings and knowing the correct steps to resolve it can save time and prevent future occurrences.
Why FaceTime Screen Recordings Lack Audio
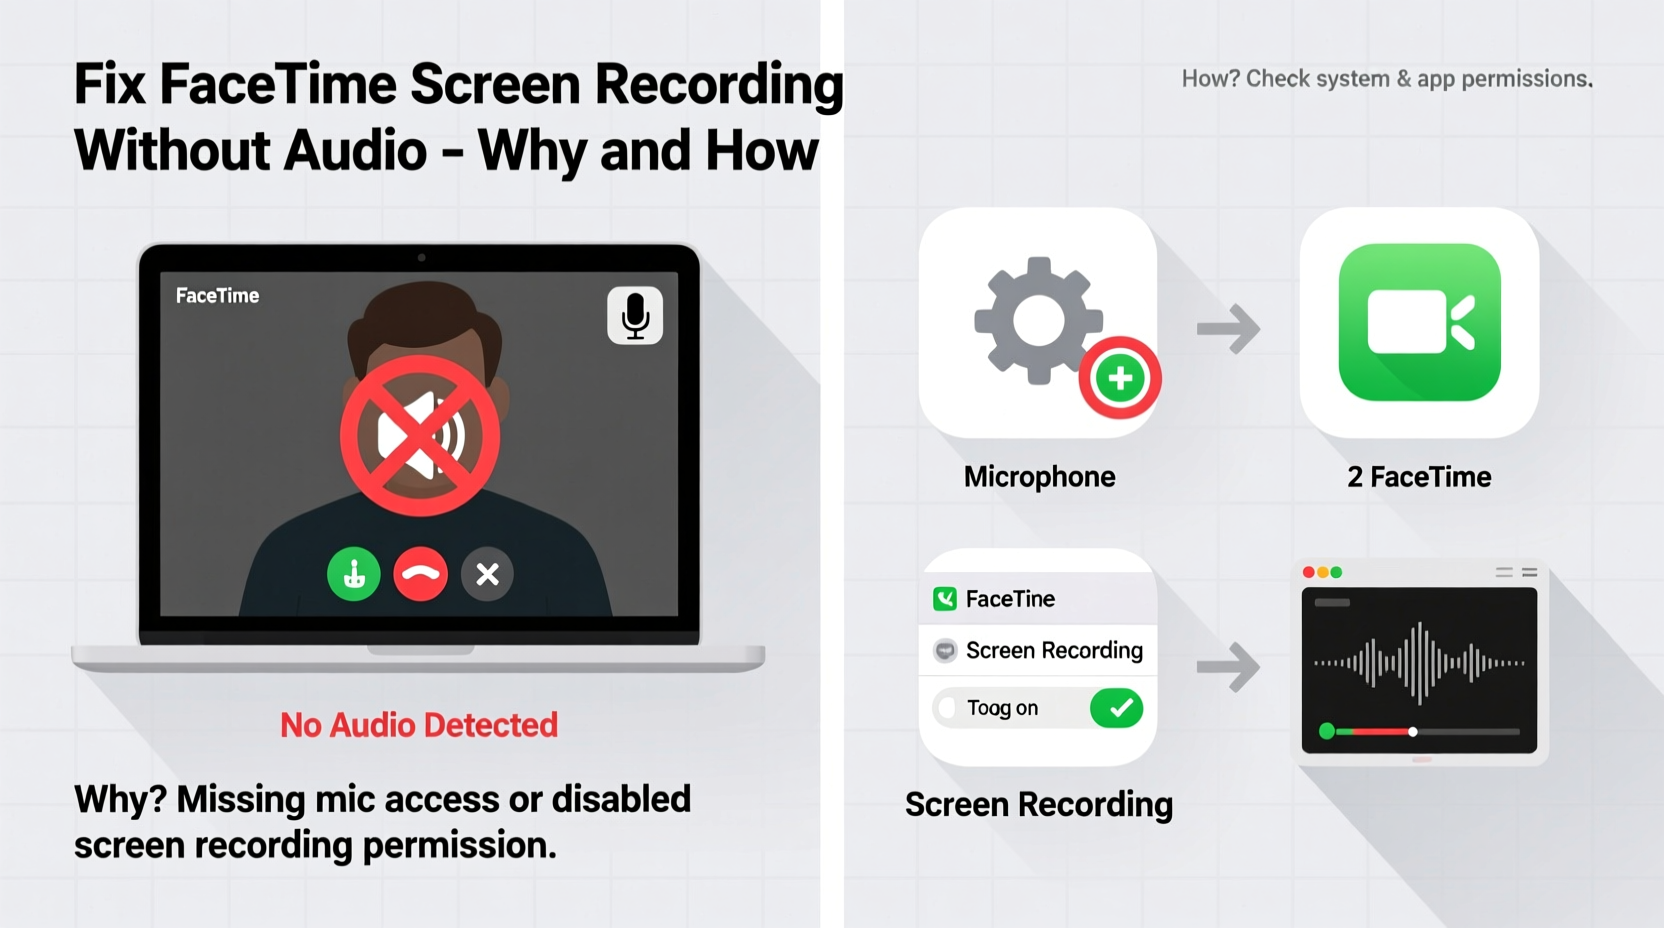
Apple intentionally restricts microphone access during screen recordings as a privacy safeguard. By default, iOS disables audio capture from the microphone when you record your screen unless explicitly enabled. Since FaceTime calls rely on real-time voice transmission, failing to activate microphone recording means your screen video will show visuals but remain silent.
Additionally, system-level bugs, outdated software, or incorrect settings can interfere with audio routing. For example, if the device is in Low Power Mode, certain background processes—including audio mixing—may be suspended. Similarly, third-party apps running in the background might conflict with iOS’s screen recording functionality.
“Apple’s design prioritizes user privacy, which is why microphone access during screen recording is opt-in, not automatic.” — David Lin, iOS Systems Analyst
Step-by-Step Guide to Enable Audio in FaceTime Screen Recordings
To successfully record FaceTime calls with audio, you must manually enable microphone input before starting the recording. Follow this sequence precisely:
- Open the Control Center by swiping down from the top-right corner (iPhone X and later) or up from the bottom (older models).
- Long-press or 3D-touch the Screen Recording button (a circle inside a circle).
- A pop-up menu appears. Tap Mic Audio to turn it on. You’ll see a small microphone icon appear next to the screen recording button when active.
- Start your FaceTime call.
- Return to Control Center and tap the screen recording button to begin.
- A three-second countdown starts. Once recording begins, speak and verify audio is being captured.
- End the recording by tapping the red status bar at the top and selecting “Stop.”
The recorded video will save to your Photos app. Play it back immediately to confirm both video and audio are present.
Common Mistakes That Cause Silent Recordings
Even when following the correct procedure, users sometimes overlook critical details. Below are frequent errors that result in audioless recordings:
- Forgetting to enable Mic Audio: The most common cause. Users assume screen recording captures all sounds automatically.
- Recording while on mute: If you're muted during FaceTime, no voice input reaches the mic—even if recording is active.
- Using Bluetooth headsets incorrectly: Some wireless earbuds fail to route microphone audio properly during screen recording.
- Low Power Mode interference: This mode can disable background audio processing, affecting recording quality.
- iOS version bugs: Older versions of iOS have known glitches where mic toggle doesn't function correctly.
Troubleshooting Checklist: Restore Audio in 5 Minutes
If your recording still has no sound after enabling mic access, use this checklist to diagnose and fix deeper issues:
- ✅ Ensure “Mic Audio” is toggled ON in Control Center before recording
- ✅ Disable Low Power Mode (Settings > Battery)
- ✅ Restart your device to clear temporary glitches
- ✅ Update to the latest iOS version (Settings > General > Software Update)
- ✅ Test microphone separately using Voice Memos app
- ✅ Avoid using third-party screen recorders that override system settings
- ✅ Reset all settings (Settings > General > Transfer or Reset [Device] > Reset > Reset All Settings)
Do’s and Don’ts When Recording FaceTime Calls
| Do’s | Don’ts |
|---|---|
| Enable Mic Audio before starting the recording | Assume screen recording captures audio automatically |
| Test the setup with a short personal recording first | Record sensitive conversations without consent |
| Keep your device charged or plugged in during long recordings | Use outdated iOS versions with known bugs |
| Close unnecessary apps to free up memory | Ignore system warnings about storage or overheating |
Real Example: How Sarah Fixed Her Missing Audio Issue
Sarah, a remote tutor, relied on screen recordings to send feedback to her students after FaceTime lessons. One day, she noticed her recordings were silent despite speaking clearly during sessions. She assumed her microphone was broken and considered replacing her iPad.
After researching online, she discovered that she had never enabled “Mic Audio” in the screen recording controls. Even though she’d been recording for months, she overlooked the tiny microphone toggle. Once she activated it, her next recording captured full audio. A simple setting change saved her hundreds of dollars and restored her confidence in digital teaching tools.
This case highlights how easy it is to miss a small but crucial step—and how impactful the solution can be.
FAQ: Common Questions About FaceTime Screen Recording Audio
Can I record a FaceTime call with audio legally?
In most regions, you can record a call if at least one party (including yourself) consents. However, some states and countries require all parties to consent. Always inform participants before recording to comply with privacy laws.
Why does my screen recording have echo or distorted audio?
Audio distortion often occurs when sound output (speaker) and input (microphone) overlap. To avoid echo, use headphones during recording so the microphone doesn’t pick up playback sound.
Does screen recording work during group FaceTime calls?
Yes, screen recording functions the same way during group calls. As long as mic audio is enabled and system settings are correct, all voices should be captured clearly.
Expert Tips for Reliable Recordings
For consistent results, adopt these best practices:
- Create a pre-recording ritual: Before every session, open Control Center and verify the mic option is active.
- Label test recordings: Save a short clip labeled “Audio Test” to validate settings weekly.
- Use wired headphones: They provide more stable audio input than Bluetooth alternatives.
- Monitor storage space: Low storage can interrupt recordings or corrupt audio tracks.
- Limit background apps: Too many running apps can strain CPU resources, leading to dropped audio frames.
“Setting up your device correctly once saves hours of frustration later. Treat screen recording like any professional tool—it requires preparation.” — Lena Patel, Digital Education Consultant
Conclusion: Take Control of Your Recordings Today
Missing audio in FaceTime screen recordings is a solvable issue rooted in settings, not hardware failure. By understanding iOS’s privacy-driven design and taking deliberate steps to enable microphone access, you regain full control over your recordings. Whether you're a teacher, remote worker, or family member preserving special moments, clear audio makes all the difference.


 浙公网安备
33010002000092号
浙公网安备
33010002000092号 浙B2-20120091-4
Comments
No comments yet. Why don't you start the discussion?