
Applying eyeshadow, eyeliner, or highlighter with precision requires more than just a steady hand—it starts with the right tools. A well-curated set of eye brushes can make the difference between a smudged, uneven look and a flawlessly blended, professional finish. With countless options available in materials, shapes, and sizes, selecting the ideal brushes demands knowledge of function, technique, and personal preference. This guide breaks down what truly matters when choosing eye brushes, so you can build a collection that enhances control, accuracy, and creativity.
Understanding Brush Shapes and Their Functions
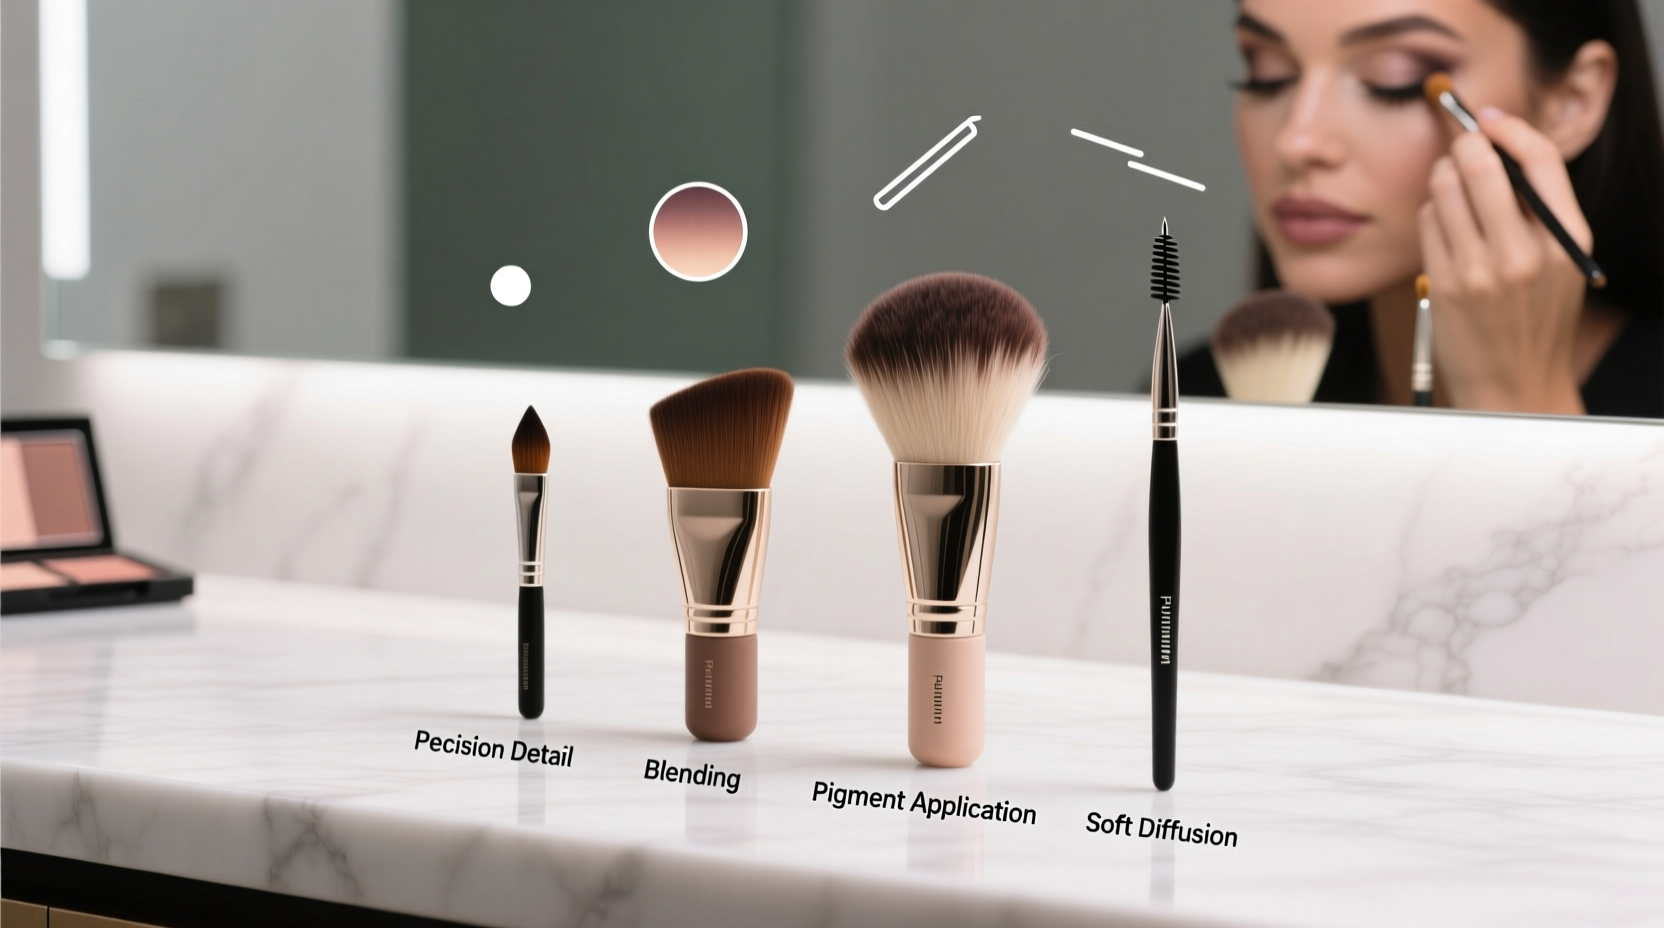
Each eye brush shape serves a specific purpose. Using the correct one ensures pigment is placed exactly where intended, minimizing fallout and blending errors. Here are the most essential brush types and their roles:
- Precision Pencil Brush: Tapered and firm, this small brush applies shadow directly to the lash line or inner corner. Ideal for tightlining or smudging liner.
- Fluffy Blending Brush: Dome-shaped with soft, loosely packed bristles. Used to diffuse harsh edges in the crease for a seamless transition.
- Flat Shader Brush: Dense and flat-tipped, perfect for packing shimmer or matte color onto the lid with maximum payoff.
- Tapered Crease Brush: Slightly angled and tapered, allowing controlled placement of darker shades into the outer V of the eye.
- Angled Liner Brush: Rigid bristles set at an angle, designed for gel or cream eyeliner application along the lash line or creating sharp winged effects.
- Detail Liner Brush: Ultra-fine tip for intricate work like lower lash line detailing or highlighting the waterline.
Bristle Material: Natural vs. Synthetic
The type of bristles significantly impacts performance, especially depending on the product being used. Understanding the strengths of each material helps avoid wasted product and frustration.
Natural bristles, typically made from animal hair (like squirrel, goat, or sable), are ideal for powder formulas. They pick up and distribute pigment evenly, offering a soft, diffused effect. These are best suited for blending and building color gradually.
Synthetic bristles, crafted from nylon or polyester, excel with creamy, gel, or liquid products. They’re less porous, preventing absorption and ensuring more product reaches the skin. Synthetic brushes are also cruelty-free and easier to clean, making them a practical choice for modern routines.
“Using natural bristles with cream products leads to streaking and poor pickup. Match your brush fiber to your formula.” — Lena Torres, Professional Makeup Artist & Educator
Key Factors When Selecting Eye Brushes
Choosing the right brush isn’t just about brand or price. Focus on these critical factors to ensure lasting performance and accurate application.
Ferrule Quality and Handle Balance
The ferrule—the metal band connecting bristles to handle—should be securely attached without gaps. Poorly constructed ferrules shed bristles over time. The handle should feel balanced in your grip; too heavy or too light affects control during delicate work.
Bristle Density and Firmness
Dense, firm bristles provide better pigment pickup and precision, while soft, fluffy ones are meant for blending. For example, a dense shader brush delivers opaque color, whereas a loose blending brush softly diffuses it.
Size Proportionality
A brush should match the scale of your eye area. Petite eyes benefit from smaller, more compact brushes, while larger lids can accommodate broader tools. Oversized brushes often miss key areas like the inner corner or lower lash line.
Essential Eye Brush Checklist
To achieve full control over your eye makeup, ensure your kit includes these core brushes:
- Flat shader brush – for base lid color
- Fluffy blending brush – for crease diffusion
- Pencil brush – for lower lash line and smudging
- Angled liner brush – for gel or powder liner
- Detail brush – for inner corner highlight or precise liner wings
- Tapered crease brush – for targeted depth in the outer eye
- Spoolie (optional) – for grooming brows or softening lines
This seven-piece toolkit covers 95% of eye looks—from natural daytime wear to dramatic evening styles.
Comparison: Best Brush Types for Different Makeup Goals
| Makeup Goal | Recommended Brush | Bristle Type | Why It Works |
|---|---|---|---|
| Full-coverage shimmer lid | Flat shader | Synthetic | Packs on glitter or metallics without patchiness |
| Soft, blended crease | Fluffy blending | Natural | Diffuses color seamlessly with minimal fallout |
| Smudged liner look | Pencil brush | Synthetic or natural blend | Applies pigment close to lashes with control |
| Sharp winged eyeliner | Angled liner | Synthetic | Holds gel product and allows fine line precision |
| Inner corner highlight | Detail brush | Synthetic | Places shimmer exactly where desired without spill |
Real Application Example: From Day to Night
Consider Sarah, a graphic designer who wears subtle makeup to work but transforms her look for evening events. In the morning, she uses a small pencil brush to apply a soft brown shade along her upper lash line for definition. She blends it slightly with a tiny fluffy brush for a soft smoky effect. At night, she switches to a flat shader to press gold shimmer onto her lids, then uses a tapered crease brush to deepen the outer corners with a rich plum. Finally, she uses an angled liner brush to draw a crisp wing with gel liner. By using purpose-specific brushes, she achieves two distinct, polished results without muddying colors or wasting product.
Step-by-Step Guide to Building Your Precision Brush Set
Follow this process to assemble a high-functioning, personalized eye brush collection:
- Assess your typical eye look: Do you prefer natural washes or bold, defined styles? This determines whether you need more blending or packing brushes.
- Identify your go-to products: If you use mostly creams, prioritize synthetic bristles. For powders, natural fibers may be better.
- Select one brush per core function: Start with a shader, blender, pencil, and angled liner brush.
- Test before committing: If possible, swatch brushes at beauty counters or order trial kits. Pay attention to comfort and release.
- Incorporate specialty tools gradually: Add detail or duo-fiber brushes as your technique advances.
- Maintain your brushes: Clean weekly with a gentle brush cleanser to preserve bristle integrity and prevent color transfer.
Common Mistakes to Avoid
- Using the same brush for multiple textures: A brush used for black cream liner shouldn’t later be used for light shimmer without deep cleaning.
- Overloading the brush: Dipping too deeply into pigment causes fallout and imprecise application. Tap off excess before applying.
- Ignoring brush maintenance: Dirty brushes harbor bacteria, affect pigment payoff, and fray faster.
- Buying sets based on quantity: Many brush sets include redundant or low-quality tools. Invest in individual high-performance pieces instead.
FAQ
How often should I replace my eye brushes?
With proper care, high-quality brushes last 2–5 years. Replace them when bristles become frayed, shed excessively, or no longer hold their shape after washing.
Can I use face brushes for eyes?
It’s not recommended. Face brushes are generally too large and not shaped for the contours of the eye. Using them increases risk of fallout and imprecise placement.
Are expensive brushes worth it?
Not always. Mid-range brands like Morphe, Sigma, and EcoTools offer excellent precision tools. However, luxury brushes from Natasha Denona or Taklon often feature superior ergonomics and durability, justifying the cost for frequent users.
Final Thoughts
Precise eye makeup begins long before the first swipe of color—it starts with thoughtful tool selection. The right brushes enhance your technique, reduce product waste, and elevate your results. Whether you're defining the lash line, blending a seamless gradient, or placing a pinpoint highlight, each brush should serve a clear, intentional purpose. By understanding bristle types, shapes, and quality indicators, you gain the confidence to choose tools that align with your goals and habits.


 浙公网安备
33010002000092号
浙公网安备
33010002000092号 浙B2-20120091-4
Comments
No comments yet. Why don't you start the discussion?