
Choosing the right ring size is essential for both comfort and style. Too tight, and it restricts circulation; too loose, and it slips off during daily activities. While visiting a jeweler is ideal, many people need to determine their ring size from home—especially when shopping online or surprising a loved one. Measuring your index finger accurately without professional tools may seem tricky, but with the right method, you can achieve precise results. This guide walks you through reliable techniques, common pitfalls, and expert-backed tips to ensure a perfect fit every time.
Why Accurate Ring Sizing Matters
A well-fitting ring should slide over the knuckle with slight resistance and sit snugly on the base of your finger without pinching. The index finger varies in thickness between individuals and even between hands, so assuming your ring size based on another finger or hand isn’t reliable. Temperature, time of day, and fluid retention can also affect finger size. For example, fingers tend to swell slightly in warm weather or after physical activity. An inaccurate measurement could lead to resizing costs, delays, or a lost ring slipping off unnoticed.
“Even a half-size difference can impact long-term comfort and wearability.” — Daniel Reeves, Master Jeweler with 25 years of experience
Step-by-Step Guide: How to Measure Your Index Finger at Home
The most effective home method uses a strip of paper or string and a ruler. Follow these steps carefully to get an accurate measurement:
- Gather Supplies: You’ll need a thin strip of paper (about 1/4 inch wide), a pen, a ruler (preferably millimeter scale), scissors, and a calculator.
- Choose the Right Time: Measure your finger at the end of the day when it’s slightly larger due to normal swelling. Avoid measuring when your hands are cold or swollen from exercise.
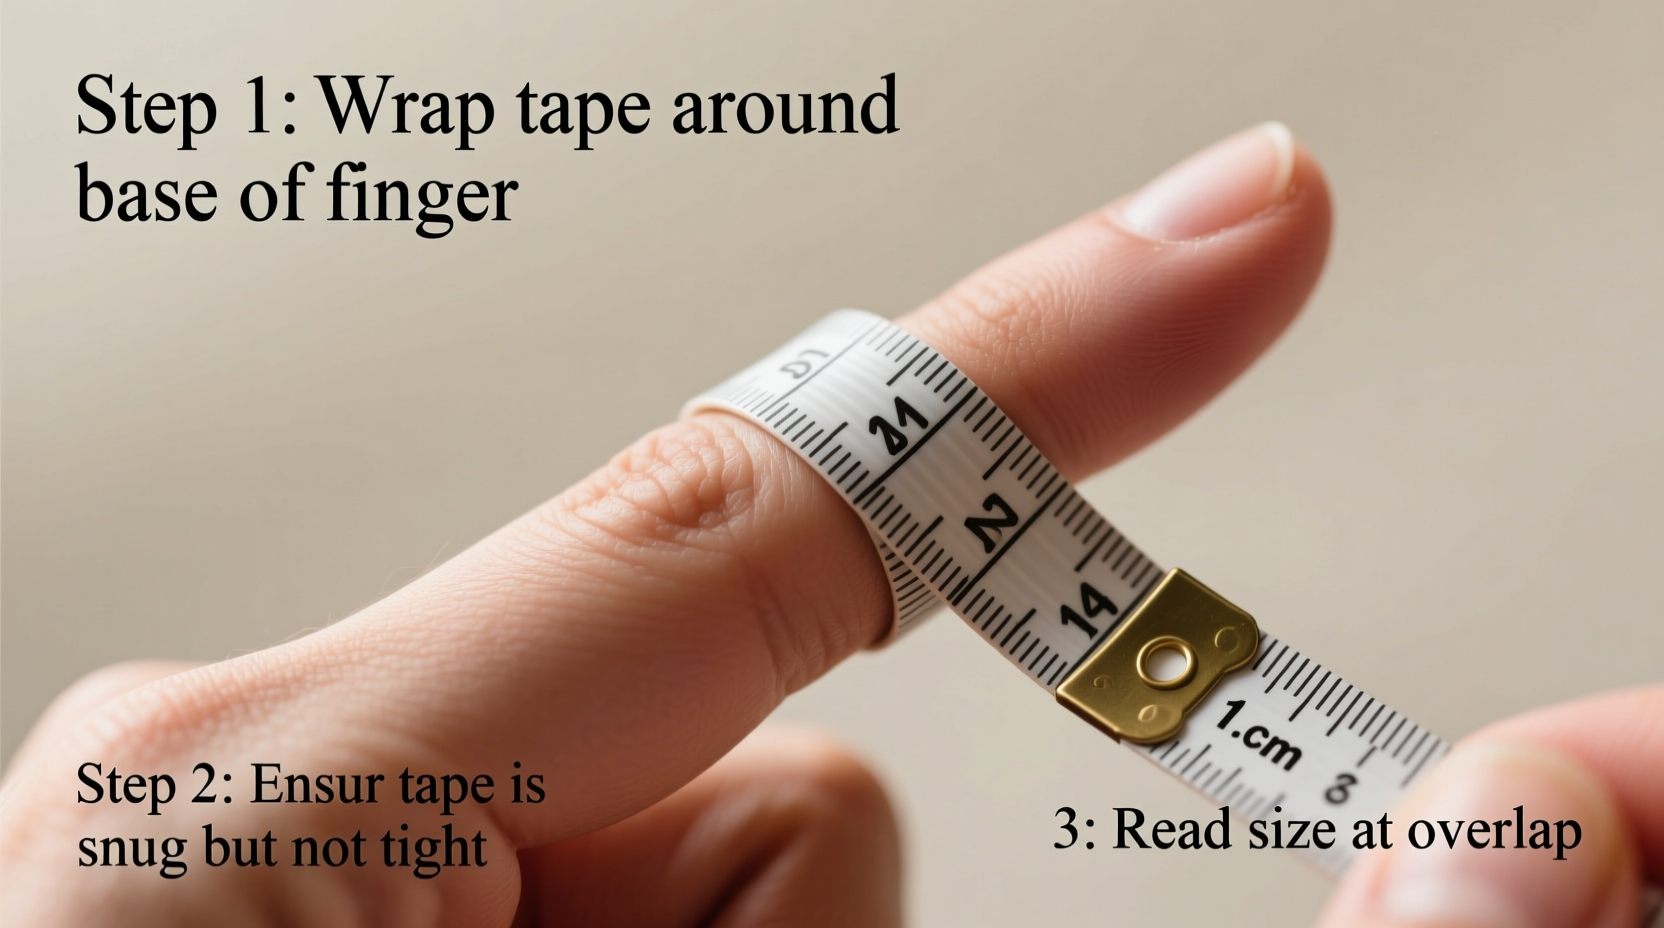
- Wrap the Paper Around Your Finger: Wrap the strip around the base of your index finger, just below the knuckle. Make sure it’s flat against the skin and not twisted. It should be snug but not tight—allow enough room to slide it on and off comfortably.
- Mark the Overlap Point: Use the pen to mark where the paper overlaps itself.
- Measure the Length: Lay the paper flat and use the ruler to measure from the edge to the mark in millimeters.
- Convert to Ring Size: Use the circumference-to-size chart below to find your corresponding ring size.
Ring Size Conversion Table (Circumference in mm)
| Circumference (mm) | US Size | UK Size | EU Size |
|---|---|---|---|
| 48.5 | 4 | L | 49 |
| 50.0 | 4.5 | L½ | 50 |
| 51.5 | 5 | M | 51 |
| 53.0 | 5.5 | M½ | 53 |
| 54.5 | 6 | N | 54 |
| 56.0 | 6.5 | N½ | 56 |
| 57.5 | 7 | O | 57 |
| 59.0 | 7.5 | P | 59 |
| 60.5 | 8 | P½ | 60 |
| 62.0 | 8.5 | Q | 62 |
| 63.5 | 9 | Q½ | 63 |
| 65.0 | 9.5 | R | 65 |
| 66.5 | 10 | R½ | 66 |
If your measurement falls between two sizes, always round up. A slightly looser fit is safer than a ring that’s too tight, especially if you plan to wear it daily.
Alternative Methods and Their Reliability
While the paper method is most accurate for home use, other approaches exist—some more practical than others.
- Using a Known Ring: If you already own a comfortable-fitting ring for the same finger, place it on a ruler and measure the internal diameter in millimeters. Match that number to the inner diameter column in a ring size chart.
- Printable Sizers: Some jewelers offer printable PDF ring sizers. These can work if printed at 100% scale and verified with a known measurement, but printer inconsistencies often introduce error.
- Mobile Apps: Augmented reality apps claim to measure ring size using your phone’s camera. However, these lack precision due to calibration issues and are best avoided for critical purchases.
“Physical measurements with a tape or paper strip remain the gold standard for at-home sizing.” — Lena Park, Jewelry Consultant at Urban Gem Co.
Common Mistakes to Avoid
Even careful attempts can go wrong if basic errors aren’t considered. Here’s what to watch out for:
| Do’s | Don’ts |
|---|---|
| Measure at room temperature in the evening | Measure when hands are cold or swollen |
| Use a non-stretch material like paper or thread | Use elastic bands or stretchy strings |
| Check multiple times for consistency | Rely on a single measurement |
| Account for knuckle size if it's larger than the base | Ignore difficulty sliding the ring over the knuckle |
Real-Life Example: Measuring for a Surprise Gift
Sarah wanted to surprise her partner with a custom signet ring for their anniversary. She didn’t want to risk asking directly and ruining the surprise. Instead, she borrowed a ring her partner wore on the right index finger and traced its inner circle onto graph paper. By measuring the diameter (18.5 mm), she cross-referenced it with a ring size chart and determined the size was 8 (EU 60). To double-check, she used the paper strip method late one evening while her partner was watching TV, quickly wrapping and measuring when they weren’t looking. Both methods matched. The ring arrived perfectly fitted, and the surprise was a success.
Frequently Asked Questions
Can I use a piece of string instead of paper?
Yes, but make sure the string is thin and non-stretchy. Fabric or cotton string works better than elastic or yarn. After wrapping, lay it flat and measure straight—do not measure while wrapped around the ruler, as this can skew results.
What if my fingers are different sizes on each hand?
It’s common for left and right fingers to vary slightly. Always measure the finger on the hand where the ring will be worn. Dominant hands often have slightly thicker fingers due to muscle use.
How often should I re-measure my ring size?
At least once a year. Weight fluctuations, aging, and medical conditions like arthritis can change finger size over time. Seasonal changes may also require adjustments—some people go up half a size in summer.
Final Checklist: Ensure Accuracy Before Buying
- ✅ Measure your finger at the end of the day
- ✅ Use a non-stretch material (paper or thread)
- ✅ Take 3 separate measurements to confirm consistency
- ✅ Compare results to a trusted ring size chart
- ✅ Consider knuckle size and ring width (wider rings may feel tighter)
- ✅ When in doubt, order a half-size up
Conclusion
Accurately measuring your index finger at home doesn’t require special tools—just patience and attention to detail. Whether you're treating yourself or planning a thoughtful gift, a properly sized ring enhances both comfort and confidence. By following these proven steps and avoiding common errors, you can make informed decisions with the same precision as a professional jeweler. Don’t guess when it comes to fit—take a few minutes now to measure correctly and enjoy your ring for years to come.


 浙公网安备
33010002000092号
浙公网安备
33010002000092号 浙B2-20120091-4
Comments
No comments yet. Why don't you start the discussion?