
New boots often promise durability, style, and protection—but too often come with an unwelcome side effect: painful blisters. Whether you’ve just invested in a pair of hiking boots, work boots, or stylish leather dress boots, the break-in process is critical. Done poorly, it leads to sore feet, lost time, and frustration. Done right, it ensures long-term comfort and performance. The key isn’t to endure pain, but to gradually condition both the boot and your feet. This guide walks through science-backed methods, practical routines, and insider strategies to help you wear new boots confidently—without a single blister.
Why Blisters Form During Break-In
Blisters develop when friction, moisture, and pressure combine on sensitive skin. New boots are typically stiff, especially in the heel collar, tongue, and sides. As they rub against your foot during movement, microscopic layers of skin separate and fill with fluid—a blister. Areas like the back of the heel, little toe, and ball of the foot are most vulnerable.
The stiffness of materials like full-grain leather or molded rubber outsoles resists natural foot motion at first. Without proper conditioning, these rigid zones create hot spots. Combine that with sweat-soaked socks, and the risk multiplies. However, blisters aren’t inevitable. They’re a sign that the boot hasn’t yet adapted to your foot’s shape and gait.
“Blisters during break-in usually mean the boot is moving independently from the foot. Your goal is synchronization—not suffering.” — Dr. Lena Torres, Podiatrist & Footwear Consultant
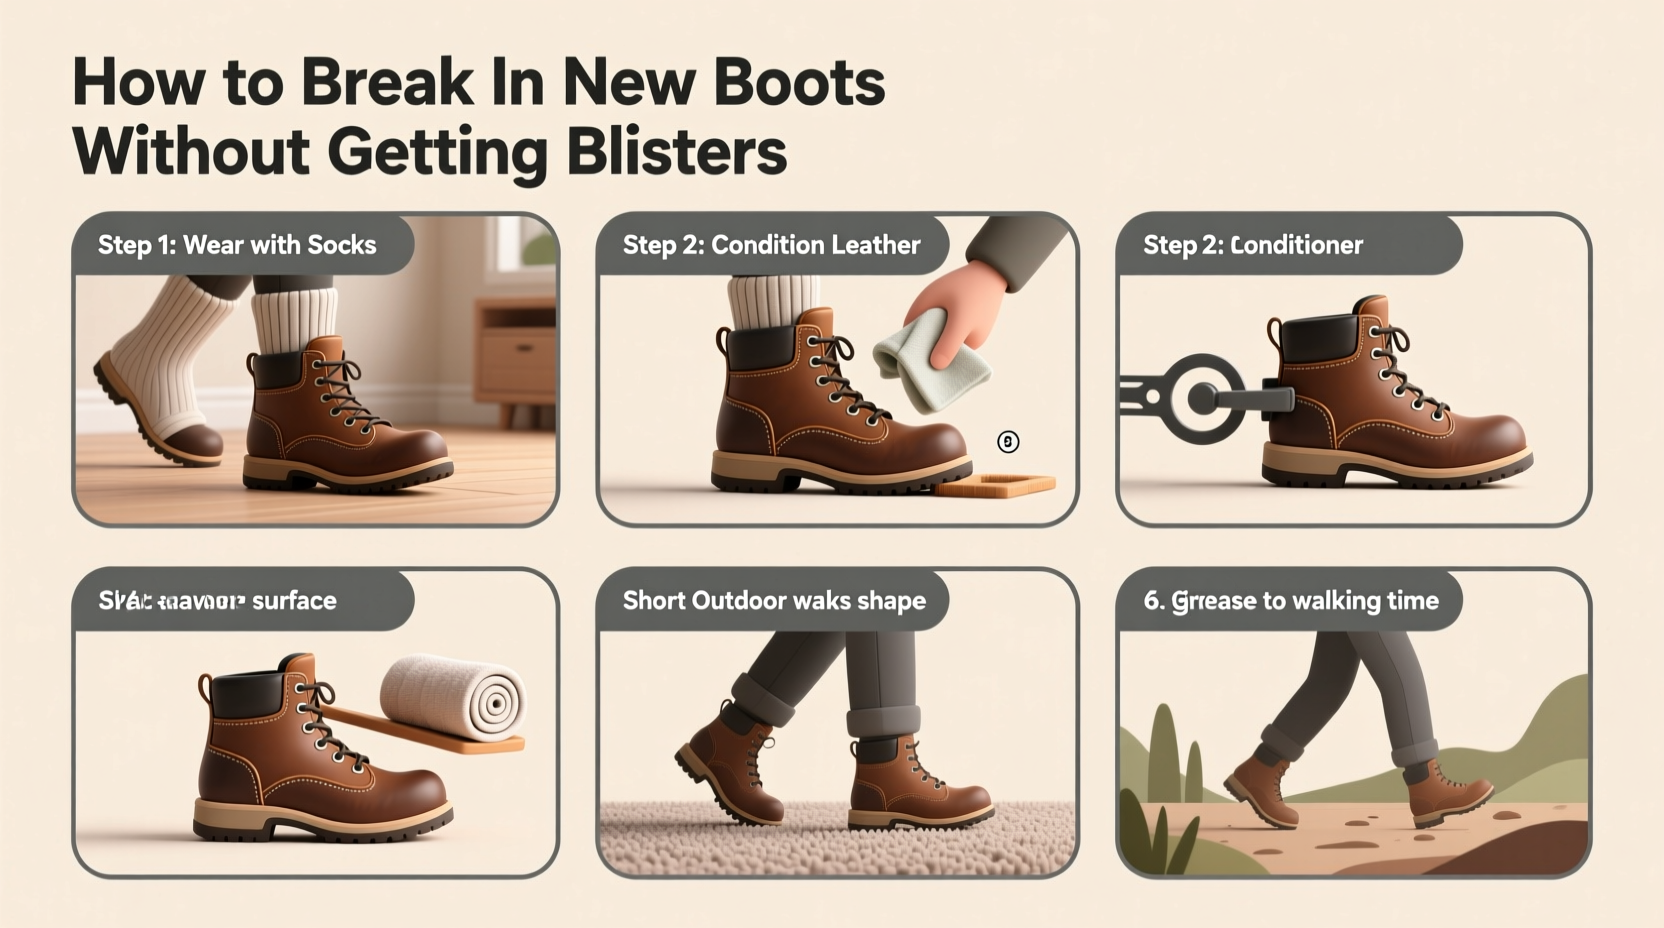
Step-by-Step Guide to Blister-Free Break-In
Breaking in boots should be gradual and controlled. Rushing the process increases discomfort and injury risk. Follow this seven-day timeline to build tolerance safely.
- Day 1–2: Indoor Wear (1–2 hours)
Wear the boots around the house with your intended sock height. Walk on carpet and hard floors. Focus on identifying pressure points. Do not lace them tightly yet. - Day 3–4: Short Outdoor Sessions (30–60 minutes)
Take short walks on flat pavement or grass. Avoid hills or uneven terrain. Pay attention to heel slippage and toe wiggle room. - Day 5–6: Moderate Activity (2–3 hours)
Wear them during errands or light chores. If using for hiking or work, simulate conditions (e.g., climbing stairs, standing). - Day 7: Full-Day Test
Wear the boots for an extended period under real-world conditions. Carry a spare pair in case discomfort arises.
After each session, inspect your feet and the interior lining. Redness that fades quickly is normal; persistent red marks or raw spots signal trouble spots needing adjustment.
Proven Techniques to Soften Boots Safely
Leather and synthetic uppers need flexibility to conform to your foot. Several safe methods accelerate this process without damaging the material.
Use Heat and Movement
Warm leather becomes more pliable. Wear the boots with thick socks and use a hairdryer on low heat to warm stiff areas (like the ankle collar) for 30–60 seconds before walking. The combination of heat and motion helps fibers relax and mold naturally. Never apply direct heat for more than a minute, and keep the dryer at least 6 inches away.
Shoe Stretcher with Expansion Bulb
A wooden or plastic shoe stretcher maintains shape and gently expands tight zones overnight. Models with adjustable width bulbs target specific pressure points, such as the instep or toe box. Apply a leather conditioner first to enhance absorption and prevent cracking.
Freezer Method for Tight Spots
Fill two sandwich bags with water, place them inside the boot where tightness occurs (e.g., over the toes), and freeze overnight. As water expands into ice, it applies outward pressure, stretching the upper slightly. Remove bags once thawed. This method works best for small, localized areas.
Condition Leather Early
Full-grain and top-grain leathers benefit from early conditioning. Use a beeswax-based balm or cream to hydrate fibers and improve suppleness. Apply sparingly with a soft cloth, let absorb for 15 minutes, then wipe off excess. Over-conditioning can weaken stitching, so limit applications to once every 10 days during break-in.
Do’s and Don’ts During Boot Break-In
| Do’s | Don’ts |
|---|---|
| Wear moisture-wicking socks to reduce sweat buildup | Wear brand-new boots on long hikes or eight-hour shifts |
| Lace boots properly to minimize heel lift | Use petroleum jelly directly inside the boot—it degrades adhesives |
| Rotate between two pairs if possible | Soak leather boots in water to soften—they may warp or crack |
| Address hot spots immediately with moleskin or tape | Ignore persistent pain—it’s not “part of the process” |
| Clean and dry boots after each use | Store damp boots in enclosed spaces—mold weakens materials |
Real Example: Breaking in Hiking Boots for the Appalachian Trail
Mark R., an experienced hiker preparing for a thru-hike, bought a new pair of Vibram-soled hiking boots six weeks before departure. Instead of testing them on a weekend trek, he followed a structured indoor-to-outdoor progression. He wore them for two hours daily around his home, then progressed to 3-mile neighborhood walks with a loaded daypack. On day 10, he noticed rubbing on his right heel. Rather than pushing through, he applied adhesive felt pads inside the heel cup and switched to merino wool blend socks. By week five, he completed a 12-mile test hike with zero blisters. “The first few days felt awkward,” he said, “but slowing down saved my trip.”
Essential Tips to Prevent Blisters
Even with well-broken-in boots, blisters can occur under certain conditions. These targeted tips reduce friction and protect vulnerable skin.
- Double-Layer Socks: Brands like Smartwool and Darn Tough use a dual-layer design that reduces shear between skin and outer fabric.
- Tape High-Risk Zones: Apply athletic tape or blister-prevention strips (e.g., Leukotape) to heels and ankles before wearing new boots.
- Use Lubricants Sparingly: Products like BodyGlide reduce friction but can make socks slippery inside the boot if over-applied.
- Lace Lock Technique: Implement a heel-lock lacing method to prevent upward movement. This involves creating a loop with the second-to-last eyelet and threading the lace through to secure the heel firmly.
- Carry Emergency Pads: Keep moleskin or hydrocolloid blister patches in your bag. At the first sign of redness, apply a patch before a blister forms.
Checklist: Blister-Free Boot Break-In Routine
Follow this checklist each time you wear new boots during the break-in phase:
- ☑ Choose the correct sock thickness and material
- ☑ Inspect boots for rough seams or sharp edges inside
- ☑ Condition leather uppers every 7–10 days (if applicable)
- ☑ Lace securely using a heel-lock method if needed
- ☑ Walk on varied surfaces to test flexibility and fit
- ☑ Check feet every 30 minutes for redness or discomfort
- ☑ Clean and air-dry boots after use—never near direct heat
- ☑ Track progress: note which areas have softened or still cause issues
Frequently Asked Questions
How long does it take to break in new boots?
Most quality boots require 20 to 40 hours of cumulative wear to fully break in. Light activity spread over 2–4 weeks is ideal. Some modern materials (like Gore-Tex liners or pre-molded midsoles) shorten this period, while rugged leather work boots may take longer.
Can I speed up the break-in process without damaging the boots?
You can accelerate softening safely using heat, moisture (from your foot, not external soaking), and mechanical stress—but avoid aggressive methods like oven heating or forceful hammering. Gradual adaptation preserves structural integrity and extends the boot’s lifespan.
What if my boots still cause blisters after several weeks?
Persistent blisters suggest a fit issue rather than insufficient break-in. Common problems include incorrect width, heel slippage, or inadequate arch support. Consider professional fitting, adding orthotics, or exchanging for a different model. No amount of breaking in fixes a fundamentally poor fit.
Expert Insight: The Role of Fit in Comfort
“The break-in period shouldn’t be about reshaping the boot to fix a bad fit. It’s about fine-tuning a good one. If your boot pinches, slides, or lacks support on day one, no technique will fully compensate.” — James Reed, Master Cobbler & Footwear Designer
This distinction is crucial. A well-fitted boot should feel snug but not tight, with about a thumb’s width between your longest toe and the end of the shoe. The heel should lift no more than ¼ inch when walking. If these basics aren’t met, focus on sizing adjustments before investing time in break-in techniques.
Conclusion
Breaking in new boots doesn’t have to mean enduring pain. With patience, the right tools, and attention to detail, you can achieve comfort without a single blister. Start slow, listen to your feet, and use smart techniques like heat molding, proper lacing, and protective taping. Remember, the goal isn’t to toughen your skin—it’s to align the boot’s structure with your foot’s natural movement. Every hour spent conditioning your boots now saves hours of discomfort later, whether you're scaling trails, standing on job sites, or walking city blocks. Treat the break-in phase as an investment in long-term performance and foot health.


 浙公网安备
33010002000092号
浙公网安备
33010002000092号 浙B2-20120091-4
Comments
No comments yet. Why don't you start the discussion?