
Every holiday season, millions of strands of lights are wrestled out of boxes, untangled, and draped across homes—only to be packed away again with frustration weeks later. But what if your entire Christmas light setup could unfold like a puzzle, snap together in under ten minutes, and then store completely flat in a single closet? That’s the promise of a modular light display. By designing your lighting system as interchangeable, repeatable units, you eliminate chaos and elevate both efficiency and aesthetics. This guide walks through how to plan, construct, and maintain a modular display that transforms your holiday decorating from a chore into a seamless tradition.
Why Modularity Matters for Holiday Lighting
Traditional Christmas light displays rely on long, continuous runs of string lights. These are prone to tangles, difficult to troubleshoot, and often require full disassembly each year. A modular approach changes this by breaking the display into self-contained sections—each designed to be independently powered, installed, and stored. The benefits are immediate: faster installation, easier repairs, consistent visual rhythm, and space-efficient storage.
Modular systems also allow for scalability. Start with a simple roofline or porch frame this year, then add new panels next season without redesigning the whole setup. Because each unit is identical or complementary in size and power draw, expansion becomes intuitive rather than overwhelming.
“Modularity isn’t just about convenience—it’s about sustainability. When one section fails, you replace or repair only that piece, not the entire display.” — Daniel Reyes, Landscape Lighting Designer & Holiday Display Consultant
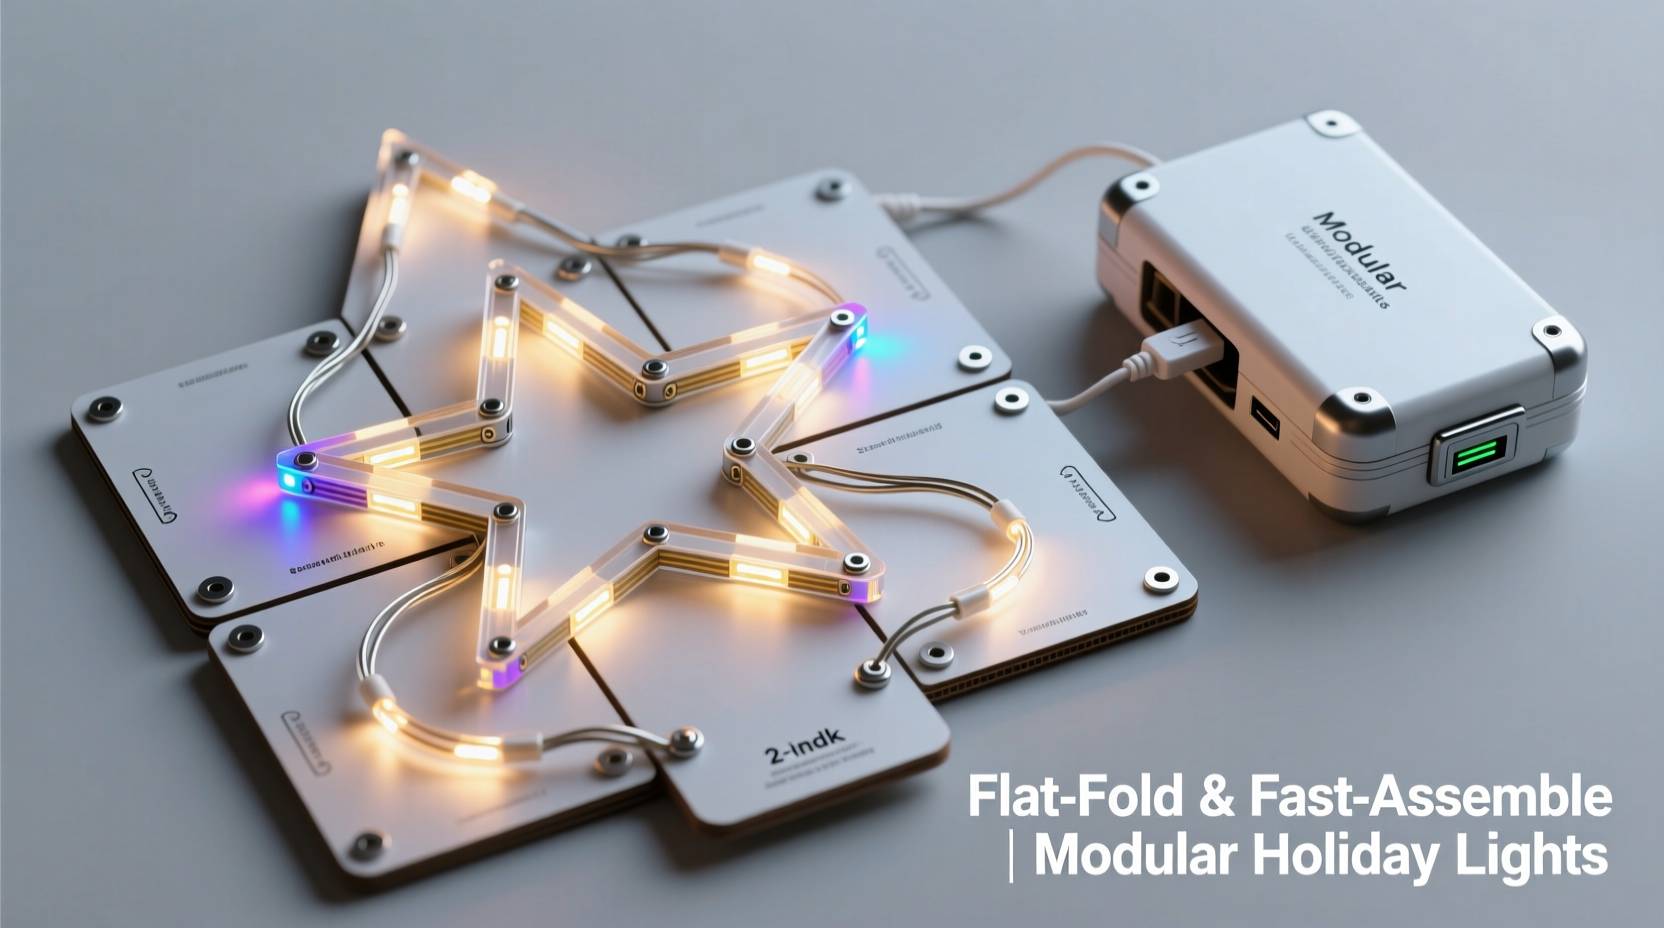
Design Principles for Flat-Storing Light Panels
The core of a modular system lies in its panel design. To ensure your display stores flat and assembles quickly, every component must serve dual purposes: structural integrity during use and compactness in storage.
Begin by defining your module dimensions. Standard sizes like 2'x4', 2'x2', or 1'x3' work well because they match common lumber cuts and fit neatly inside most garages or closets when stacked. Use lightweight but rigid materials such as PVC sheets, corrugated plastic (commonly known as coroplast), or thin plywood. Coroplast, frequently used for political signs, is ideal—it’s weather-resistant, inexpensive, and can be cut precisely with a utility knife.
Map out where lights will go on each panel. For uniformity, align LEDs in grids or borders. If outlining windows or eaves, shape panels to match architectural features while keeping them detachable via quick-connect hardware. Each panel should have labeled connection points and orientation markers (e.g., “Top,” “Left”) to prevent confusion during setup.
Step-by-Step: Building Your First Light Module
Constructing a prototype module takes a few hours and less than $30 in materials. Follow this sequence to create a durable, flat-storing light panel.
- Choose your base material: Cut a 2’x2’ square from coroplast using a straightedge and box cutter. Smooth any rough edges with sandpaper.
- Select LED string lights: Use commercial-grade, low-voltage LED strings rated for outdoor use. Opt for 50-light strands with 18-inch spacing—these cover a 2’x2’ area evenly. Avoid incandescent bulbs; they generate heat and consume more power.
- Attach lights securely: Run the strand around the perimeter of the panel. Secure every third bulb with UV-resistant zip ties fed through pre-punched holes (1/8” diameter) every 6 inches. Do not stretch the wire—allow slight slack to absorb temperature shifts.
- Wire connections: Solder or use waterproof connectors to join multiple strands if needed. Keep all splices sealed with silicone-filled heat-shrink tubing.
- Add mounting hardware: Install two L-brackets on adjacent corners for wall alignment. On opposite corners, attach male/female magnetic connectors or industrial snap fasteners for panel-to-panel joining.
- Label and test: Mark polarity (+/-) on wires and write a unique ID (e.g., “Panel A3”) with permanent marker. Test the entire unit before final sealing.
- Seal exposed components: Cover solder joints and plug ends with dielectric grease and rubber boot covers to prevent moisture ingress.
Repeat this process to build matching modules. Store completed panels in vertical stacks separated by cardboard to avoid scratching.
Smart Wiring and Power Distribution
A modular display fails if power delivery isn’t equally modular. Centralized control prevents overloading circuits and simplifies operation.
Use a hub-and-spoke wiring model: Each panel connects to a central distribution block located near an exterior outlet. This block splits one GFCI-protected circuit into multiple fused outputs, each serving 2–4 panels depending on total wattage. Low-voltage DC systems (12V or 24V) are safer and allow thinner gauge wire runs over longer distances.
For plug-and-play connectivity, install weatherproof multi-pin connectors (like those used in RVs or marine applications) between panels and the main harness. Color-code cables so red always goes to red, eliminating miswiring. Include a master switch or smart relay at the hub to turn the entire display on/off remotely.
| Component | Recommended Type | Avoid |
|---|---|---|
| Base Material | Coroplast, 4mm PVC sheet | Plywood (absorbs moisture) |
| Light Strings | Commercial LED, 50-count per strand | Mini-incandescent, non-commercial grade |
| Wiring Connectors | Marine-grade multi-pin, IP67-rated | Twist-on wire nuts outdoors |
| Power Source | 12V/24V transformer + distribution block | Daisy-chained household outlets |
| Storage Method | Vertical stack with spacers | Floor pile with no protection |
Real Example: The Johnson Family Porch Upgrade
The Johnsons in Portland, Oregon, spent three weekends each December installing and removing over 1,200 feet of tangled lights across their wraparound porch. In 2022, they redesigned the system using modular panels.
They measured each porch section and created eight identical 2’x3’ coroplast frames. Each held three 100-light LED strips arranged in a zigzag pattern for even glow. Panels connected magnetically at corners and plugged into a single 24V power rail mounted under the eave. Installation time dropped from 18 hours to 45 minutes. After the holidays, the panels nested flat in a 24”x36”x8” plastic bin.
When a squirrel chewed through one cable in 2023, they replaced only that panel’s wiring harness—no rewiring the entire porch. Total cost: $210 for materials. Estimated time saved over five years: 50+ hours.
Checklist: Launch Your Modular Display in One Weekend
- ☐ Measure key areas (rooflines, trees, railings) and define standard panel sizes
- ☐ Purchase coroplast sheets, LED strings, zip ties, and connectors
- ☐ Build and test one prototype panel
- ☐ Confirm power requirements and secure a suitable transformer
- ☐ Create a labeling system (panel ID, polarity, orientation)
- ☐ Assemble remaining modules and conduct full lighting test
- ☐ Install mounting rails or anchors on house structure
- ☐ Perform dry run: disassemble, store, then reassemble indoors
- ☐ Pack storage bin with panels, spare bulbs, tools, and instructions
Maintenance and Longevity Tips
Even the best-designed system degrades without care. Extend lifespan by inspecting each panel annually before deployment. Look for cracked bases, frayed wires, loose connections, or corroded terminals. Clean surfaces with mild soap and water—avoid pressure washers, which can force water into sealed joints.
Store panels vertically in a climate-controlled space if possible. Humidity and freezing cycles weaken adhesives and promote metal fatigue. Keep a log of each panel’s usage history: note repairs, replacements, and performance issues. Rotate front-facing panels yearly to distribute wear evenly.
FAQ
Can I mix different light colors or effects in my modular system?
Yes—but plan ahead. Assign specific modules to warm white, cool white, or color-changing roles. Label them clearly so you can recreate preferred arrangements each year. Use addressable LEDs (like WS2812B strips) if you want dynamic patterns controlled via app or music sync.
What if my house has irregular shapes—can modularity still work?
Absolutely. Design corner modules or tapered end-caps to handle angles and curves. Treat standard rectangles as your primary building blocks, then create custom pieces only where necessary. This keeps 80% of your system uniform and scalable.
Are magnetic connectors safe for outdoor electrical use?
Only if they’re specifically rated for outdoor, low-voltage applications. Standard magnets may conduct moisture or fail under tension. Use industrial locking magnetic couplers with rubber gaskets and current ratings above your load.
Conclusion: Turn Holiday Stress into Holiday Joy
A modular Christmas light display isn’t just a technical upgrade—it’s a lifestyle shift. It replaces annual frustration with predictable ease, turning what was once a weekend burden into a satisfying 30-minute ritual. Once built, your system pays dividends every December, freeing time for family, traditions, and enjoyment of the lights themselves.
Start small. Build one perfect panel. Test it. Improve it. Then scale. Within a few seasons, you’ll have a dazzling, durable, and effortlessly reusable display that becomes part of your home’s holiday identity. The goal isn’t just brighter lights—it’s a better experience.


 浙公网安备
33010002000092号
浙公网安备
33010002000092号 浙B2-20120091-4
Comments
No comments yet. Why don't you start the discussion?