
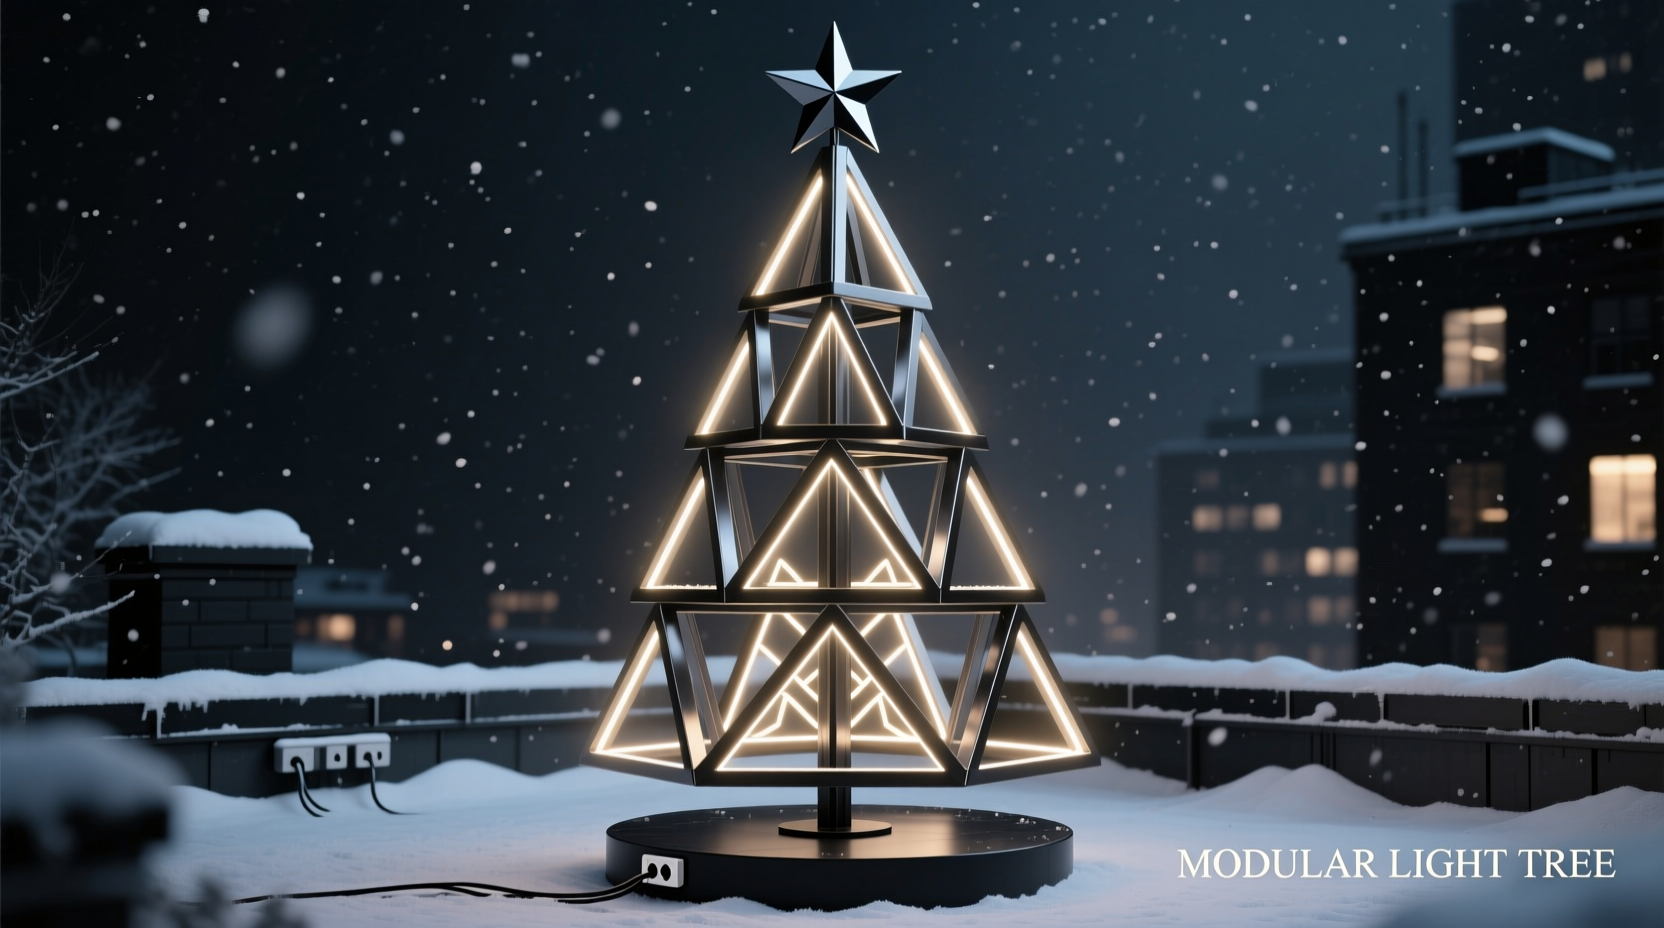
In recent years, traditional evergreen trees have taken a backseat in some homes for sleeker, more sustainable alternatives. One of the most innovative trends is the modular Christmas tree built from geometric light frames. These structures combine minimalist design with festive brilliance, offering a customizable centerpiece that’s lightweight, reusable, and perfect for small spaces or modern interiors. Unlike conventional trees, these are constructed from interlocking wireframes—often triangles, hexagons, or tetrahedrons—illuminated with LED strings to create the illusion of volume and depth through light alone.
The appeal lies not just in aesthetics but in practicality. Modular light-frame trees can be disassembled into flat components, stored in minimal space, and reconfigured year after year. They also allow for creative expression—adjusting height, density, and even color schemes without changing a single ornament. This guide walks through the entire process of designing, building, and styling such a tree, ensuring durability, visual impact, and ease of assembly.
Why Choose a Geometric Light-Frame Tree?
Before diving into construction, it helps to understand why this alternative has gained traction among urban dwellers, designers, and eco-conscious decorators. Traditional trees require annual purchases, generate waste, and demand significant floor space. In contrast, a modular light-frame version offers:
- Sustainability: Reusable metal or acrylic frames eliminate yearly consumption.
- Space efficiency: Ideal for apartments, hallways, or minimalist living rooms.
- Customization: Height, shape, and lighting effects can be altered annually.
- Durability: Resistant to shedding, fire hazards (when using LEDs), and pet interference.
- Aesthetic versatility: Works equally well in Scandinavian, industrial, or futuristic décors.
Designers like Sofia Lin, known for her work on interactive holiday installations in Brooklyn, note a growing shift: “People aren’t rejecting tradition—they’re redefining it. The emotional warmth of Christmas doesn’t come from pine needles; it comes from light, memory, and shared moments.”
“Light is the new green. A glowing frame can carry as much holiday spirit as any spruce.” — Sofia Lin, Installation Artist & Lighting Designer
Materials and Tools Required
To build your own modular tree, you’ll need a mix of structural and decorative components. Below is a comprehensive checklist categorized by function.
Structural Components
- Aluminum or steel rods (¼” diameter, 24–36” length)
- Plastic or metal corner connectors (90° and 60° angles)
- Modular joint hubs (optional, for complex geometries)
- Base plate (wooden disc or weighted platform, 12–18” diameter)
- Threaded rods or central support pole (for vertical stacking)
Lighting Elements
- LED string lights (preferably warm white or color-tunable, battery or plug-in)
- Waterproof tape or heat-shrink tubing (for securing connections)
- Timer or smart controller (for automated operation)
- Extension cords (low-profile, braided for aesthetics)
Assembly Tools
- Measuring tape and marker
- Wire cutters and pliers
- Hex key or small wrench set
- Drill (if mounting base or threading rods)
- Sandpaper (to deburr cut edges)
Step-by-Step Construction Guide
Building a modular tree requires precision and patience, but the result is a stunning, repeatable system. Follow this timeline-based approach over one weekend.
Day 1: Design and Frame Assembly
- Choose a geometry: Triangular modules are easiest for beginners. Each triangle forms a tier of the tree, narrowing toward the top.
- Calculate dimensions: For a 6-foot tree, use six tiers. Base tier: 36” per side. Reduce each subsequent tier by 6”, maintaining equilateral shapes.
- Cut and shape rods: Cut rods to length. Bend ends slightly (5–10°) if using press-fit connectors for tighter joins.
- Assemble modules: Connect three rods per triangle using corner joints. Ensure all angles are precise to prevent wobbling.
- Label each module: Mark bottom edges with tape (e.g., “Tier 1,” “Tier 2”) for easy reassembly next year.
Day 2: Stacking System and Base Integration
- Prepare the base: Attach a threaded central rod vertically to the center of the wooden base using epoxy or a flange mount.
- Create alignment guides: Drill a hole in the center of each triangular frame slightly larger than the rod diameter (e.g., ⅜”). This allows smooth stacking.
- Test fit: Slide tiers onto the rod from largest to smallest. Add rubber washers between layers to prevent metal-on-metal contact and reduce vibration noise.
- Secure the top: Cap the final tier with a finial piece—either a small pyramid, star, or illuminated orb attached to the rod’s end.
Day 3: Wiring and Lighting Integration
- Plan light placement: Wrap each frame once with LED string lights, following the perimeter. Use zip ties at corners to secure—don’t overtighten.
- Route wires internally: If using hollow rods, feed wiring through the center and exit at the base. Otherwise, run discreetly along outer edges.
- Connect power: Link all strings to a single controller. Use soldered connections for permanence or plug-and-play adapters for modularity.
- Test illumination: Turn on lights in a dark room. Adjust spacing or add secondary strings if brightness is uneven.
Design Variations and Customization Options
One of the greatest strengths of a modular system is adaptability. Consider these variations to personalize your display:
- Shape: Swap triangles for hexagons or diamonds to create a fuller silhouette.
- Color: Use RGB LEDs to match seasonal themes—rose gold for New Year’s, icy blue for winter wonderlands.
- Transparency: Replace metal rods with clear acrylic tubes filled with fiber optics for a floating-light effect.
- Motion: Add slow-rotating motorized base (from a turntable kit) for dynamic viewing angles.
- Interactivity: Integrate motion sensors so lights brighten when someone approaches.
| Design Style | Best Frame Shape | Recommended Lighting | Use Case |
|---|---|---|---|
| Minimalist | Single-tier triangle | Warm white micro-LEDs | Bookshelves, desks |
| Statement Centerpiece | Multi-tier tetrahedron stack | Color-changing strips | Living rooms, lobbies |
| Eco-Friendly | Bamboo-reinforced modules | Solar-powered LEDs | Patios, gardens |
| Kids’ Room | Large hexagons with cutouts | Sound-reactive pixels | Playrooms, nurseries |
Real-World Example: The Brooklyn Loft Installation
In 2023, designer Marcus Tran transformed a 400-square-foot Brooklyn loft using a five-tier triangular light tree made entirely from recycled aluminum conduit. With limited floor space, he mounted the base on a wall corner and angled the structure outward using a cantilevered bracket. Each frame was wrapped with programmable LEDs synced to a holiday playlist via Bluetooth. During gatherings, the tree pulsed gently with music, creating an immersive experience without obstructing movement.
“I didn’t want something that dominated the room,” Tran explained. “I wanted light to define the season, not the furniture.” The entire system broke down into a single storage tote and took under 20 minutes to reassemble the following year—proof that thoughtful design enhances both beauty and convenience.
Maintenance, Storage, and Longevity Tips
To ensure your tree remains functional and visually striking for years, follow these best practices:
- After disassembly, wipe rods with a dry microfiber cloth to remove dust.
- Store connectors in labeled plastic bags to avoid loss.
- Coil LED strings around cardboard spools—never twist tightly.
- Test all lights before storage to catch failing bulbs early.
- Keep assembly instructions and wiring diagrams in a sealed folder with the kit.
Frequently Asked Questions
Can I make a modular tree without power access nearby?
Yes. Use high-capacity USB-rechargeable LED strings with built-in batteries. A 5000mAh pack can power a medium tree for up to 12 hours per charge. Place a charging dock nearby for nightly top-ups.
Is this safe around children and pets?
Absolutely—if designed properly. Use low-voltage LEDs (under 24V), round off sharp rod ends, and secure the base to prevent tipping. Avoid dangling wires at floor level.
How do I add ornaments without damaging the frame?
Use magnetic clips or adhesive-backed hooks rated for lightweight items. Alternatively, hang transparent fishing line from ceiling mounts to suspend glass baubles mid-air around the tree, enhancing the floating-light illusion.
Final Checklist Before First Assembly
- All rods cut to correct length and deburred
- Corner connectors tested for snug fit
- Base securely mounted with central rod aligned vertically
- Each tier labeled and stacked in order
- LED strings unwound and tested individually
- Wiring routed cleanly with excess coiled at base
- Controller accessible and programmed with desired mode
- Safety check: no exposed wires, stable balance, no overheating
Conclusion: Light the Way Forward
A modular Christmas tree built from geometric light frames isn’t just a decoration—it’s a statement of intention. It reflects a desire for sustainability, innovation, and personal expression in holiday traditions. By investing time in thoughtful construction now, you create a legacy piece that evolves with your space and style. Whether you opt for a simple triangle or an elaborate kinetic sculpture, the glow you produce carries the same warmth as any fir-scented classic.
This season, consider stepping beyond the expected. Build something that lasts, inspires, and adapts. Then share your design—your friends may just ask for plans next year.


 浙公网安备
33010002000092号
浙公网安备
33010002000092号 浙B2-20120091-4
Comments
No comments yet. Why don't you start the discussion?