
For many pet owners, especially those with older dogs or small breeds, navigating stairs can be a daily challenge. A well-built dog ramp provides a safer, more accessible alternative, reducing strain on joints and preventing injuries. While commercial ramps are available, building your own allows you to customize size, strength, and materials to fit your home and your dog’s needs. This guide walks through the entire process—from planning to finishing touches—so even first-time builders can create a sturdy, reliable ramp.
Why Build a Custom Dog Ramp?
Prefabricated ramps often lack the ideal length, width, or incline for specific staircases. Off-the-shelf models may also use lightweight materials unsuitable for larger dogs or long-term outdoor use. A custom-built ramp ensures precise fit, durability, and safety tailored to your pet. According to Dr. Rebecca Langston, DVM and veterinary rehabilitation specialist:
“Controlled, low-impact access to elevated areas is crucial for dogs with arthritis or recovering from surgery. A properly sloped ramp reduces joint stress by up to 60% compared to stairs.” — Dr. Rebecca Langston, DVM
Building your own gives you control over every aspect, including grip surface, side rails, and weather resistance—making it a smart investment in your dog’s long-term comfort.
Planning Your Dog Ramp: Measurements and Materials
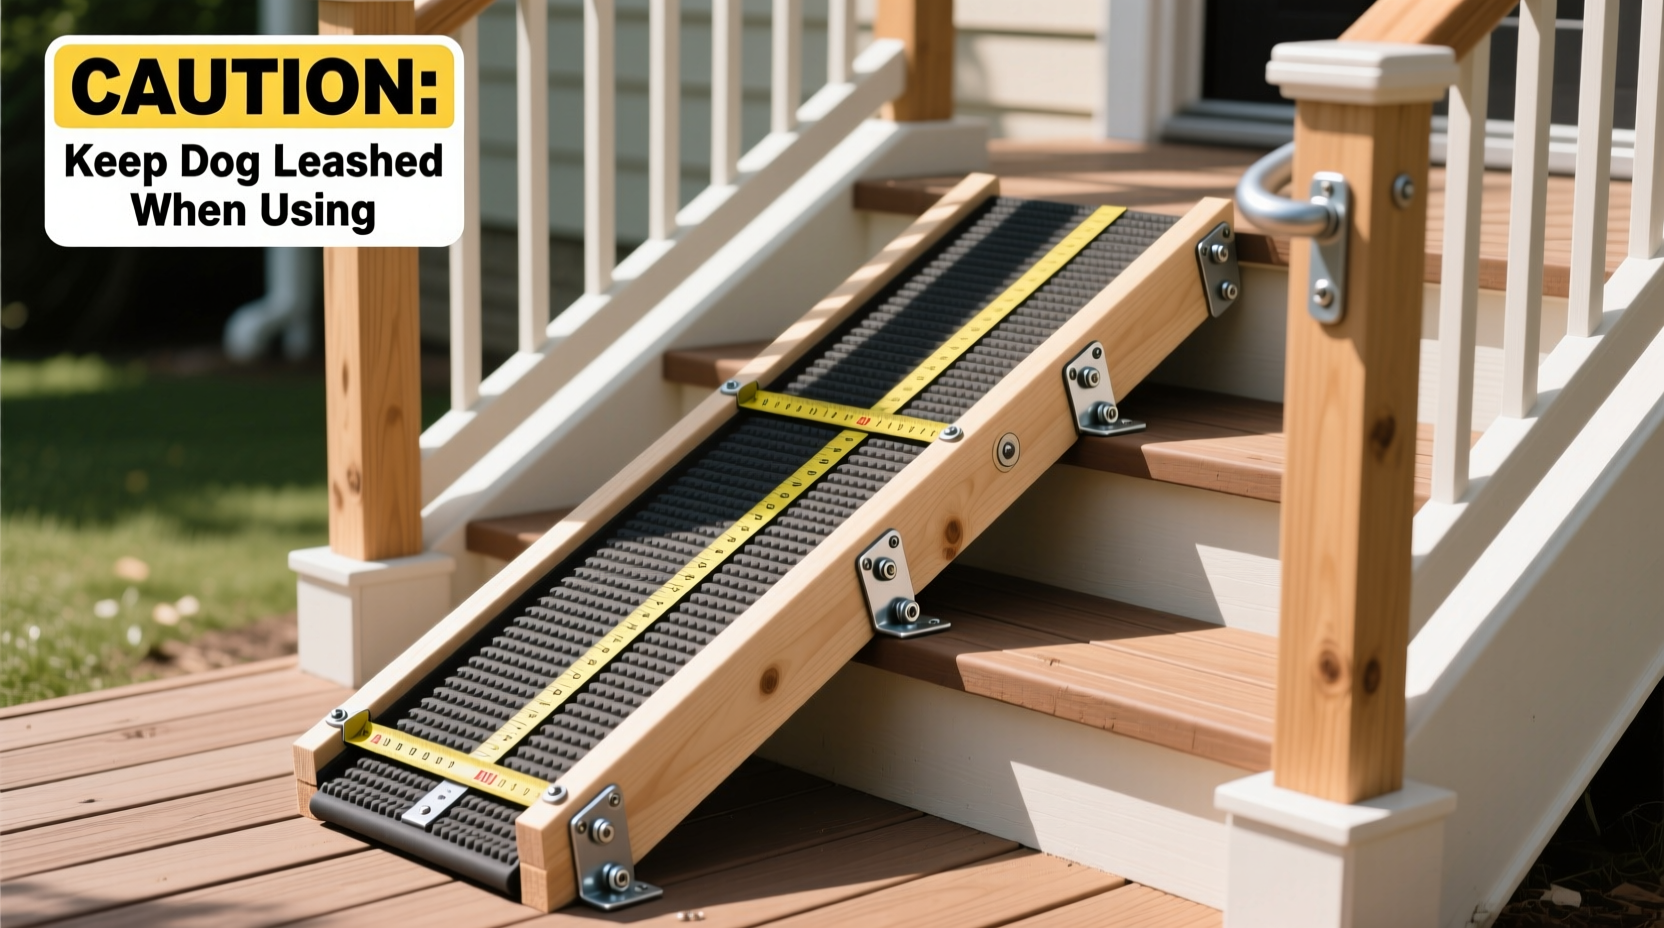
Before cutting any wood, accurate measurements are essential. Start by measuring your staircase:
- Total rise: Vertical height from the bottom floor to the top landing.
- Total run: Horizontal distance the ramp will cover.
- Stair width: Ensure the ramp is wide enough for your dog to walk comfortably—typically 12–24 inches, depending on breed.
The incline is critical. Most experts recommend a slope no steeper than 20 degrees (roughly a 1:3 rise-to-run ratio). For example, if your stairs rise 30 inches, the ramp should extend at least 90 inches horizontally.
Recommended Materials List
| Material | Recommended Type | Why It Matters |
|---|---|---|
| Framing | 2x4 pressure-treated pine | Durable, moisture-resistant, strong support |
| Ramp Surface | ¾” exterior-grade plywood | Smooth yet stable base for traction coating |
| Traction Layer | Non-slip tread tape or rubber matting | Prevents slipping, especially when wet |
| Fasteners | 2.5” exterior-grade screws | Resist rust and hold joints securely |
| Side Rails | 1x3 pine or composite trim | Guides the dog and adds lateral stability |
Step-by-Step Construction Guide
With materials gathered and dimensions confirmed, follow these steps to assemble a safe, long-lasting ramp.
- Cut the frame supports. Use two 2x4s as side rails, cut to the full length of the ramp. These will bear most of the weight. Cut additional cross supports every 12–16 inches for added rigidity.
- Build the base frame. Lay the side 2x4s parallel to each other. Attach cross supports with exterior screws, ensuring all edges are flush. Reinforce corners with metal L-brackets for extra durability.
- Attach the ramp surface. Secure the plywood sheet to the frame using screws spaced every 6–8 inches along the edges and supports. Avoid nails—they can loosen over time.
- Add non-slip surfacing. Apply adhesive-backed non-slip tape in horizontal strips across the ramp, spaced 4–6 inches apart. Alternatively, glue down a marine-grade rubber mat using outdoor construction adhesive.
- Install side rails. Attach 1x3 boards along both edges using countersunk screws. These should extend 3–4 inches above the ramp surface to prevent your dog from stepping off accidentally.
- Finish and seal. Sand all surfaces to remove splinters. Apply two coats of water-sealant or exterior polyurethane, especially if the ramp will be used outdoors. Allow full drying between coats.
Real-Life Example: Helping an Aging Labrador
Sarah Thompson, a pet owner in Portland, built a custom ramp for her 11-year-old Labrador, Max, who developed hip dysplasia. Her back porch had five steep steps, and Max began refusing to go outside alone.
She measured the 28-inch rise and built a 96-inch ramp with a gentle 17-degree slope. Using pressure-treated lumber and rubber stair treads, she completed the project in one weekend. “Max walked up confidently the first try,” Sarah said. “Within days, he was using it multiple times a day without hesitation. It gave him his independence back.”
The ramp has lasted three years with only annual resealing and replacement of one worn tread strip—proof that thoughtful design pays off.
Safety and Maintenance Checklist
To ensure lasting performance and ongoing safety, follow this maintenance routine:
- ✅ Inspect monthly for loose screws, warping, or wear on the non-slip surface.
- ✅ Clean the ramp quarterly with mild soap and water; avoid pressure washers that can damage wood.
- ✅ Reapply sealant annually, especially in humid or rainy climates.
- ✅ Check side rails for stability—tighten screws if wobbling occurs.
- ✅ Store indoors during winter if not designed for permanent outdoor use.
Frequently Asked Questions
Can I make a foldable ramp for storage?
Yes. Use a central hinge between two ramp sections and support legs that fold underneath. However, ensure the joint is reinforced with steel plates and heavy-duty fasteners to maintain stability under load.
How do I train my dog to use the ramp?
Start by placing treats along the ramp while supporting your dog. Walk beside them and encourage with verbal praise. Most dogs adapt within a few sessions. Never force them—patience builds confidence.
Is wood better than plastic or metal for dog ramps?
Wood offers the best balance of strength, customization, and cost. Plastic ramps may crack over time, and metal can become slippery or hot in sunlight. With proper sealing and non-slip treatment, wood outperforms both in durability and safety.
Final Thoughts and Next Steps
A homemade dog ramp isn’t just a woodworking project—it’s an act of care. By investing time in proper design and materials, you give your pet safer access to their favorite spaces, whether it’s the porch, car, or bed. The benefits extend beyond physical support; reduced anxiety and increased mobility contribute to a happier, more active life.
If you’ve been considering a ramp but hesitated due to cost or complexity, remember: this project requires only basic tools and common materials. With careful measurement, attention to slope, and a focus on grip and stability, you can build something truly valuable.


 浙公网安备
33010002000092号
浙公网安备
33010002000092号 浙B2-20120091-4
Comments
No comments yet. Why don't you start the discussion?