
A beautifully decorated Christmas tree is the centerpiece of any holiday home. But behind that festive glow often lies a chaotic mess of tangled cords—extension cables, light strings, power strips, and plug adapters snaking across the floor. Not only does this look unappealing, but it also poses tripping hazards and increases wear on electrical components. With a few smart strategies, you can transform that clutter into an organized, efficient setup that’s both safer and easier to manage year after year.
Bundling cords isn’t just about aesthetics; it’s about function, safety, and longevity. A tidy cord system makes decorating faster, reduces strain on plugs and sockets, and simplifies storage when the season ends. Whether you have a real or artificial tree, indoor or outdoor lights, or multiple strands from different brands, a systematic approach ensures everything stays under control—without sacrificing brightness or convenience.
Why Cord Management Matters During the Holidays
During the holiday season, homes often double or triple their usual number of plugged-in devices. From mini projectors and motorized ornaments to heated garlands and smart lighting controllers, the demand on outlets grows quickly. Without proper organization, cords become a hazard zone—especially in homes with children or pets who may tug, trip, or chew on exposed wires.
Poorly managed cords are also more likely to overheat. When multiple extension cords are coiled tightly or buried under rugs or furniture, heat builds up, increasing fire risk. The U.S. Fire Administration reports that between 2016 and 2018, U.S. fire departments responded to an average of 160 home fires per year that started with Christmas trees. While most are caused by faulty lights or proximity to heat sources, improper electrical use—including overloaded circuits and tangled wiring—plays a significant role.
Neat bundling helps prevent these issues by promoting airflow around cords, reducing stress on insulation, and making it easier to inspect each connection before powering up.
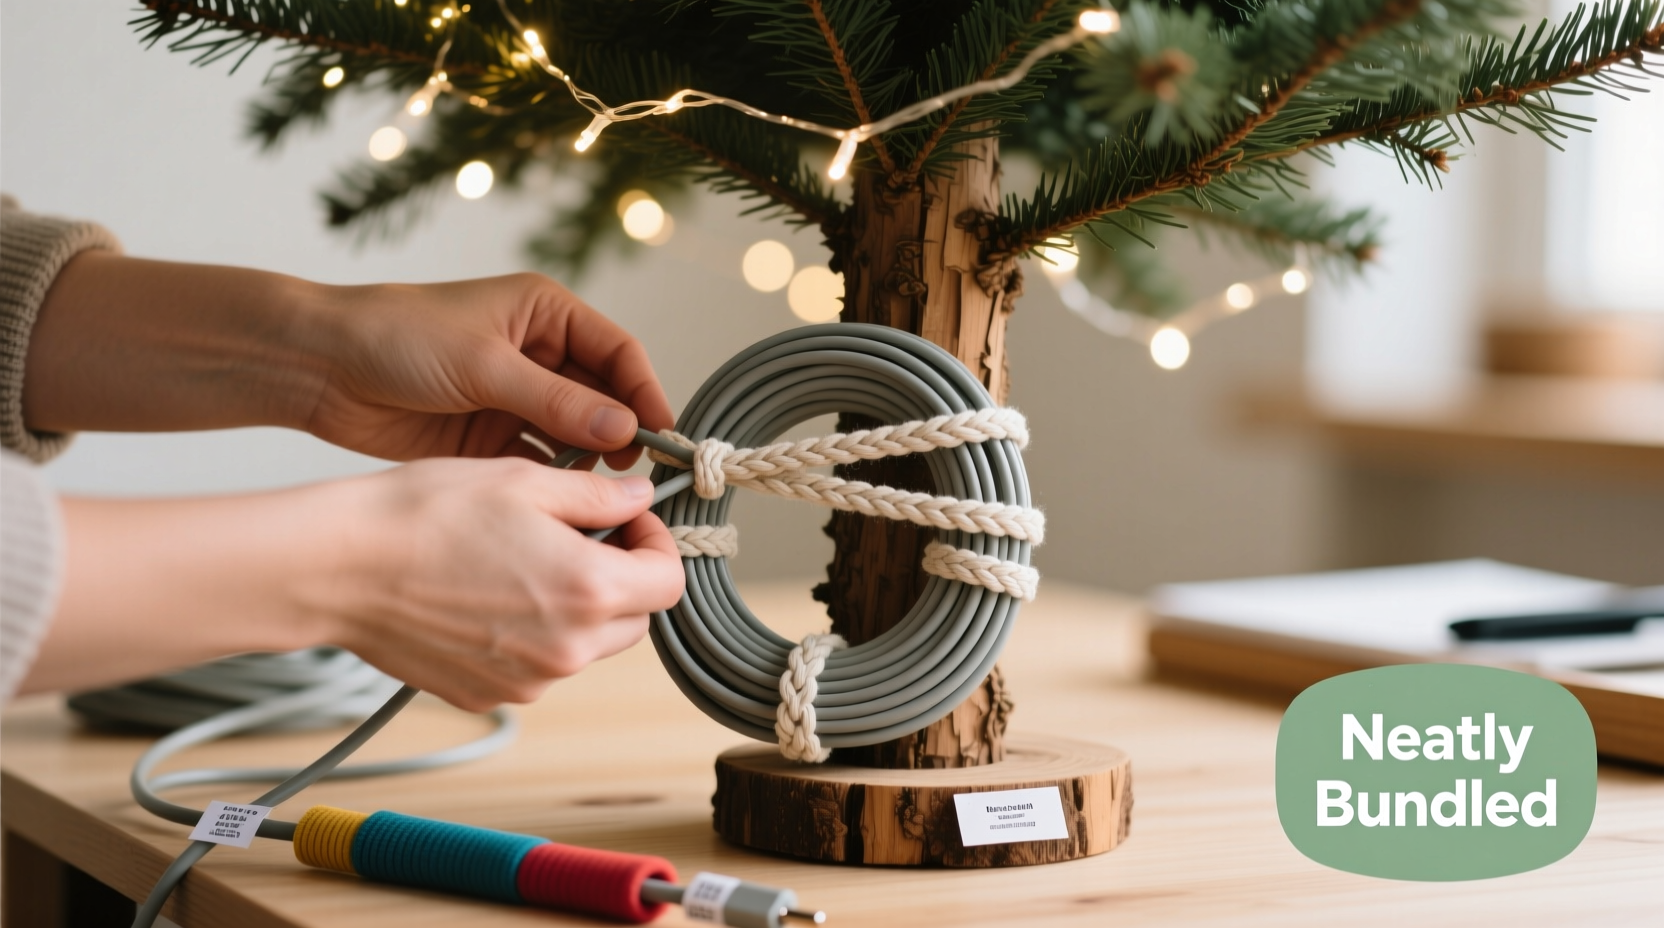
Step-by-Step Guide to Bundling Cords Behind Your Tree
Follow this proven sequence to organize your cords efficiently and safely every holiday season.
- Unplug Everything First
Before touching any cord, ensure all devices are powered down and disconnected from outlets. This eliminates the risk of short-circuiting or accidental energizing during handling. - Lay Out All Components
Remove the tree skirt temporarily and spread out all cords, lights, extension cables, and power strips on the floor. Identify which lights go where (e.g., top half, bottom ring, outer branches) and group them accordingly. - Test Each String Individually
Plug each strand into a working outlet to confirm functionality. Replace any flickering or dead bulbs now rather than later. Label each tested strand with a small tag indicating its position (e.g., “Top Front,” “Left Side”) using masking tape and a marker. - Start at the Base and Work Upward
Begin draping lights from the bottom of the trunk upward. Feed the male plug end toward the nearest wall outlet. Keep excess length routed vertically along the backside of the tree stand, not wrapped around the base, to prevent overheating. - Group Cords Into Bundles
Use soft Velcro straps or reusable twist ties to gather similar cords together. Avoid metal wire ties—they can cut into insulation over time. Bundle no more than three to four cords per tie to maintain flexibility and reduce bulk. - Route Toward the Outlet Strategically
Run bundled cords straight toward the outlet along the shortest safe path. Never run them under rugs, behind heavy furniture, or across high-traffic areas. If necessary, use flat cord covers designed for floor use to protect both people and wires. - Connect to a Power Strip with Surge Protection
Plug all light strings into a single surge-protected power strip placed near the outlet. This centralizes control and allows you to switch everything off with one button. Make sure the total wattage doesn’t exceed the strip’s rating (typically 1,875 watts for a 15-amp unit). - Secure the Final Run
Once plugged in, fasten the final stretch of bundled cords to the wall or baseboard using adhesive-backed cable clips. These keep cords flush against surfaces and out of foot traffic zones. - Replace the Tree Skirt Carefully
Fold the skirt around the organized cord bundle rather than burying it. Cut a small slit in the inner lining if needed to allow the bundle to exit cleanly toward the outlet without pinching. - Final Check
Turn on the lights and inspect for flickering, loose connections, or signs of overheating. Touch each major junction gently—if anything feels warm, disconnect immediately and reevaluate load distribution.
Best Tools and Supplies for Cord Organization
The right tools make a dramatic difference in how cleanly and durably you can manage cords. Here’s a breakdown of recommended products and why they work.
| Tool | Best For | Why It Works |
|---|---|---|
| Velcro Cable Ties (Reusable) | Temporary bundling, seasonal setups | No cutting required; gentle on insulation; easy to adjust or remove |
| Adhesive Cable Clips | Securing cords to walls or baseboards | Low-profile, removable without damage, keeps cords off the floor |
| Snap-Together Raceways | Long runs along baseboards | Encloses multiple cords neatly; paintable to match decor |
| Label Tags or Masking Tape | Identifying light strands | Prevents confusion during setup and storage |
| Surge-Protected Power Strip | Centralized power management | Protects against voltage spikes; simplifies on/off control |
Do’s and Don’ts of Holiday Cord Management
Avoid common pitfalls with this clear comparison of best practices versus risky habits.
| Do’s | Don’ts |
|---|---|
| Use UL-listed extension cords rated for indoor use | Use outdoor-rated cords indoors unless necessary—many are bulkier and harder to conceal |
| Leave service loops near the power strip for easy access | Daisy-chain multiple power strips or extension cords—this overloads circuits |
| Check cords annually for fraying, cracking, or bent prongs | Use cords with damaged insulation—even minor cracks increase shock and fire risk |
| Keep bundles loose enough to allow airflow | Wrap cords tightly in knots or rubber bands, which degrade insulation over time |
| Label each set of lights before storing | Mix different types of lights (LED and incandescent) on the same circuit without checking compatibility |
Real Example: Transforming a Cluttered Setup in Under 30 Minutes
Sarah, a homeowner in Portland, used to spend hours untangling cords every November. Her six-foot pre-lit tree had additional garland lighting, a rotating ornament projector, and twinkle lights woven through nearby shelves. By December, her living room outlet was buried under a knot of wires she called “the snake pit.” After one incident where her dog chewed through a spare extension cord, she decided to overhaul her system.
Using the step-by-step method outlined above, Sarah laid out all her components, tested each strand, and labeled them by location. She replaced old zip ties with Velcro straps and installed adhesive clips along the baseboard to route a single neat bundle from tree to outlet. She added a surge-protected power strip mounted flush to the wall and tucked the final run into a white plastic raceway painted to match the trim.
The result? Setup time dropped from two hours to 35 minutes. More importantly, her space looked cleaner, felt safer, and allowed her to confidently let her toddler play nearby. She now stores her cords coiled loosely in labeled bins with tags still attached—making next year’s setup even faster.
“Proper cord management isn’t just a one-time fix—it’s a habit that pays off every holiday season.” — Daniel Reyes, Residential Electrician & Safety Consultant
Essential Checklist for a Tidy Tree Setup
Use this checklist each year before decorating to ensure a smooth, safe, and organized installation.
- ☐ Unplug all cords and devices before starting
- ☐ Test every light string and replace faulty bulbs
- ☐ Label each strand by placement (e.g., “Top,” “Front Lower”)
- ☐ Gather supplies: Velcro ties, cable clips, power strip, labels
- ☐ Route cords vertically from tree base to outlet—avoid wrapping around stand
- ☐ Bundle cords in groups of 3–4 using non-abrasive ties
- ☐ Connect to a surge-protected power strip near the outlet
- ☐ Secure final run with adhesive clips or raceway
- ☐ Ensure no cords run under rugs or across walkways
- ☐ Recheck connections after powering on—feel for heat, watch for flickering
- ☐ Store labels with lights for next year
Frequently Asked Questions
Can I use zip ties to bundle Christmas light cords?
While zip ties are strong, they’re not recommended for seasonal use because they can’t be reused and often tighten too much when pulled, compressing insulation and creating weak points. Over time, this leads to cracked sheathing and exposed wires. Opt for reusable Velcro ties instead—they provide secure bundling without damage.
How many light strings can I safely connect together?
Most manufacturers specify a “maximum connectable” limit—usually 3 to 5 strands for incandescent lights and up to 10–15 for LEDs due to lower wattage. Always check packaging labels. Exceeding this number risks overheating and circuit overload. When in doubt, plug additional strands into a separate circuit or power strip.
What should I do if my cords feel warm during use?
Warmth indicates resistance, often caused by overloaded circuits, daisy-chained extensions, or damaged wires. Immediately unplug the setup and inspect each component. Reduce the number of connected devices, avoid coiling cords while in use, and consider upgrading to LED lights, which generate significantly less heat.
Conclusion: A Cleaner, Safer Holiday Starts Behind the Tree
A well-decorated Christmas tree brings joy, warmth, and tradition into the home—but true excellence lies in the details others don’t see. Taking the time to bundle cords neatly isn’t just a chore; it’s an investment in safety, efficiency, and peace of mind. With the right tools, a logical process, and a bit of discipline, you can eliminate tangles, reduce hazards, and make holiday decorating something to look forward to—not dread.
Start this year with intention. Apply these methods early, label as you go, and store thoughtfully. Come next season, you’ll save time, avoid frustration, and enjoy a display that shines as brightly behind the scenes as it does in front.


 浙公网安备
33010002000092号
浙公网安备
33010002000092号 浙B2-20120091-4
Comments
No comments yet. Why don't you start the discussion?