
Selecting the ideal hiking backpack for weekend trips is more than just picking a stylish or spacious bag. It’s about matching functionality, comfort, and durability to your specific needs. A poorly chosen pack can turn an enjoyable trail adventure into a painful slog, while the right one enhances mobility, balance, and endurance. With dozens of models on the market—ranging from ultralight daypacks to full-featured overnight systems—knowing what to prioritize makes all the difference.
This guide breaks down the essential features of weekend hiking backpacks, explains how they affect performance, and provides practical advice to help you make an informed decision based on your body type, trip length, terrain, and gear load.
Understand Capacity: The Foundation of Your Choice
Backpack capacity is measured in liters and directly correlates with how much gear you can carry. For weekend trips—typically defined as 1–2 nights in the backcountry—the sweet spot lies between 35 and 65 liters.
- 35–45L: Ideal for minimalist hikers or those using lightweight gear. Suitable for fast-and-light trips where you carry only essentials: sleeping bag, pad, shelter, food, water, and clothing.
- 50–60L: Most versatile range. Offers room for additional layers, cooking system, extra food, and slightly bulkier shelters like small tents. Recommended for average users with standard gear.
- 60–65L: Best for colder conditions requiring heavier insulation, winter camping, or multi-activity weekends that include snowshoeing or climbing gear.
Keep in mind that volume claims can vary between brands. A 50L pack from Brand A might feel smaller than a 50L from Brand B due to internal shape, frame design, or compression straps. Always try packing your intended gear before committing.
Fit Matters More Than Size: Torso Length and Hip Belt Alignment
No matter how advanced the suspension system, a backpack that doesn’t fit your torso will cause discomfort, fatigue, and potential injury. The key is matching the pack’s adjustable harness to your body dimensions.
Torso length—not height—is the critical measurement. To determine yours:
- Place a flexible ruler or tape along your spine, starting at the C7 vertebra (the bony bump at the base of your neck when you tilt forward).
- Measure down to the top of your hip bones (iliac crest), where your hips naturally bend.
- The distance in inches is your torso length.
Most packs are designed for short (16–18\"), regular (18–20\"), or long (20–22\") torsos. Some high-end models offer fully adjustable harnesses, allowing fine-tuning across ranges.
The hip belt should sit snugly on your iliac crest, transferring 80–90% of the weight to your hips. If it rides too high or low, the load won’t be properly supported, leading to lower back strain.
“Proper fit isn’t optional—it’s foundational. A well-fitted pack disappears on your back; a poor one dominates your attention.” — Sarah Thompson, Certified Outdoor Guide & Gear Technician
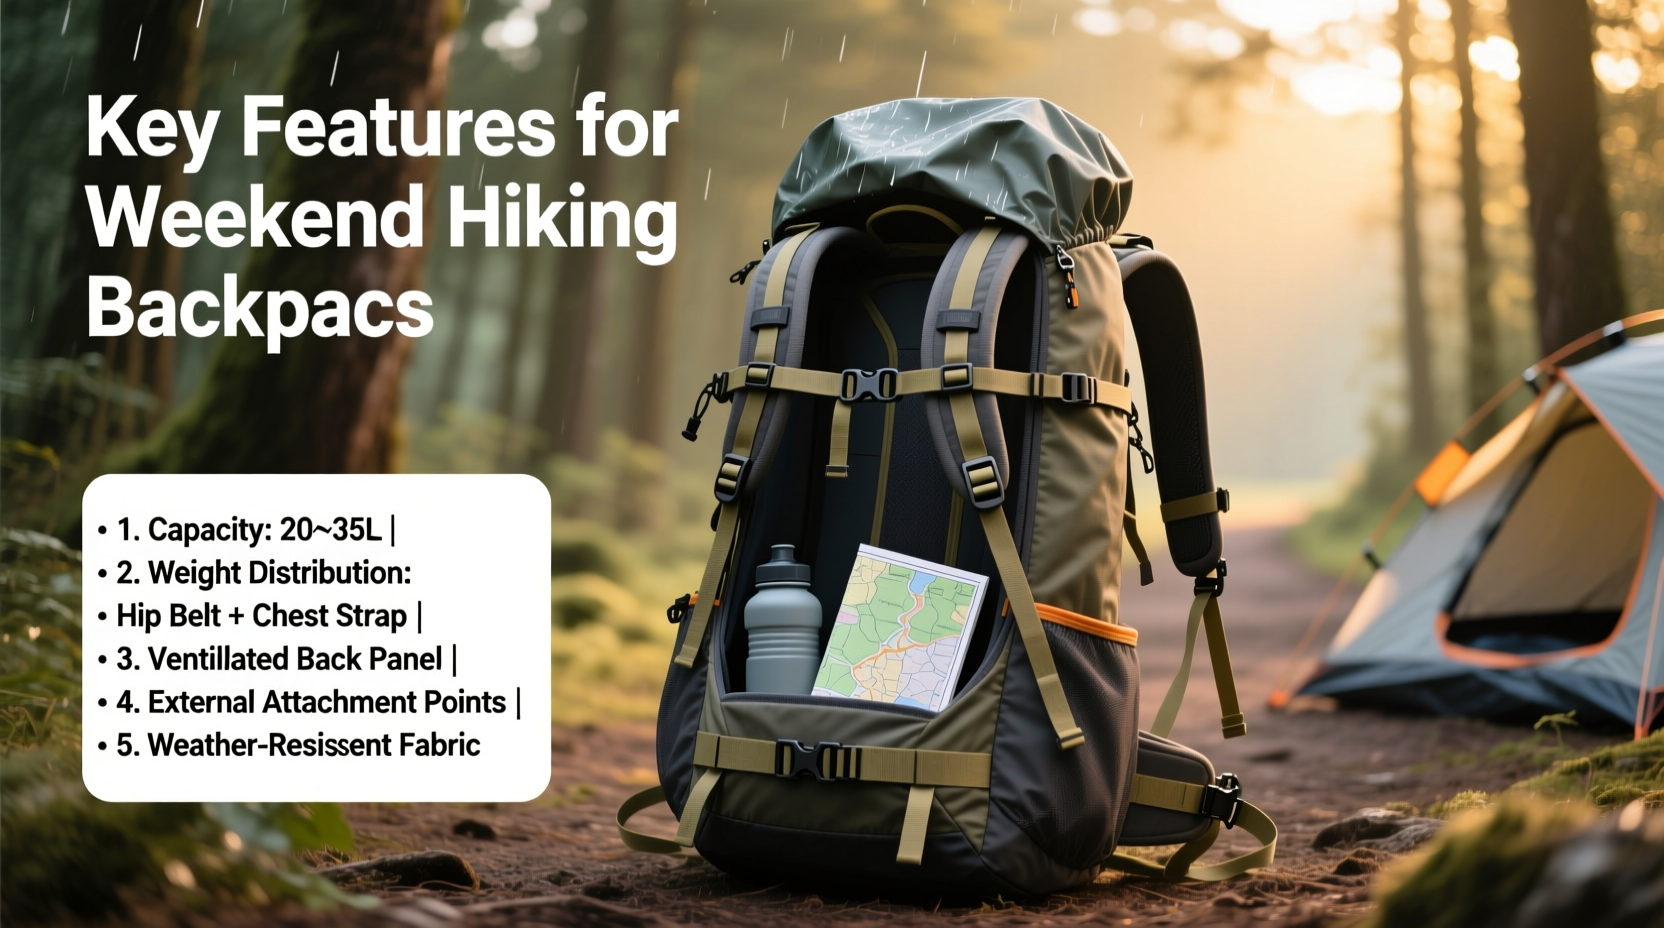
Key Features That Impact Comfort and Functionality
Beyond capacity and fit, several technical elements define how a backpack performs during real-world use. These features influence breathability, accessibility, stability, and weather resistance.
Ventilation Systems: Stay Cool on the Climb
Extended hikes generate heat and sweat, especially between your back and the pack. Modern ventilated suspension systems use tensioned mesh panels, trampoline-style frames, or air channels to create a gap between your spine and the pack.
- AirSpeed (Osprey), AntiGravity (Deuter): Use suspended mesh that floats over aluminum or composite stays.
- Channel Back (The North Face): Rigid foam ridges with airflow gaps.
While effective, highly ventilated designs may sacrifice some structure under heavy loads. Test them with weight if you plan to carry more than 25 lbs.
Frame Type: Internal vs. Frameless
All weekend packs have some structural support, but the design varies:
| Frame Type | Pros | Cons | Best For |
|---|---|---|---|
| Internal Frame | Stable load transfer, maintains upright posture, compatible with hydration sleeves | Slightly heavier, less packable | Most weekenders, uneven terrain, heavier loads |
| Frameless | Lightweight, compressible, flexible movement | Poor weight distribution above 20 lbs, less durable over time | Ultralight hikers, smooth trails, minimalists |
| Hybrid (Stiff Panels + Light Frame) | Balances support and weight | Limited adjustability | Day-to-weekend versatility |
Accessibility and Organization
How you access your gear matters. Weekend trips require frequent retrieval of layers, snacks, maps, and rain shells. Look for:
- Top-loading with front panel zip: Full access without unpacking everything.
- Side or bottom compartment: Dedicated space for sleeping bags or wet gear.
- Multiple external pockets: Stretch mesh side pockets for water bottles, hip belt pockets for sunscreen/snacks, front shove-it pocket for quick storage.
- Daisy chains and gear loops: Allow attachment of trekking poles, ice axes, or helmets.
Real-World Example: Choosing for a Mountain Lake Getaway
Consider Alex, planning a two-night trip to the Sawtooth Mountains in Idaho. Conditions are mild (50–70°F), but unpredictable afternoon storms are common. His gear list includes:
- 3-season tent (3 lbs)
- Sleeping bag and pad (2.5 lbs)
- Cooking stove, fuel, pot (1.5 lbs)
- Three days of food (5 lbs)
- Water filter and 2L capacity
- Rain jacket, fleece, spare clothes
Total pack weight: ~18 lbs (plus 5 lbs of water). He’s 5'10\" with a 19\" torso. After testing several models, he chooses a 55L internal-frame pack with:
- An adjustable harness fitting his torso precisely
- Ventilated back panel for summer hikes
- Dual side pockets, hip pockets, and a front stretch pocket
- Integrated rain cover and trekking pole attachments
The result? A balanced, breathable load that allows him to hike 8-mile days comfortably, even when the trail turns steep.
Step-by-Step Guide to Selecting Your Backpack
Follow this sequence to ensure you don’t overlook critical factors:
- Define your typical trip profile: How many nights? What season? What gear do you usually bring?
- Measure your torso length: Use the C7 to iliac crest method described earlier.
- Determine required capacity: Based on trip duration and gear bulk, select a liter range.
- Narrow by fit system: Choose packs offering adjustability for your torso and hip size.
- Test with weight: Visit an outdoor retailer and load a demo pack with 15–20 lbs. Walk around, bend, squat.
- Evaluate key features: Check ventilation, pocket layout, ease of access, and strap adjustments.
- Assess build quality: Inspect stitching, zipper strength, fabric denier (aim for 100D+ on high-wear areas).
- Compare warranties: Brands like Osprey, Deuter, and Hyperlite offer lifetime repairs—valuable for longevity.
“Try before you buy. No spec sheet replaces the feel of a loaded pack on your shoulders.” — Mark Delgado, Outdoor Retailer & LNT Educator
Frequently Asked Questions
Can I use a 30L daypack for a weekend trip?
Only if you’re an ultralight backpacker using a hammock, no-cook meals, and minimal clothing. Most people will find 30L too restrictive for two nights. Upgrade to at least 35L for flexibility.
Do I need a hydration reservoir?
It depends on climate and personal preference. In hot, dry environments, a built-in hydration sleeve and tube exit port make water access safer and faster. However, bladders can be hard to clean and freeze in cold weather. Many experienced hikers prefer bottles in side pockets for reliability.
Are women-specific packs worth it?
Yes, for most female hikers. Women’s models typically feature shorter torso lengths, narrower shoulder straps, wider hip belts, and lighter overall frames—designed to match anatomical differences. Unisex packs may not distribute weight as efficiently on smaller-framed individuals.
Essential Checklist Before You Buy
Use this checklist to evaluate any backpack before purchase:
- ✅ Torso length matches adjustable harness range
- ✅ Hip belt wraps securely around iliac crest
- ✅ Shoulder straps contour to your chest without gapping
- ✅ Capacity aligns with your typical gear load (not maximum possible)
- ✅ Ventilation system suits your climate
- ✅ Key items (headlamp, snacks, map) are easily accessible
- ✅ External attachment points exist for poles, mats, or tripod
- ✅ Fabric is durable (≥100D nylon/polyester) and water-resistant
- ✅ Warranty covers seams, zippers, and frame defects
- ✅ Pack feels stable when loaded (test with weight if possible)
Final Thoughts: Invest in Fit, Not Just Features
The best hiking backpack for weekend trips isn’t the largest, lightest, or most expensive—it’s the one that fits your body, supports your load, and simplifies your journey. While advanced materials and clever compartments add convenience, nothing substitutes for proper fit and balanced weight distribution.
Take the time to measure yourself, research models, and ideally, test packs in person. Remember that your backpack is the foundation of your outdoor experience. When it works with your body instead of against it, every step becomes easier, every view more rewarding.


 浙公网安备
33010002000092号
浙公网安备
33010002000092号 浙B2-20120091-4
Comments
No comments yet. Why don't you start the discussion?