
Daisy keychains are more than just functional—they’re small expressions of personality, often gifted as tokens of friendship or affection. Their delicate design, usually featuring a tiny enamel or metal daisy with soft yellow centers and white petals, can lose its luster over time due to exposure to oils, dust, moisture, and everyday handling. Cleaning them improperly can lead to chipped paint, tarnished metal, or damaged finishes. The good news is that with the right tools and techniques, you can restore your daisy keychain to its original brilliance without risking damage. This guide walks through practical, safe cleaning methods tailored to common materials used in daisy keychains.
Understanding Your Keychain’s Material
Before applying any cleaning method, it's essential to identify what your daisy keychain is made from. Most daisy keychains fall into one of three categories: enamel-coated metal, stainless steel, or zinc alloy with painted details. Each material reacts differently to cleaning agents and physical abrasion.
Enamel keychains have a glass-like coating applied over metal. While durable, they can chip if scratched or exposed to harsh chemicals. Stainless steel is naturally resistant to rust and corrosion but may still accumulate grime in crevices. Zinc alloy is commonly used for affordable decorative pieces but is prone to oxidation and fading when cleaned improperly.
Step-by-Step Guide to Safely Clean Your Daisy Keychain
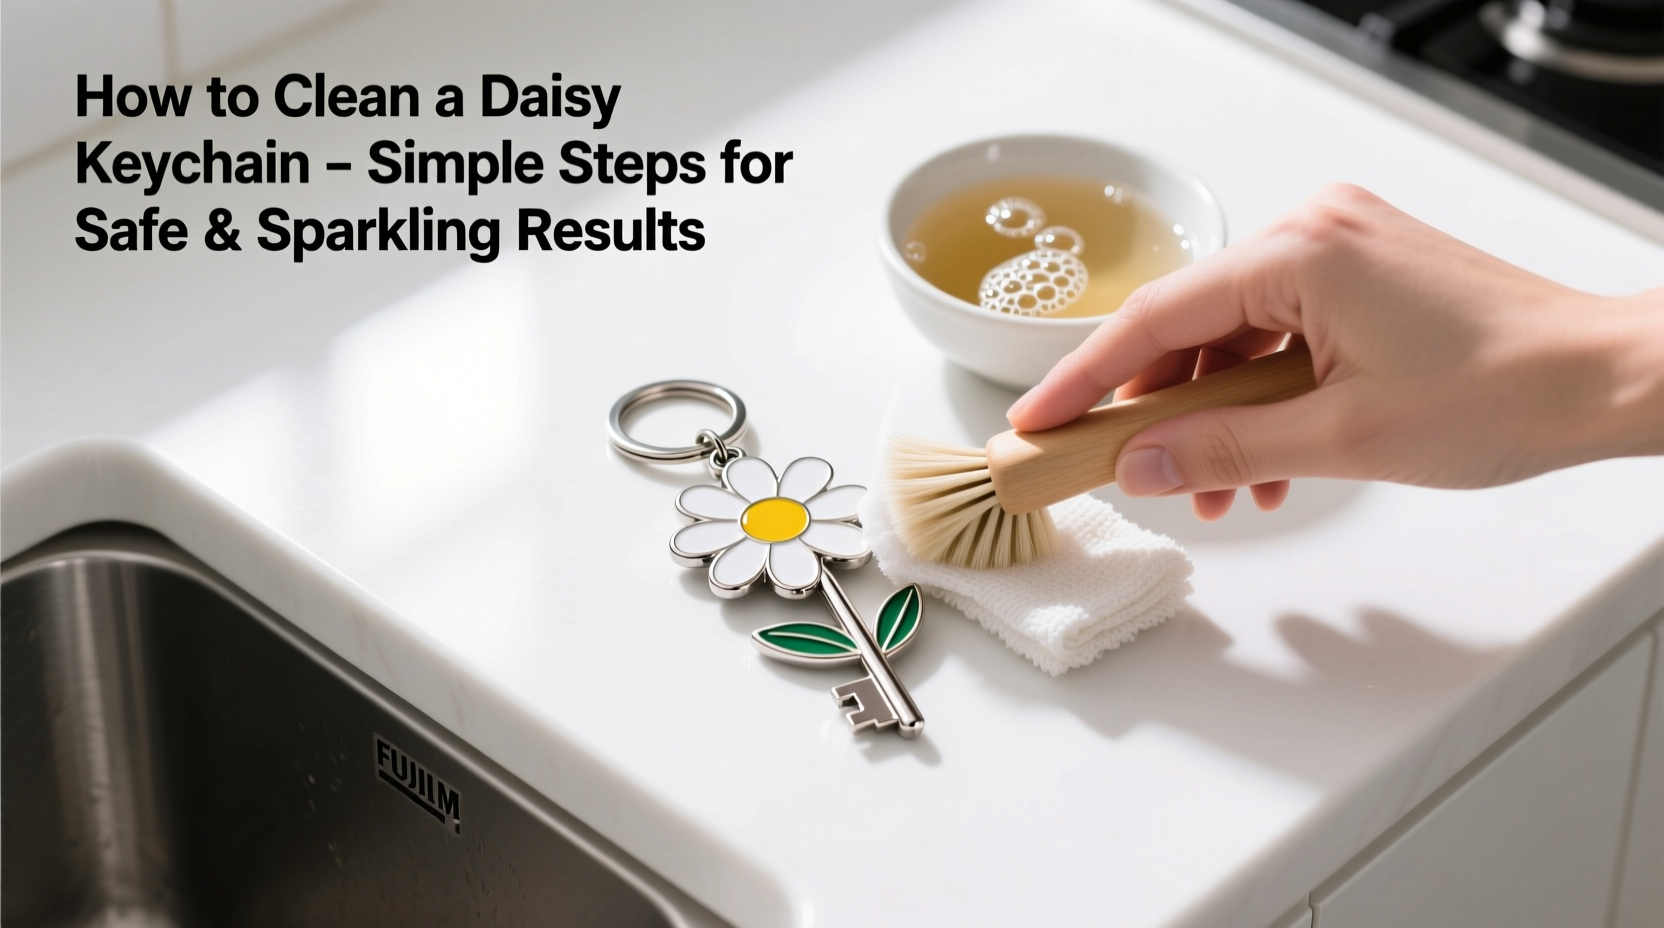
Cleaning a daisy keychain doesn’t require professional tools or expensive products. With household items and careful handling, you can achieve excellent results at home. Follow this timeline-based process for consistent, safe cleaning.
- Inspect the keychain: Look closely for signs of chipping, loose parts, or discoloration. If the enamel is cracked or the paint is peeling, avoid soaking or scrubbing aggressively.
- Gather supplies: You’ll need mild dish soap, lukewarm water, a soft-bristled toothbrush (preferably new), microfiber cloth, cotton swabs, and optionally, white vinegar or baking soda.
- Prepare a cleaning solution: Mix a few drops of gentle dish soap into a small bowl of lukewarm water. Do not use hot water, as it can weaken adhesives or cause thermal shock to enamel.
- Soak briefly (if safe): For non-porous metals like stainless steel or intact enamel, soak the keychain for 3–5 minutes. Avoid prolonged soaking, especially if there are glued components or painted areas.
- Scrub gently: Use the toothbrush to lightly brush around the edges, ridges, and center of the daisy. Focus on areas where dirt accumulates, such as between petals or near the jump ring.
- Tackle stubborn spots: For persistent grime, dampen a cotton swab with diluted white vinegar (1 part vinegar to 2 parts water) and spot-clean. Never pour vinegar directly onto the keychain.
- Rinse carefully: Rinse under a gentle stream of cool water or wipe with a damp cloth. Do not submerge electrical or electronic keychains (e.g., those with LED lights).
- Dry thoroughly: Pat dry with a microfiber cloth, then air-dry completely before reattaching to keys. Trapped moisture can lead to tarnishing or mold growth.
Do’s and Don’ts When Cleaning Decorative Keychains
| Do’s | Don’ts |
|---|---|
| Use mild soap and lukewarm water | Use bleach, acetone, or abrasive cleaners |
| Clean monthly for regular maintenance | Soak painted or glued keychains for long periods |
| Store in a dry place away from humidity | Leave wet keychains to air-dry in direct sunlight |
| Use a soft toothbrush for crevices | Scrub with steel wool or stiff brushes |
| Check for loose rings or clasps after cleaning | Use ultrasonic cleaners unless specified as safe |
Real Example: Reviving a Gifted Keychain
Sophie received a silver-toned daisy keychain from her best friend during college. Over five years, it traveled across cities, survived rainstorms, and lived in crowded purses. By year six, the petals looked dull, and the yellow center had turned hazy. Instead of replacing it, she decided to clean it using the method above. After a 4-minute soak in soapy water and careful brushing with a baby toothbrush, the keychain regained its shine. She avoided vinegar since the yellow center appeared painted, opting instead for a cotton swab dipped in water. The entire process took 15 minutes, and the emotional value of the restored item far outweighed the effort.
“Small accessories like keychains carry big memories. A little care preserves both their appearance and sentimental worth.” — Lena Ruiz, Jewelry Preservation Consultant
When to Avoid Home Cleaning Methods
Not all daisy keychains are suitable for DIY cleaning. If your keychain includes gemstones, electronic components, fabric ribbons, or adhesive-backed elements, standard washing may do more harm than good. Vintage or antique-style keychains, especially those passed down through generations, should be handled with museum-level caution. In such cases, consult a professional jeweler or conservator who specializes in small metal objects.
Additionally, if the keychain shows active corrosion—such as greenish spots on copper-based alloys or flaking black layers on iron-based metals—stop all cleaning attempts. These signs indicate advanced degradation that requires specialized treatment.
Maintenance Checklist for Long-Term Shine
- Inspect monthly for dirt buildup or wear
- Clean every 4–6 weeks with mild soap and water
- Polish occasionally with a jewelry polishing cloth (for metal-only parts)
- Ensure complete drying before storage
- Store separately in a soft pouch or compartmentalized box
- Avoid wearing during swimming, showering, or exercising
- Check jump rings annually for looseness or breakage
Frequently Asked Questions
Can I use toothpaste to clean my daisy keychain?
No, despite popular belief, toothpaste is mildly abrasive and can scratch enamel and soft metals. It may also leave behind residues that attract dirt. Stick to pH-neutral dish soap for safer results.
How often should I clean my daisy keychain?
A light wipe-down every few weeks is ideal. A full cleaning every 4–6 weeks keeps grime from building up, especially if carried daily or exposed to sweat and lotions.
What if my keychain turns my skin green?
This reaction typically occurs with low-quality base metals like copper or nickel alloys reacting with skin acidity. While harmless, it signals the need for careful cleaning and limited skin contact. Consider sealing the metal with a clear nail polish coat (applied thinly and allowed to dry fully) to create a barrier.
Keep Your Memories Bright
Your daisy keychain might seem like a small thing, but it could represent a meaningful journey, relationship, or milestone. Taking a few minutes to clean and care for it honors that significance. With gentle handling, routine attention, and smart storage, even the most delicate charm can stay vibrant for years. Don’t wait until it looks worn—build simple maintenance into your habits now. A sparkling keychain isn’t just about appearance; it’s about preserving what matters, one petal at a time.


 浙公网安备
33010002000092号
浙公网安备
33010002000092号 浙B2-20120091-4
Comments
No comments yet. Why don't you start the discussion?