
Mechanical keyboards are built to last, but even the most durable switches degrade over time if not properly maintained. Dust, debris, skin oils, and food particles accumulate under keycaps and inside switch housings, leading to inconsistent actuation, double-typing, or complete failure. While some assume that faulty switches mean it’s time for a full replacement, that’s rarely necessary. With the right techniques, you can restore performance and extend the life of your existing switches—without spending on new hardware.
Cleaning switches in place is a cost-effective, sustainable solution that preserves the feel and customization you’ve already invested in. Whether you're using Cherry MX, Gateron, Kailh, or any other type of mechanical switch, this guide delivers proven cleaning strategies that work across brands and form factors.
Why Cleaning Switches Matters
Switches are the heart of a mechanical keyboard. Each keystroke relies on precise internal mechanics: a spring compresses, a stem moves, and metal contacts connect. Over months of use, contaminants interfere with these actions. Grime builds up around the stem, reducing smoothness. Oils from fingers corrode contact points. Dust jams the spring mechanism. The result? A once-responsive keyboard feels sluggish or unreliable.
Replacing individual switches is possible but time-consuming and often unnecessary. Most issues stem from surface-level contamination rather than mechanical failure. Cleaning restores functionality by removing what’s obstructing movement and conductivity.
“Over 80% of ‘dead’ switches I see in repair shops aren’t broken—they’re just dirty. A proper cleaning brings them back 90% of the way.” — Daniel Ruiz, Keyboard Technician & Modder with 12 years of experience
Essential Tools and Materials
Before starting, gather the right tools. Using improper cleaners or tools can damage plastic housings or internal components. Here’s what you need:
- Keycap puller – Safely removes keycaps without scratching.
- Compressed air canister – Blows out loose debris from switch stems and PCB.
- Isopropyl alcohol (IPA), 70% minimum, ideally 90%+ – Dissolves oils and evaporates quickly without residue.
- Cotton swabs (preferably foam-tipped) – For precision cleaning around switch stems.
- Soft-bristle brush or anti-static brush – Removes stubborn dust.
- Ziplock bag and rice (optional) – For drying switches if removed.
- Tweezers – To extract trapped debris.
- Latex or nitrile gloves – Protects your hands and prevents oil transfer during cleaning.
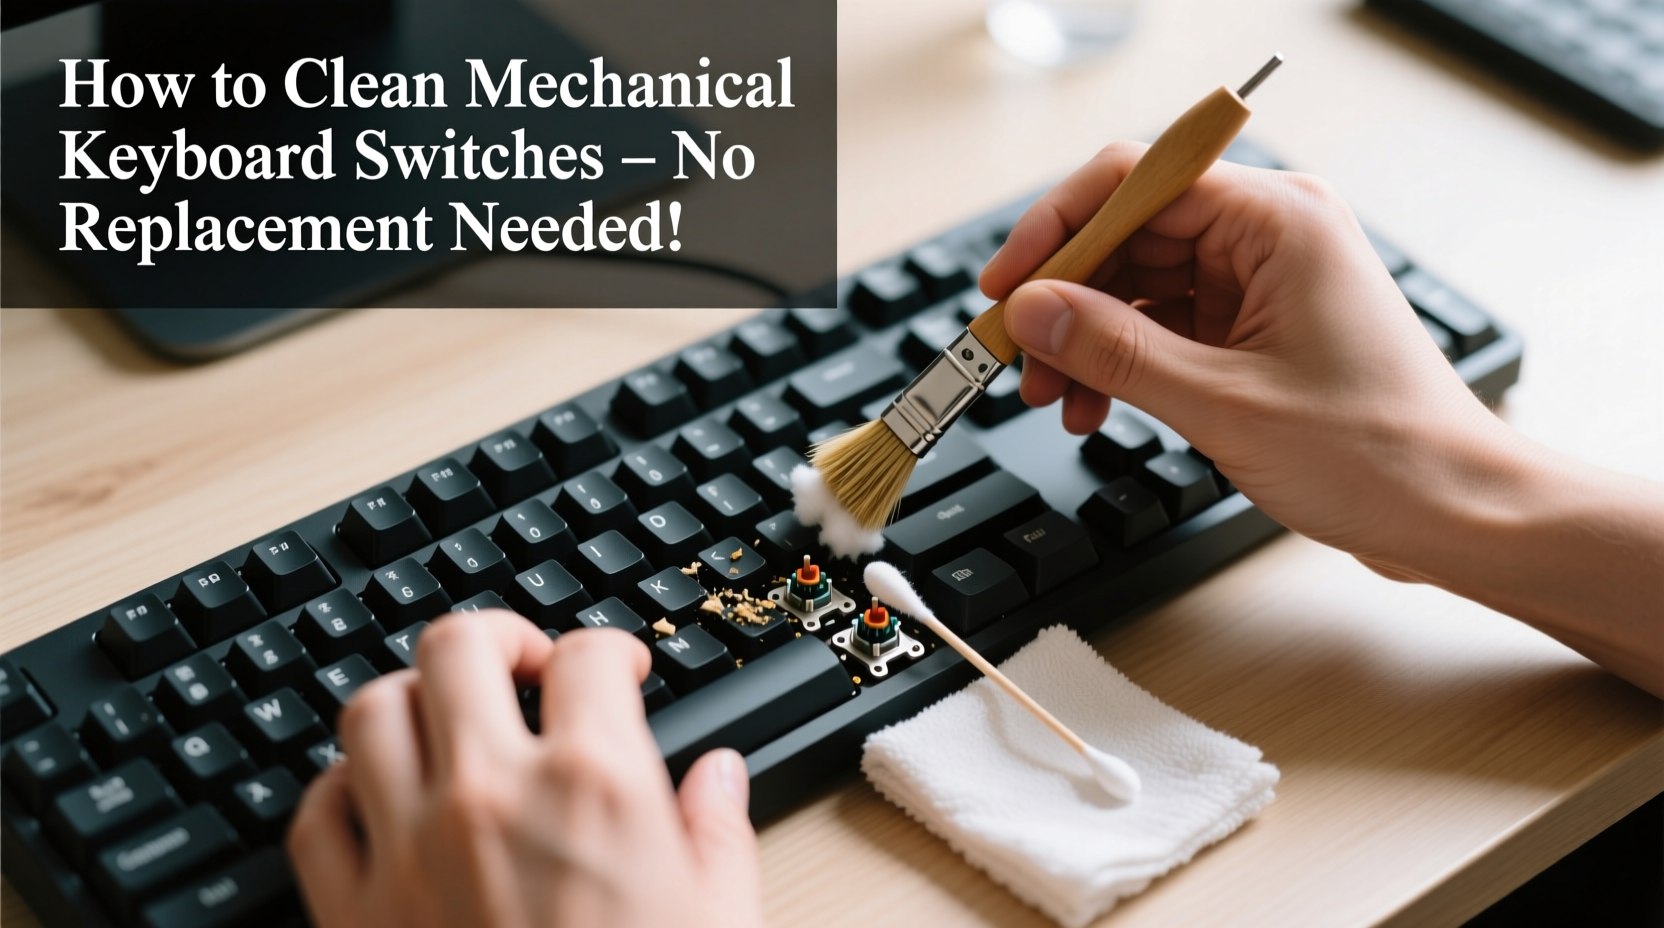
Step-by-Step Guide to Cleaning In-Situ Switches
You don’t need to desolder switches to clean them. This method works for keyboards where switches are mounted directly onto the PCB (through-hole or plate-mounted). Follow these steps carefully:
- Power down and unplug – Disconnect the keyboard from your computer. If wireless, remove batteries or turn off the device.
- Remove keycaps – Use a keycap puller to gently lift each cap. Work row by row to avoid confusion. Place them in a labeled container or layout tray.
- Vacuum or blow out debris – Use compressed air at a 45-degree angle to dislodge dust from switch stems and gaps. Hold the can upright to prevent liquid propellant from spraying.
- Brush between switches – Use a soft brush to sweep away residual particles. Focus on tight spaces between switches.
- Dampen a foam swab with IPA – Do not soak it. Wring it slightly so it’s moist, not dripping.
- Clean around each switch stem – Rotate the swab in small circles around the top housing. Repeat for all switches, especially high-use keys like Enter, Shift, and Spacebar.
- Target sticky or unresponsive keys – For problem switches, apply a few drops of IPA directly into the stem gap using a dropper or syringe. Press the key 20–30 times to let the fluid penetrate.
- Let dry completely – Wait at least 30 minutes before reattaching keycaps. Ensure no moisture remains.
- Reattach keycaps and test – Plug in the keyboard and test each key. If issues persist, repeat the process or consider switch removal.
When to Remove and Deep Clean Switches
If in-situ cleaning doesn’t resolve issues, deeper contamination may be present. Some keyboards allow switch removal via hot-swap sockets. Others require soldering. If your board supports hot-swap, you can extract and clean switches individually.
To deep clean removed switches:
- Pop the switch out using a switch puller or tweezers.
- Soak in 90%+ isopropyl alcohol for 10–15 minutes.
- Use a soft brush to scrub the housing, stem, and slider rails.
- Rinse briefly in fresh IPA to remove loosened grime.
- Shake off excess fluid and lay on a lint-free cloth to dry for 1–2 hours.
- Reinstall once fully dry.
For non-hot-swap boards, only attempt removal if you have soldering experience. Desoldering and resoldering carries risk of damaging the PCB or pad lifting. In such cases, thorough in-place cleaning is safer.
Do’s and Don’ts of Switch Cleaning
| Do’s | Don’ts |
|---|---|
| Use 70–99% isopropyl alcohol for cleaning | Use water or glass cleaner |
| Let switches dry completely before use | Reassemble while damp |
| Test keys after cleaning | Assume all keys are fixed without testing |
| Work in a well-ventilated area | Breathe IPA fumes directly |
| Label keycaps during removal | Place keycaps randomly after removal |
Real Example: Reviving a Stuck Backspace Key
Jamal, a freelance writer, noticed his backspace key on a Gateron Brown-equipped keyboard started missing inputs. He assumed the switch was failing. Instead of ordering replacements, he followed the IPA-drip method. After removing the keycap, he applied two drops of 90% IPA into the switch housing and pressed the key repeatedly for a minute. Within moments, a dark residue began emerging. After letting it dry overnight, the key responded perfectly. No disassembly required.
This case highlights how localized buildup—likely from hand oils and desk dust—was restricting stem travel. A simple, targeted intervention restored function. Jamal saved $15 on replacement switches and avoided downtime.
Checklist: Clean Your Mechanical Keyboard Switches Safely
Follow this checklist to ensure a thorough and safe cleaning process:
- ✅ Unplug the keyboard or disable power source
- ✅ Gather tools: keycap puller, IPA, swabs, compressed air, brush
- ✅ Remove keycaps systematically and store safely
- ✅ Blow out loose debris with compressed air
- ✅ Brush between switches to remove clinging dust
- ✅ Clean around each stem with IPA-dampened swab
- ✅ Apply IPA directly to problematic switches
- ✅ Allow 30+ minutes for full drying
- ✅ Reattach keycaps and test every key
- ✅ Repeat if necessary or consider switch removal for persistent issues
Frequently Asked Questions
Can I clean optical switches the same way?
Yes, optical switches can be cleaned using the same IPA and swab method. Since they rely on light beams instead of metal contacts, they’re less prone to oxidation. However, dust on the internal lens can disrupt signals, making cleaning even more critical.
How often should I clean my switches?
Light cleaning every 3–6 months is sufficient for most users. Heavy typists, gamers, or those who eat near their desk should clean every 1–2 months. Visible debris or inconsistent typing are signs it’s time to clean.
Will cleaning void my keyboard’s warranty?
It depends on the manufacturer. Most warranties cover defects, not wear and tear. Opening the case or desoldering switches may void coverage, but external cleaning (like removing keycaps and using IPA) typically does not. Always check your warranty terms first.
Conclusion: Maintain, Don’t Replace
Your mechanical keyboard’s switches don’t need replacing just because they’ve slowed down or act up. Most performance issues stem from avoidable buildup, not mechanical failure. With regular maintenance and the right cleaning techniques, you can keep your switches responsive for years. The process is simple, inexpensive, and far more sustainable than upgrading unnecessarily.


 浙公网安备
33010002000092号
浙公网安备
33010002000092号 浙B2-20120091-4
Comments
No comments yet. Why don't you start the discussion?