
A well-designed holiday lighting display can transform an ordinary home into a winter wonderland. One of the most visually compelling techniques is the gradient effect—where lights transition gradually from dim or unlit areas to full brightness. This subtle progression mimics natural light patterns, evokes depth, and draws the eye along architectural lines. Unlike uniform brightness that can feel flat, a gradient adds dimension and drama. Whether you're illuminating a roofline, wrapping trees, or outlining windows, mastering this technique elevates your seasonal décor from amateur to artisan.
Understanding the Gradient Effect in Holiday Lighting
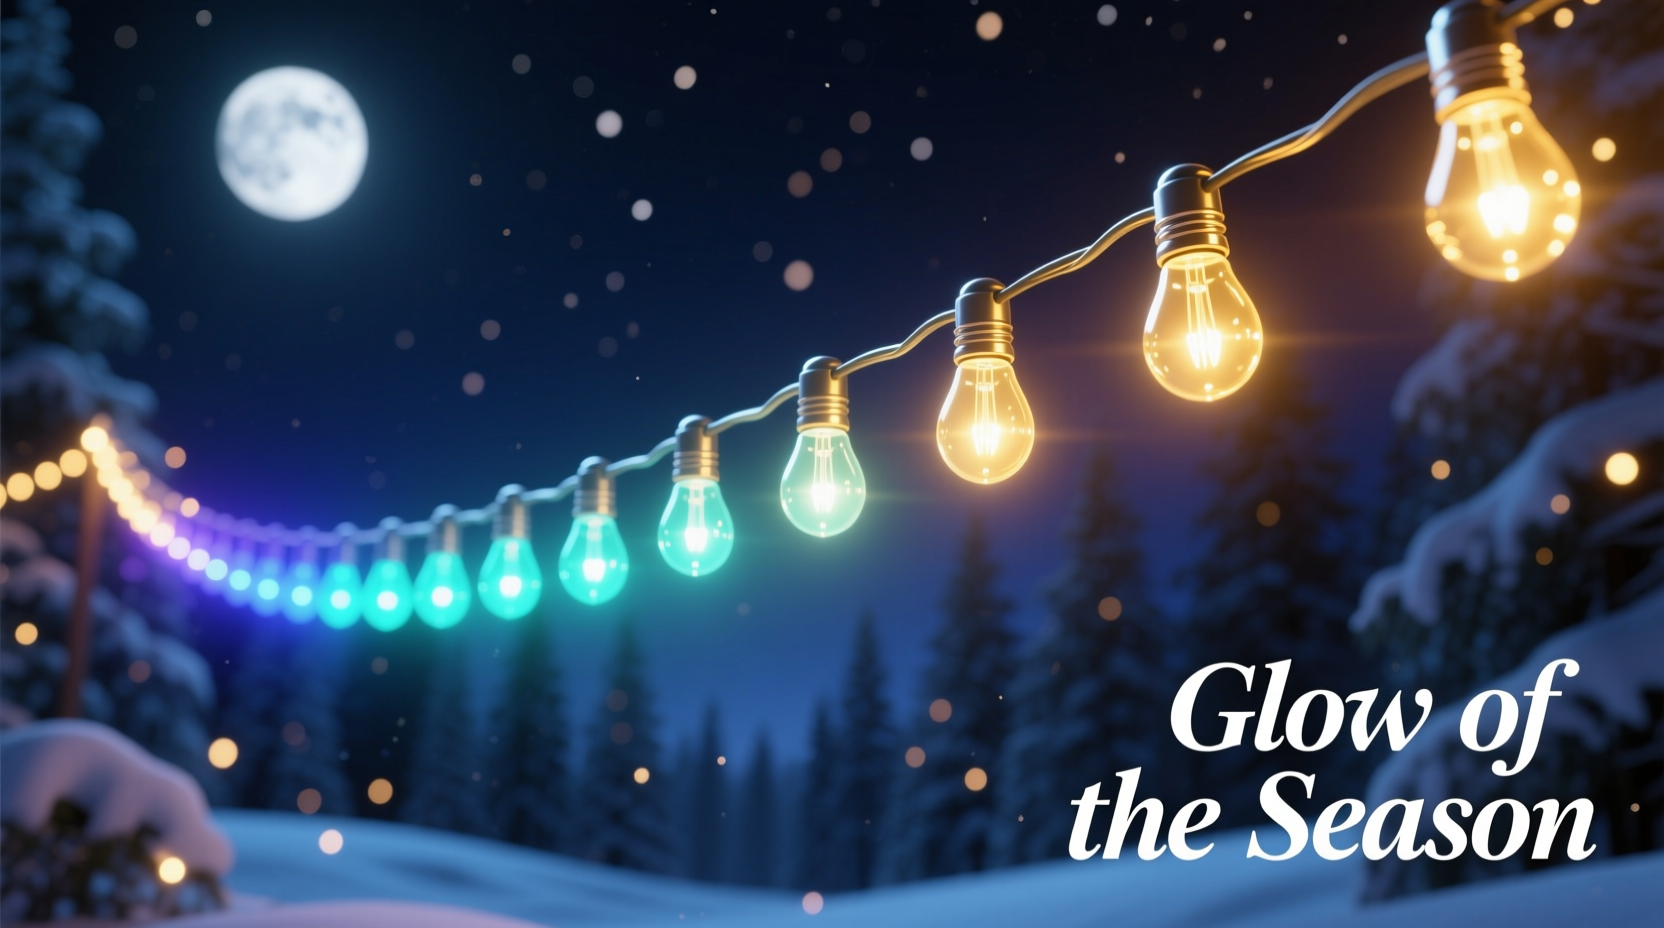
The gradient effect in Christmas lighting refers to a deliberate variation in light intensity across a display. Instead of turning all strands on at full brightness, you orchestrate a sequence where illumination starts low—either through fewer bulbs, lower-lumen LEDs, or dimmed circuits—and builds progressively to peak brilliance. This approach mirrors sunrise over snow-covered rooftops or moonlight filtering through evergreens.
The psychological impact is significant. Human eyes are naturally drawn to contrast and movement. A gradient creates visual flow, guiding attention from one area to another. It also enhances perceived space; darker zones recede, while brighter ones advance, giving your façade added depth.
Technically, achieving this requires planning beyond simple plug-and-play setups. You'll need to consider bulb density, spacing, power distribution, and control systems. The goal isn't randomness—it's calculated progression.
“Light gradients mimic nature’s own transitions. They’re not just decorative—they’re emotional.” — Daniel Reyes, Landscape Lighting Designer & Holiday Display Consultant
Step-by-Step Guide: Building Your Gradient-Lit Display
Creating a convincing gradient demands precision. Follow these steps to design and install a seamless dark-to-bright transformation across your property.
- Map Your Layout: Sketch your house or yard, marking key features like eaves, columns, trees, and walkways. Identify where the gradient should begin (e.g., far end of a driveway) and end (main entrance).
- Determine Light Zones: Divide the layout into three to five sections based on distance or elevation. Assign each zone a brightness level: Zone 1 (darkest), Zone 5 (brightest).
- Select Compatible Lights: Use LED string lights with consistent color temperature (preferably warm white or cool white depending on aesthetic). Ensure all strands are dimmable if using smart controls.
- Calculate Spacing and Density: In darker zones, space bulbs farther apart (e.g., 6 inches between bulbs). Gradually decrease spacing toward brighter zones (e.g., 2–3 inches). Alternatively, use fewer strands in early zones and increase strand count downstream.
- Wire Strategically: Avoid daisy-chaining too many strands on one circuit. Use separate extension cords or power supplies for each zone to maintain voltage stability and prevent dimming due to overload.
- Install and Test Incrementally: Hang lights starting from the darkest zone. Power each section individually as you go to verify the progression feels smooth, not jarring.
- Adjust and Refine: Step back frequently during installation. View from multiple angles and distances. Fine-tune bulb placement or add/remove strings to perfect the fade.
Choosing the Right Tools and Technology
Not all Christmas lights are suited for gradient work. Here’s what to look for when selecting materials:
- Dimmable LEDs: Essential for precise brightness control. Look for labels like “dimmable” or compatibility with smart controllers.
- Smart Controllers: Devices like Philips Hue, LIFX, or Wi-Fi-enabled RGBW strips allow per-zone brightness adjustment via app or schedule.
- DMX Systems (Advanced): For large-scale displays, DMX offers granular control over individual channels, enabling cinematic fades and motion effects.
- Timers with Fade Functions: Some outdoor timers include soft-on/soft-off features that enhance gradient realism at dusk and dawn.
If using non-smart lights, simulate gradients manually by varying physical density. For example, wrap tree trunks sparsely at the base and increase wraps near the crown. Along rooflines, start with single strands and double up toward focal points.
Comparison: Methods for Achieving Gradient Brightness
| Method | Best For | Pros | Cons |
|---|---|---|---|
| Bulb Spacing Variation | Traditional incandescent or fixed-LED strands | Inexpensive, easy to implement | Limited fine control; less smooth transition |
| Strand Count Layering | Eaves, fences, railings | High impact in bright zones | Increased power draw; bulkier wiring |
| Digital Dimming (Smart Lights) | Precision displays, multi-zone setups | Exact brightness levels, programmable scenes | Higher cost; technical setup required |
| Hybrid Approach | Most residential applications | Combines affordability with visual quality | Requires careful planning |
Real Example: Transforming a Two-Story Colonial
Consider a homeowner in New England aiming to highlight their two-story colonial without overwhelming neighbors. They wanted a welcoming glow that built anticipation as guests approached.
Their plan began at the driveway gate—Zone 1—with a single strand of warm white LEDs spaced every 8 inches along the fence line. As the path curved toward the front porch, Zone 2 introduced tighter spacing (6 inches) and a second strand on the lower shrubbery. By the time visitors reached the stairs (Zone 3), both sides featured dual-wrapped columns with 3-inch spacing.
The porch roofline (Zone 4) used triple-layered strands, creating intense upward illumination. Finally, above the front door (Zone 5), a circular wreath lit at 100% brightness served as the climax.
To manage it all, they used four outdoor-rated smart plugs programmed through a mobile app. Each zone turned on sequentially at 5-minute intervals after sunset, enhancing the sense of progression. Neighbors commented that the house felt “alive,” as if it gently awakened each evening.
Common Mistakes and How to Avoid Them
Even experienced decorators make errors when attempting gradients. Watch for these pitfalls:
- Overloading Early Zones: Starting too bright eliminates contrast. Always anchor your design in subtlety.
- Ignoring Voltage Drop: Long runs of connected lights lose power over distance, causing trailing ends to dim unnaturally. Use mid-run power injectors or split circuits.
- Mixing Color Temperatures: Combining warm (2700K) and cool (5000K) whites breaks the illusion. Stick to one tone across all zones.
- Forgetting Nighttime Viewing Angles: What looks balanced from the yard may appear uneven from the street. Test views from sidewalks and cars.
- Skipping a Power Plan: Multiple transformers or outlets may be needed. Map them early to avoid unsightly cord runs.
Checklist: Preparing Your Gradient Lighting Project
Before hanging a single bulb, run through this checklist to ensure success:
- ☐ Measure total linear footage of intended lighting paths
- ☐ Divide layout into 3–5 brightness zones
- ☐ Choose uniform LED type and color temperature
- ☐ Confirm all lights are dimmable (if using smart controls)
- ☐ Purchase sufficient extension cords and surge protectors
- ☐ Acquire mounting clips or gutter hooks for secure attachment
- ☐ Test all strands before installation
- ☐ Program timers or smart devices according to zone schedule
- ☐ Perform final walkthrough at night after full installation
Frequently Asked Questions
Can I create a gradient with regular (non-smart) Christmas lights?
Yes. While smart lights offer finer control, you can achieve excellent results with standard LEDs by varying bulb density and strategic layering. Use fewer strings in shadow zones and stack multiple strands in highlight areas. Just ensure proper electrical load management.
How do I prevent my gradient from looking patchy?
Consistency is key. Use the same brand and model of lights throughout. Maintain even spacing within each zone and avoid abrupt changes between zones. Transition gradually—one extra strand or slightly closer bulbs per section—to maintain fluidity.
Is this technique suitable for indoor trees or mantels?
Absolutely. Apply the same principle vertically: sparse lighting near the base of the tree, increasing density toward the top. On a mantel, start with dimmer clusters at the ends and build to brightest centerpieces. Indoor gradients add sophistication to smaller spaces.
Final Thoughts and Call to Action
A gradient Christmas light display is more than decoration—it’s storytelling with illumination. It invites viewers on a journey, building warmth and wonder step by step. With thoughtful planning, the right tools, and attention to detail, you can craft a display that doesn’t just shine, but resonates.
Start small if needed. Try a single pathway or window frame. Refine your technique each season. Share photos online, tag local holiday light maps, or simply enjoy the quiet awe of passersby pausing to take it in.


 浙公网安备
33010002000092号
浙公网安备
33010002000092号 浙B2-20120091-4
Comments
No comments yet. Why don't you start the discussion?