
Keychains are more than just functional tools—they’re personal statements. Whether clipped to a bag, purse, or set of keys, a well-designed keychain reflects individuality and creativity. Creating your own unique keychain decoration allows you to craft something that’s not only useful but also emotionally significant. From choosing materials to adding personalized touches, this guide walks through the entire process with practical advice, expert insights, and real-world inspiration.
Selecting the Right Materials and Tools
The foundation of any great keychain is the quality and compatibility of its components. Choosing materials depends on durability, aesthetic appeal, and the intended use. Common base materials include metal rings, lobster clasps, split rings, and swivel hooks. These come in various sizes and finishes—such as nickel, brass, or antique bronze—to match different styles.
For decorative elements, consider:
- Resin charms – Ideal for encapsulating small items like dried flowers, handwritten notes, or glitter.
- Fimo or polymer clay – Moldable, oven-bake clay perfect for custom shapes and textures.
- Wooden blanks – Great for engraving names, dates, or symbols.
- Beads and pendants – Glass, ceramic, or stone beads add color and elegance.
- Leather strips – Offer a rustic, handmade feel when braided or stamped.
Step-by-Step Guide to Crafting Your Keychain
- Define your purpose: Decide if the keychain is a gift, keepsake, or fashion accessory. This influences design choices.
- Gather supplies: Collect all materials including pliers, glue (E6000 recommended), cutters, and surface protectors.
- Create the centerpiece: Sculpt clay, pour resin into molds, or engrave wood. Allow adequate drying or curing time.
- Add personalization: Use paint pens, stamps, or laser engraving to include initials, quotes, or symbols.
- Assemble components: Attach jump rings to connect charms, beads, or leather tassels securely using pliers.
- Attach the keyring: Ensure it’s tightly closed and tested for strength under light tension.
- Final inspection: Check for loose parts, rough edges, and overall balance.
This process can be adapted for beginners or advanced crafters. The key is patience—rushing steps often leads to weak joints or smudged details.
Design Inspiration and Personalization Techniques
What makes a keychain truly unique is the story behind it. A charm shaped like a tiny book might honor a favorite novel; a miniature globe could symbolize wanderlust. Consider these personalization methods:
- Photo encapsulation: Reduce a cherished photo to fit inside a resin dome or locket-style pendant.
- Hand-lettering: Use fine-tip metallic pens to write names, coordinates, or short mantras directly onto flat surfaces.
- Natural elements: Embed pressed leaves, seashells, or sand from a memorable beach visit into clear resin.
- Themed sets: Create matching keychains for couples, best friends, or family members with complementary designs.
| Technique | Best For | Longevity |
|---|---|---|
| Resin embedding | Photos, fabric scraps, small trinkets | High (if UV-resistant resin used) |
| Clay sculpting | Custom shapes, animals, abstract art | Moderate to high (with sealing) |
| Laser engraving | Metal, wood, acrylic | Very high |
| Bead weaving | Colorful, intricate patterns | Moderate (thread may degrade over time) |
Mini Case Study: A Wedding Favors Project
Sophie, a DIY enthusiast from Portland, was tasked with creating wedding favors for her sister’s big day. She wanted something meaningful yet practical. Her solution? Miniature wooden keychains engraved with each guest’s initials and the wedding date, paired with a small heart-shaped resin charm containing a drop of blue dye—symbolizing “something blue.”
She sourced unfinished maple tags in bulk, sanded them smooth, and used a handheld engraving tool to personalize each piece. After applying a food-safe wood finish, she attached stainless steel split rings. The project took two weekends but received rave reviews. Guests appreciated the thoughtfulness, and many reported still using their keychains years later.
Sophie’s success came from balancing sentimentality with functionality—and proving that even modest crafting skills can yield professional-looking results.
Expert Insight on Craftsmanship and Meaning
“Personalized keychains succeed when they blend craftsmanship with emotional resonance. It’s not about perfection—it’s about intention.” — Marcus Reed, Artisan Jewelry Designer & Educator
Reed emphasizes that imperfections in handmade items often enhance their charm. A slightly uneven paint line or asymmetrical bead pattern can make a piece feel authentic and human-made. He advises new crafters to focus on storytelling rather than technical precision.
Common Pitfalls and How to Avoid Them
Even experienced makers encounter issues. Here are frequent mistakes and solutions:
- Weak attachments: Jump rings opened incorrectly (prying sideways) lose tension. Always twist them open along the seam, not pull apart.
- Resin bubbles: Tap molds gently after pouring and use a heat gun or toothpick to pop air pockets.
- Peeling paint: Clean surfaces thoroughly before painting and use primer if necessary.
- Overcrowding: Too many elements make a keychain bulky and impractical. Stick to one focal point plus one or two accents.
Checklist for a Successful Keychain Project
- ☑ Define the theme or purpose
- ☑ Choose durable, compatible materials
- ☑ Prepare workspace with protective covering
- ☑ Personalize main element (engrave, paint, embed)
- ☑ Assemble with proper tools and techniques
- ☑ Test durability before gifting or use
- ☑ Package neatly if giving as a gift
FAQ
How long does homemade resin take to cure?
Most standard epoxy resins require 24 hours to fully cure, though thicker pours may need up to 72 hours. Always follow manufacturer instructions and avoid moving the piece during setting.
Can I wash a fabric or leather keychain?
It’s best to spot-clean fabric or leather components with a damp cloth and mild soap. Submerging them in water can weaken adhesives and cause warping or discoloration.
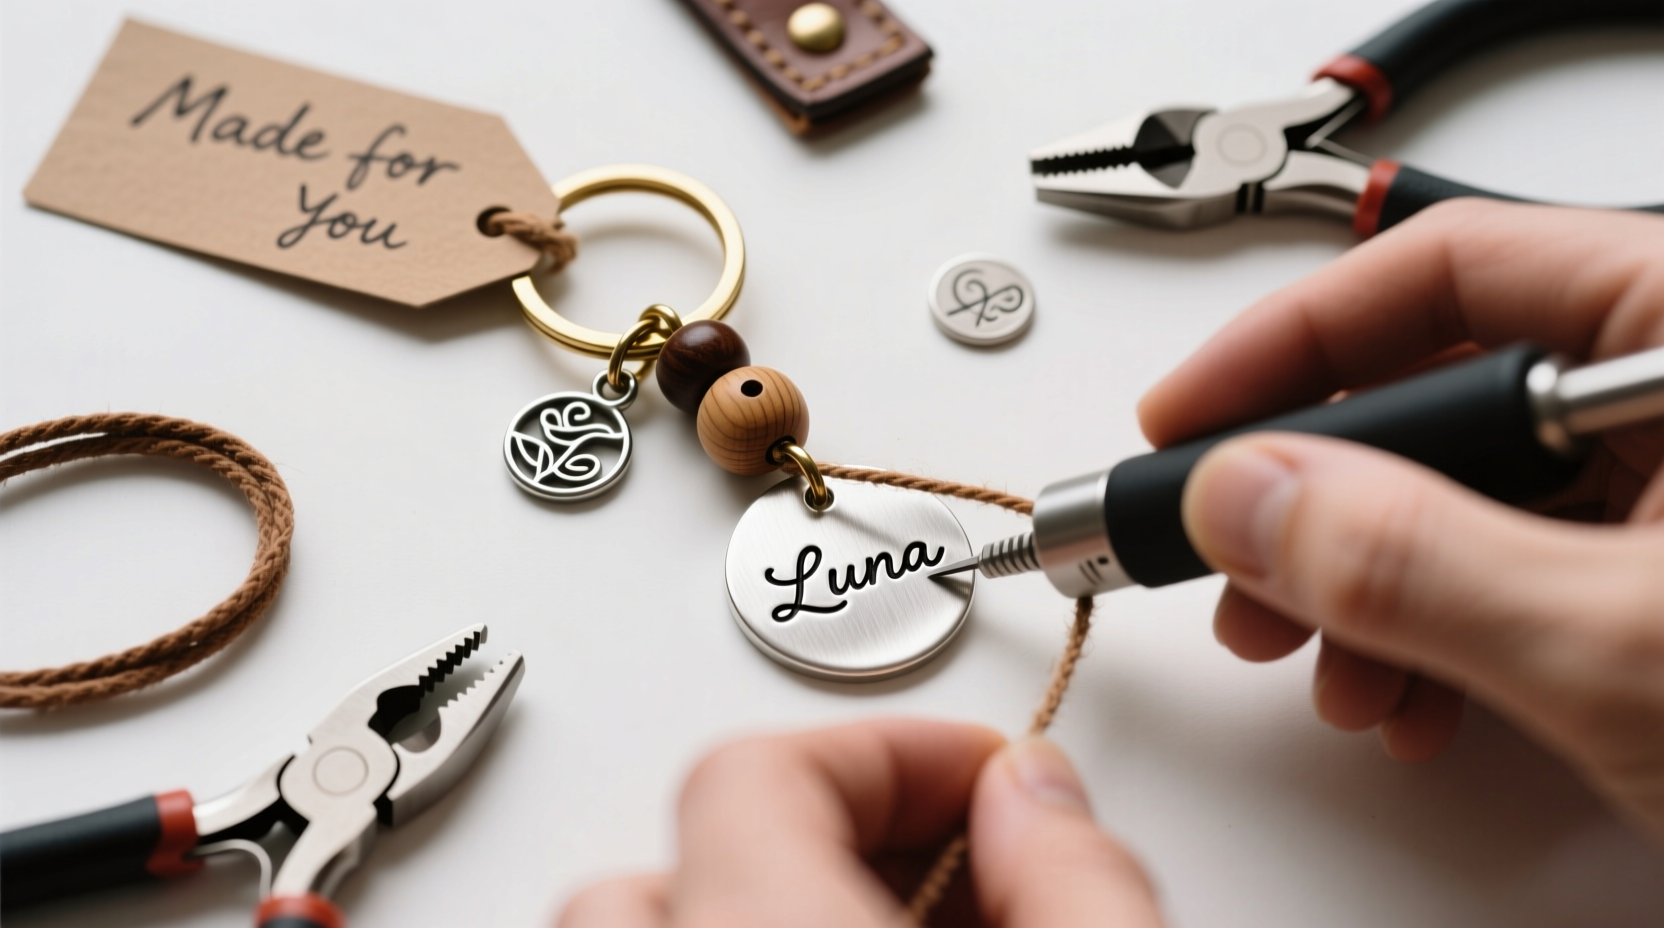
What’s the safest way to engrave metal at home?
Use a rotary tool with an engraving bit or invest in a desktop engraving machine. Wear safety goggles and secure the metal piece firmly to prevent slipping.
Conclusion
Crafting a unique keychain decoration is a rewarding way to express creativity while producing something genuinely useful. With thoughtful planning, attention to detail, and a few basic tools, anyone can make personalized designs that stand out. Whether commemorating a milestone, celebrating a hobby, or simply adding flair to everyday carry items, handmade keychains carry meaning far beyond their size.


 浙公网安备
33010002000092号
浙公网安备
33010002000092号 浙B2-20120091-4
Comments
No comments yet. Why don't you start the discussion?