
In the past decade, the average person has taken more photos than their parents did in a lifetime. Smartphones, cloud storage, and social media have made capturing moments effortless—but managing them is another story. Most people end up with thousands of unsorted images scattered across devices, apps, and folders. The result? A digital photo graveyard where memories go to be forgotten. Without a clear system, finding a specific photo—like your child’s first day of school or last summer’s beach trip—can feel like searching for a needle in a haystack.
Decluttering your digital photos isn’t just about freeing up space; it’s about reclaiming access to your memories. When done right, a streamlined photo library becomes a source of joy, not stress. This guide walks through a realistic, step-by-step process to organize your digital photos so they’re easy to locate, safe from loss, and meaningful for years to come.
Start by Assessing Your Current Photo Collection
The first step in any decluttering project is understanding what you're working with. Begin by gathering all your photos into one central location. This may include:
- Phone and tablet galleries
- Digital cameras and memory cards
- External hard drives
- Cloud storage (Google Photos, iCloud, Dropbox)
- Email attachments and old computers
Once collected, take inventory. Use file explorer or a photo management tool to count how many images you have and identify duplicates, blurry shots, and irrelevant screenshots. Many people are shocked to discover that over 40% of their photos are either low quality or redundant.
During this phase, resist the urge to delete or rename anything yet. Focus on awareness. Note recurring themes: too many pet photos, dozens of nearly identical sunset shots, or hundreds of product screenshots. These patterns will inform your cleanup strategy.
Establish a Clear Naming and Folder Structure
A consistent folder hierarchy is the backbone of an organized photo library. Without structure, even a small collection quickly becomes chaotic. The goal is to create a system that’s intuitive and scalable.
Use a simple format like: [Year]-[Month]-[Event or Location]. For example:
- 2023-07-Family-Reunion-Lake-Tahoe
- 2024-02-Birthday-Party-James
- 2023-12-Holiday-Gifts
Within each folder, name individual photos descriptively. Avoid generic labels like “IMG_1234.” Instead, use names such as:
- James-blows-out-candles.jpg
- Aunt-Maria-singing-happy-birthday.jpg
- Sunset-over-lake-with-canoe.jpg
This level of detail makes visual scanning faster and improves searchability when using tools like Windows File Explorer or macOS Spotlight.
“People don’t lose photos because they run out of space—they lose them because they lack a naming convention.” — David Lin, Digital Archivist at the National Preservation Council
Folder Structure Best Practices
| Do | Don’t |
|---|---|
| Use consistent date formats (YYYY-MM-DD) | Mix formats like “July 5” and “07-05-23” |
| Limit folder depth (max 3 levels deep) | Create nested folders like “Photos > 2023 > Summer > June > Week 2 > Day 3 > Afternoon” |
| Include location or event name in folder titles | Use vague names like “Trip” or “Vacation” |
| Store raw files and edited versions in subfolders | Mix originals and edits in the same folder |
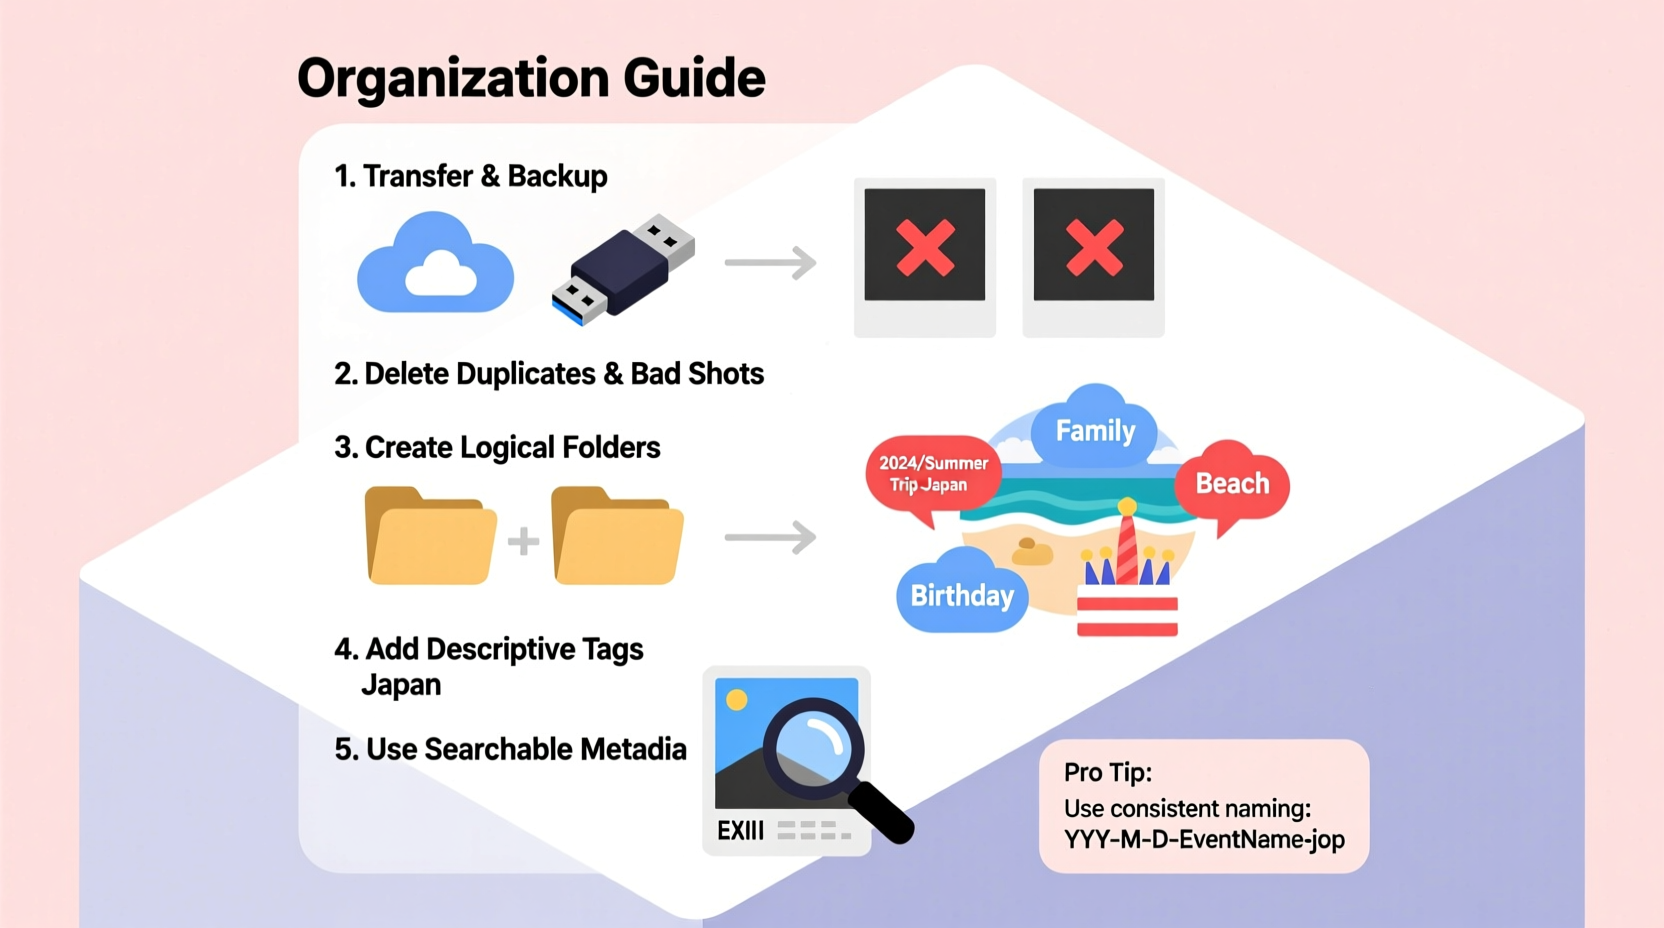
Step-by-Step Guide to Decluttering Your Photos
Now that you understand your collection and have a structure in mind, follow this six-phase process to clean and organize your photos effectively.
- Backup Everything First
Before making any deletions, back up your entire photo library to at least two locations—one local (external drive) and one cloud-based (Google Drive, iCloud, or Backblaze). This ensures no data is lost during cleanup. - Delete Obvious Junk
Remove screenshots, receipts, duplicate QR codes, failed camera attempts, and severely blurred images. If a photo serves no emotional or practical purpose, cut it. - Eliminate Near-Duplicates
Use software like Adobe Lightroom, Duplicate Photo Cleaner, or Gemini Photos (Mac) to detect and remove visually similar images. These tools compare pixel data to flag duplicates without requiring manual side-by-side checks. - Sort by Date and Event
Group photos chronologically. Drag related images into appropriately named folders. This is where your naming system pays off—clean sorting becomes fast and repeatable. - Add Metadata and Keywords
For deeper organization, embed metadata such as location, people, and occasion. Tools like Google Photos auto-tag faces and places. For desktop libraries, use XnView or Adobe Bridge to manually add keywords like “beach,” “graduation,” or “Grandma’s house.” - Review and Archive
Once sorted, review each folder. Ask: Does this photo matter? Would I miss it if it were gone? Keep only what resonates. Move final selections to your master archive and confirm backups.
Real Example: How Sarah Reclaimed Her Photo Library
Sarah, a freelance photographer and mother of two, had over 45,000 photos spread across her iPhone, old laptops, and a disorganized external drive. She wanted to create a family photo book but couldn’t find key images from her daughter’s first birthday.
She began by backing up everything to Google Drive and an encrypted hard drive. Then, she used Duplicate Photo Cleaner to eliminate 8,000 near-duplicates—mostly slightly shifted angles from birthday party videos. Next, she created a master folder tree using the YYYY-MM-DD-Event format. Over three weekends, she sorted photos into themed folders, renaming important ones with descriptive titles.
She also enabled face tagging in Google Photos, which automatically grouped pictures of her children, partner, and parents. Within a month, she found the missing cake-blowout shot—and completed the photo book in under a week. More importantly, she now spends less time searching and more time reliving memories.
Essential Tools for Long-Term Photo Management
No single tool fits everyone, but combining the right software with smart habits ensures sustainability. Here’s a comparison of top options based on needs:
| Tool | Best For | Key Features | Platform |
|---|---|---|---|
| Google Photos | Automatic backup and AI search | Face recognition, voice search (“show me dogs at the beach”), free high-quality storage | iOS, Android, Web |
| Apple Photos | iOS/Mac users wanting seamless sync | Memory creation, People album, Places map view | iOS, macOS |
| Adobe Lightroom | Advanced editing + organization | Keyword tagging, batch renaming, cloud sync, duplicate detection | Windows, Mac, Mobile |
| Duplicate Photo Cleaner | Removing redundant images | Visual preview, similarity threshold control, safe deletion | Windows, Mac |
| XnView MP | Metadata editing & batch processing | Supports 500+ formats, bulk rename, geotagging | Windows, Mac, Linux |
Choose one primary hub—either cloud-based (Google Photos) or desktop-based (Lightroom)—and stick with it. Sync across devices, but avoid scattering photos across multiple apps unless necessary.
Frequently Asked Questions
How do I find a photo if I don’t remember the date?
Use semantic search features in Google Photos or Apple Photos. Try queries like “Christmas 2022,” “pictures with Mom,” or “dog snow.” These platforms analyze image content, text in photos, and facial recognition to deliver accurate results—even without exact dates.
Should I keep original files after editing?
Yes. Always preserve the original RAW or unedited JPEG. Store it in a subfolder labeled “Originals” within your event folder. Edited versions go in a sibling folder called “Edited.” This preserves authenticity and allows re-editing later.
Is it safe to delete photos from my phone after backing up?
Only after confirming the backup is complete and accessible. Wait at least 48 hours after upload before deleting. Test by opening a few random photos from the backup location. Once verified, removing local copies frees space without risk.
Final Checklist: Your Photo Decluttering Action Plan
Follow this concise checklist to ensure nothing is missed:
- ✅ Back up all photos to two separate locations (cloud + external drive)
- ✅ Delete obvious junk: screenshots, duplicates, blurry shots
- ✅ Use software to detect and remove near-duplicates
- ✅ Create a standardized folder structure using YYYY-MM-DD-Event format
- ✅ Rename important photos with descriptive titles
- ✅ Add metadata: tags, people, locations
- ✅ Organize into thematic folders and verify accessibility
- ✅ Set a recurring calendar reminder for quarterly photo reviews
Take Control of Your Digital Memories Today
Your photos are more than data—they’re fragments of your life. But without organization, they become invisible. By applying a disciplined approach to decluttering, you transform chaos into clarity. You gain not just storage space, but peace of mind. Imagine being able to pull up “that picnic at the red bridge” in seconds, or showing your future self a curated timeline of meaningful moments.
The effort you invest now will compound over time. Future you will thank present you for creating a photo library that’s not only functional but joyful to navigate. Start small—just one folder today. Build momentum. Make photo organization a habit, not a chore.


 浙公网安备
33010002000092号
浙公网安备
33010002000092号 浙B2-20120091-4
Comments
No comments yet. Why don't you start the discussion?