
Digital clutter has become one of the most overlooked aspects of modern life. While we meticulously organize our homes and schedules, our photo libraries often spiral into chaos—thousands of blurry shots, duplicate images, forgotten screenshots, and outdated selfies scattered across devices and cloud services. This digital disarray doesn’t just consume space; it makes it nearly impossible to find meaningful moments when you need them most. The good news is that with a structured approach, you can reclaim control over your digital memories. This guide walks you through actionable strategies to streamline your photos across smartphones, tablets, computers, and cloud platforms—without losing what matters.
Why Digital Photo Clutter Matters
Most people take more photos in a month than their parents did in a decade. Smartphones make capturing moments effortless, but they also encourage hoarding. Over time, unmanaged photo libraries lead to several problems:
- Slower device performance: Full storage slows down phones and laptops.
- Wasted cloud subscription costs: Services like iCloud, Google Photos, and Dropbox charge for extra storage you may not need if files were organized.
- Emotional overwhelm: Searching for a specific image becomes frustrating when buried under duplicates and irrelevant shots.
- Risk of data loss: Without a clear backup strategy, important memories could vanish during a device failure or accidental deletion.
Decluttering isn't about deleting everything—it's about curating a collection that reflects your life meaningfully while removing digital noise.
A Step-by-Step Guide to Declutter Your Digital Photos
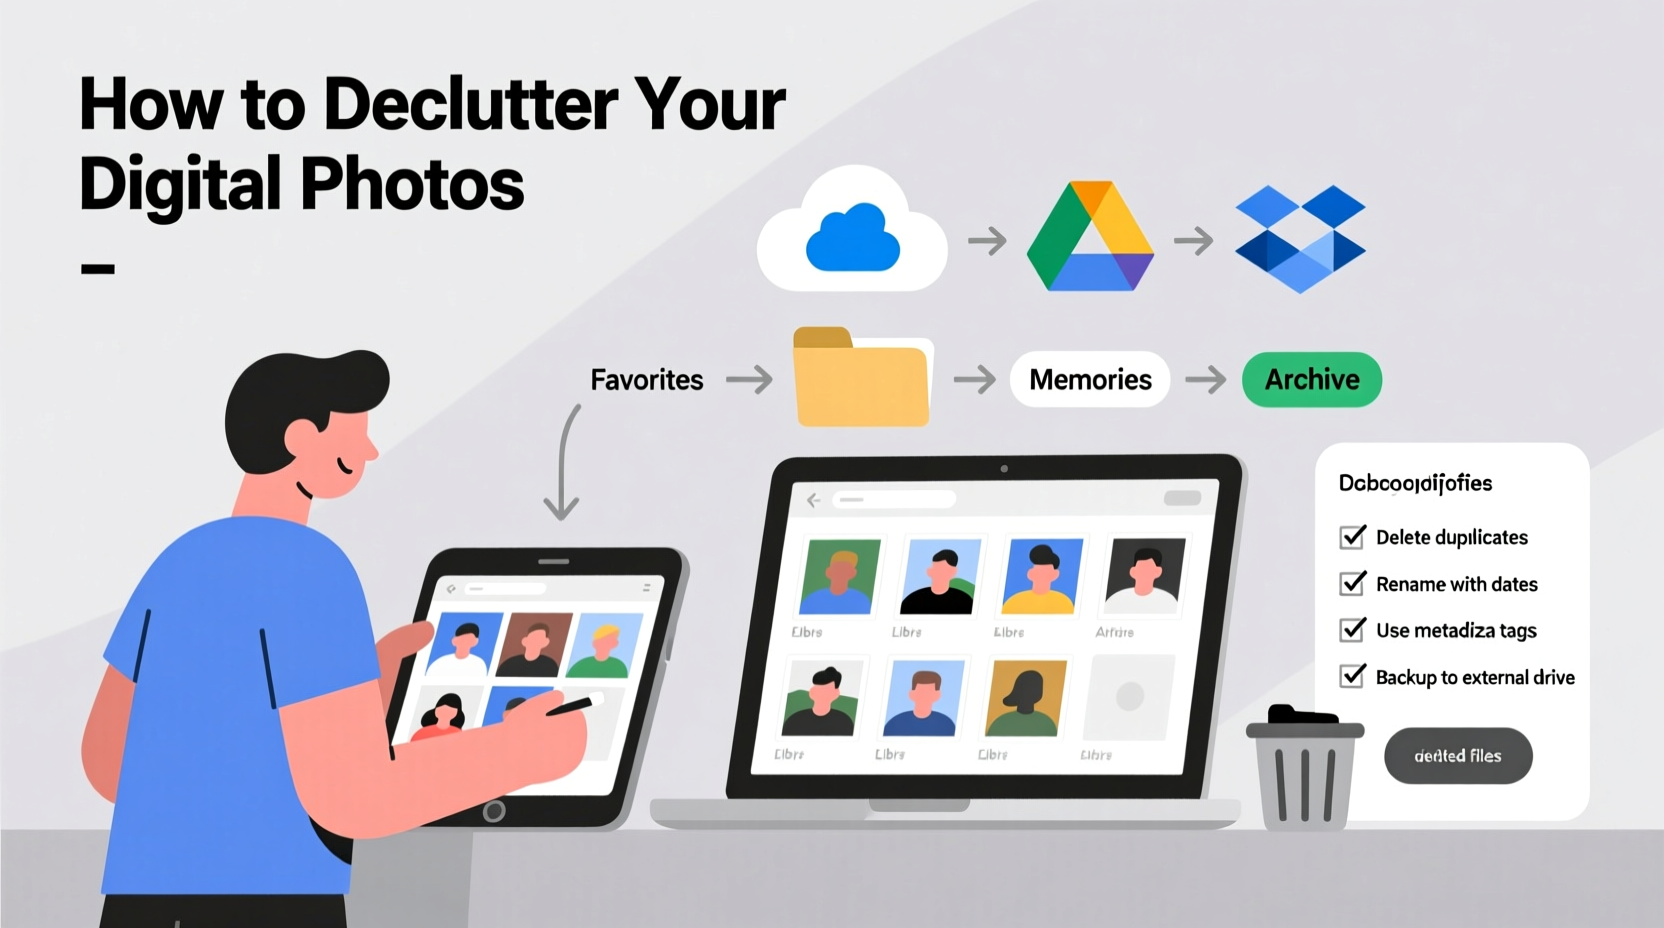
Cleaning up your digital photos requires planning, consistency, and the right tools. Follow this seven-step process to systematically organize your collection across all devices and cloud accounts.
- Inventory Your Devices and Cloud Accounts
Begin by listing every place where photos are stored: iPhone, Android phone, tablet, laptop, desktop, iCloud, Google Photos, Dropbox, OneDrive, etc. Note which services sync automatically and whether any duplicates exist between them. - Pause Auto-Sync Temporarily
Before making changes, disable automatic syncing (e.g., iCloud Photos, Google Photos backup) on all devices. This prevents new uploads from interfering with your cleanup workflow. - Start with Your Primary Device
Choose the device with the largest or most disorganized photo library—usually your smartphone. Open the gallery app and sort photos by date or album. - Delete in Batches Using the “Three-Strike Rule”
Review photos in groups (e.g., one week at a time). Ask yourself:- Is this photo out of focus, poorly lit, or redundant?
- Do I have multiple versions of the same moment?
- Will I realistically want to revisit this image in five years?
- Create Meaningful Albums or Folders
After deletion, group remaining photos into thematic folders such as:- Family Events (birthdays, holidays)
- Vacations (include year and location)
- Milestones (graduations, weddings)
- Projects & Documents (whiteboards, receipts)
- Pets and Daily Life
- Synchronize Across Cloud Platforms
Once your primary device is clean, re-enable cloud sync. Let your updated library upload fully. Then log into your cloud service and repeat the review process there, ensuring no duplicates slip through. - Maintain with Monthly Mini-Cleanups
Schedule 20 minutes each month to review new photos. Delete low-value images immediately. Update albums as needed. This habit prevents future buildup.
Best Practices for Managing Multiple Devices
If you use both an iPhone and an Android device, or switch between personal and work phones, managing photos gets complicated. Here’s how to maintain consistency:
- Choose a central cloud hub: Pick one primary platform (Google Photos for Android users, iCloud for Apple-centric households) to serve as your master archive.
- Use cross-platform tools: Apps like Dropbox or Microsoft OneDrive allow seamless access across iOS, Android, and desktop systems.
- Label device-specific photos: If you must keep separate libraries temporarily, add tags like “[iPhone]” or “[Work Phone]” in folder names to avoid confusion.
- Transfer before switching devices: When upgrading phones, ensure all photos are backed up and reviewed before erasing the old device.
“Digital organization is not a one-time fix—it’s a hygiene practice. Just like brushing your teeth, small consistent actions prevent major problems later.” — Dr. Lena Torres, Digital Wellness Researcher, Stanford University
Do’s and Don’ts of Photo Management
| Do’s | Don’ts |
|---|---|
| Back up photos to at least two locations (device + cloud) | Store all photos only on your phone |
| Use descriptive album names (e.g., “Mexico Trip 2023”) | Name albums “Vacation” or “Stuff” |
| Delete screenshots and memes unless essential | Keep every temporary image “just in case” |
| Review and update metadata (dates, locations) if incorrect | Assume auto-tagging is always accurate |
| Archive older photos into yearly folders | Leave decades of photos in a single endless scroll |
Real Example: How Sarah Reclaimed Her Photo Library
Sarah, a freelance designer and mother of two, found herself spending hours scrolling through over 18,000 photos trying to find pictures of her daughter’s first ballet recital. Her iPhone was constantly warning of low storage, and her Google Photos account had exceeded its free tier. She decided to tackle the problem over a weekend.
She started by downloading all photos from Google Photos to her laptop for a full audit. Using file explorer, she sorted images by month and began applying the three-strike rule. She deleted hundreds of blurred action shots, repeated food photos, and outdated screenshots of invoices. For events, she kept only the top 5–10 images per occasion.
Next, she created folders labeled by year and event type: “2022 - Summer Road Trip,” “2023 - Emma’s Birthday,” “Home Renovation Progress.” She uploaded the curated set back to Google Photos in high quality and enabled facial recognition tagging.
The result? Her library dropped to just under 6,000 carefully selected images. Her phone gained 12GB of storage, and she canceled her $2/month Google One upgrade. More importantly, finding memories became joyful again.
Essential Checklist for Digital Photo Decluttering
Use this checklist to stay on track during your cleanup:
- ☐ List all devices and cloud services storing photos
- ☐ Disable auto-sync temporarily
- ☐ Back up current library before deleting anything
- ☐ Delete blurry, duplicate, or irrelevant photos (use three-strike rule)
- ☐ Organize remaining photos into dated, descriptive albums
- ☐ Sync cleaned library to your primary cloud service
- ☐ Verify backups on at least two platforms
- ☐ Schedule monthly 20-minute maintenance sessions
- ☐ Consider printing favorite photos annually
- ☐ Share key albums with family members for collaborative preservation
Frequently Asked Questions
How do I know which photos to keep?
Ask three questions: Does this photo capture a unique moment? Is it visually clear and well-composed? Would I miss it if it were gone? If yes to at least two, keep it. Otherwise, let it go.
Should I delete photos from my phone after backing them up?
Yes—if they’re securely backed up to a trusted cloud service and you’ve verified the upload. However, retain a local copy on one device (like your main phone or computer) for quick access until you're confident in the backup.
What’s the safest way to back up thousands of photos?
Use a dual-layer strategy: one cloud service (e.g., Google Photos or iCloud) plus a physical external drive. This protects against both device failure and account breaches. Rotate drives annually and store one offsite (e.g., at a relative’s house).
Final Thoughts: Make Your Memories Accessible Again
Decluttering your digital photos isn’t just a technical task—it’s an act of preservation. Every photo you keep should earn its place by adding value, emotion, or utility. By eliminating the excess, you transform your library from a chaotic archive into a curated story of your life.
The effort pays off immediately: faster devices, lower costs, and less stress. But the real reward comes later—when you can effortlessly share a perfect shot of your child’s laughter, pull up directions from a saved whiteboard, or reminisce about a sunset abroad without wading through junk.


 浙公网安备
33010002000092号
浙公网安备
33010002000092号 浙B2-20120091-4
Comments
No comments yet. Why don't you start the discussion?