
Email overload is one of the most common productivity drains in modern work life. The average professional receives over 120 emails per day, many of which are automated notifications, newsletters, or low-priority updates. Left unchecked, your inbox becomes a digital landfill—cluttered, stressful, and inefficient. But you don’t need hours or complex systems to regain control. With strategic use of email filters, you can clear out hundreds of messages, automate organization, and reclaim focus—all in under 30 minutes.
This guide walks you through a proven, time-efficient method to declutter your inbox using filters in Gmail (though the principles apply across platforms like Outlook and Apple Mail). By the end, your inbox will be lean, organized, and set up for long-term sustainability.
Why Filters Are the Key to Inbox Zero
Filters act as silent assistants that sort, label, archive, or delete incoming emails based on rules you define. Instead of manually managing every message, filters automate the process—freeing mental bandwidth and reducing decision fatigue. According to Cal Newport, author of *Digital Minimalism*, “The ability to ignore unimportant information is one of the most valuable skills in the knowledge economy.” Filters give you that power at scale.
They’re especially effective for handling recurring but non-urgent emails: shipping confirmations, social media alerts, promotional offers, and team updates. Without filters, these accumulate into noise. With them, they’re automatically routed where they belong—or removed entirely.
“Automation isn't about doing more—it's about preserving attention for what truly matters.” — Anne-Laure Le Cunff, Cognitive Productivity Researcher
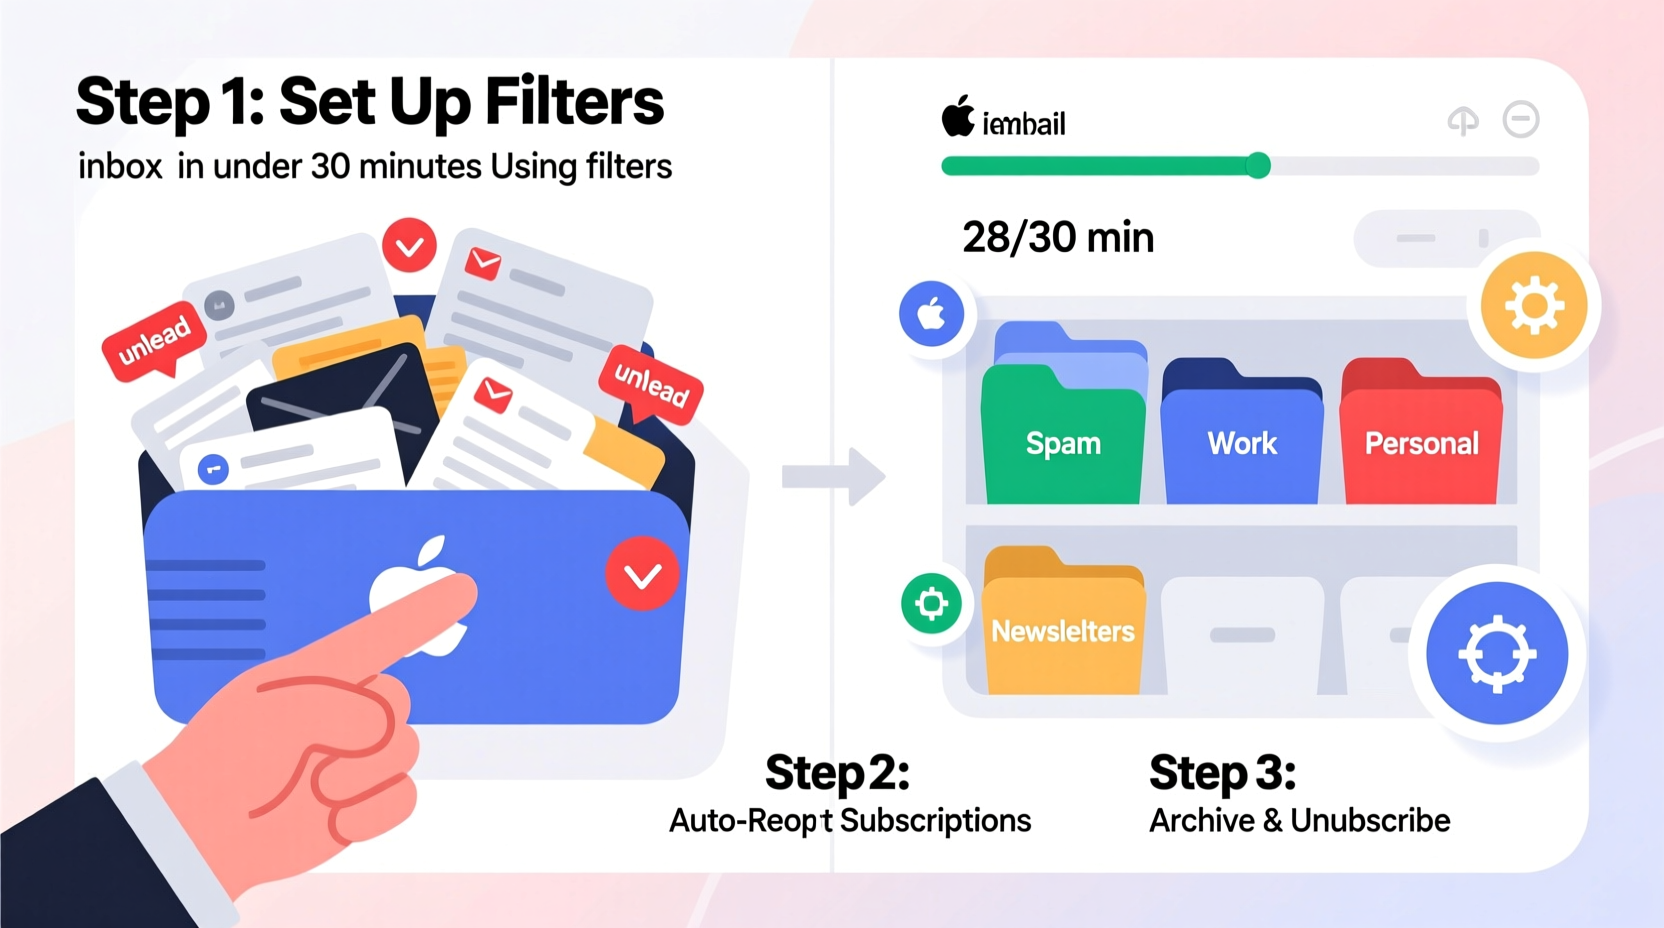
Step-by-Step: Declutter Your Inbox in 30 Minutes
The following timeline breaks down the process into manageable phases. Stick to the clock, avoid distractions, and complete each step before moving on.
- Minute 0–5: Audit Your Inbox (Manual Sweep)
Open your inbox and scan the last 50–100 messages. Identify patterns: newsletters, receipts, team updates, automated reports. Don’t act yet—just observe. Look for messages you consistently ignore, skim, or immediately archive.
- Minute 5–10: Delete or Archive in Bulk
Select all emails older than 30 days that don’t require action. This includes outdated promotions, old confirmations, or resolved threads. Use the “Select all” checkbox and choose “Archive” or “Delete.” In Gmail, if more than 50 messages appear, click “Select all conversations that match this search” to clear them all at once.
- Minute 10–20: Create High-Impact Filters
Now build filters for the top 3–5 categories clogging your inbox. Focus on volume-heavy senders or subjects. For example:
- “Your weekly digest from [Newsletter Name]”
- “Order confirmation” from Amazon, Etsy, etc.
- “GitHub notification” or “Trello update”
In Gmail: Click the search bar’s dropdown arrow → enter criteria (sender, subject, keywords) → click “Create filter” → choose actions (skip inbox, apply label, mark as read, delete).
- Minute 20–25: Apply Labels and Organize
Use labels to categorize filtered mail. Examples: “Newsletters,” “Receipts,” “Notifications.” This keeps archived items searchable without cluttering your inbox. You can always revisit these folders later if needed.
- Minute 25–30: Set Up Ongoing Maintenance
Enable auto-delete for low-value emails older than six months using a time-based filter (requires Google Workspace or third-party tools like SaneBox). Alternatively, schedule a monthly 10-minute review to refine filters and remove obsolete ones.
Top 5 Filters Every Professional Should Use
These pre-built filter templates handle the most common inbox offenders. Customize sender names or subjects to match your usage.
| Category | Filter Criteria | Action |
|---|---|---|
| Newsletters | From: *@newsletter.com OR Subject: “Weekly Roundup” | Skip inbox, apply label “Read Later,” mark as read |
| E-commerce Receipts | From: amazon.com, etsy.com, shop@stripe.com | Skip inbox, apply label “Receipts,” archive |
| Social Notifications | From: linkedin.com, twitter.com, instagram.com | Skip inbox, apply label “Social,” do not mark important |
| Team Updates | To: team-updates@company.com OR Subject: “Daily Standup Report” | Skip inbox, apply label “Internal,” archive |
| Spam-Like Promotions | Subject: “Limited Time Offer,” “Act Now,” “Exclusive Deal” | Delete permanently |
These filters reduce visual load while preserving access. For instance, instead of seeing 15 unread newsletters daily, they’re quietly grouped under a label you check weekly during focused reading time.
Real Example: How Sarah Cleared 2,000 Emails in 25 Minutes
Sarah, a project manager at a mid-sized tech firm, opened her inbox one Monday morning to find 2,374 unread messages. Most were Jira ticket updates, Zoom meeting logs, and marketing bulletins. She felt overwhelmed and delayed checking email for two days—a cycle that worsened the backlog.
Using the 30-minute method, she:
- Archived all emails older than 60 days (removed ~1,800 messages)
- Created a filter for “Jira Notification” emails → skip inbox, label “Tasks”
- Filtered Zoom summaries → skip inbox, label “Meetings”
- Labeled all “HubSpot Digest” emails → mark as read, archive
- Deleted all “Free Trial Expiring” alerts from SaaS tools
Within 25 minutes, her inbox dropped to 42 unread messages—all of which required actual attention. Over the next week, new automated emails no longer piled up. Her stress levels decreased, and she reported spending 37% less time managing email.
“Before filters, I was constantly reacting. Now I’m in control.” — Sarah T., Project Manager
Do’s and Don’ts of Email Filtering
Misconfigured filters can cause missed messages or accidental deletions. Follow this checklist to avoid common pitfalls.
| Do’s | Don’ts |
|---|---|
| Test filters with real messages before applying broadly | Don’t filter emails from clients or managers unless carefully scoped |
| Use descriptive label names (“Bank Statements” vs. “Finance”) | Don’t create too many labels—stick to 5–7 core categories |
| Review filtered emails monthly to ensure relevance | Don’t auto-delete emails containing attachments unless certain |
| Combine sender + subject criteria for precision | Don’t filter entire domains (e.g., @google.com) without exceptions |
| Use “Never send to spam” for key contacts | Don’t rely solely on filters—pair with regular inbox reviews |
Essential Checklist: Your 30-Minute Inbox Reset
Follow this concise checklist to execute the full process without missing a step.
- ☐ Close all browser tabs and apps to minimize distractions
- ☐ Open your email client and go to the inbox
- ☐ Perform a quick visual scan for high-volume senders
- ☐ Select and archive/delete all non-essential emails older than 30 days
- ☐ Identify the top 3 recurring email types cluttering your inbox
- ☐ Build filters for each type using sender, subject, or keyword rules
- ☐ Assign appropriate actions: skip inbox, label, archive, or delete
- ☐ Test each filter with a sample message
- ☐ Create or confirm label structure for filtered mail
- ☐ Schedule a 10-minute calendar reminder for next month’s filter review
Frequently Asked Questions
Can filters work on emails already in my inbox?
Yes. When creating a filter in Gmail, you’ll see an option: “Also apply filter to matching conversations.” Check this box to retroactively clean up existing messages. This is crucial for immediate decluttering.
What if I accidentally filter an important email?
Always start with “Skip inbox + Apply label” instead of “Delete” when testing. That way, messages are preserved but out of sight. Review labeled folders periodically. If you do lose something, check “All Mail” or “Trash” and adjust the filter criteria to exclude similar future messages.
Do these methods work with Outlook or Apple Mail?
Absolutely. While terminology differs, the logic remains the same. In Outlook, use “Rules” under the Home tab. In Apple Mail, go to Mail > Preferences > Rules. Set conditions (from, subject) and actions (move to folder, mark as read). The time investment is similar, and results are just as effective.
Build a Sustainable Inbox Habit
Decluttering once is helpful—but maintaining a clean inbox requires consistency. Filters are not a one-time fix; they’re part of an ongoing system. Revisit your rules every 4–6 weeks. Unsubscribe from newsletters you no longer read. Update sender addresses as companies rebrand. Remove filters for services you’ve stopped using.
The goal isn’t perfection—it’s sustainability. A healthy inbox doesn’t mean zero messages; it means only meaningful ones demand your attention. When automation handles the rest, you gain back time, clarity, and peace of mind.


 浙公网安备
33010002000092号
浙公网安备
33010002000092号 浙B2-20120091-4
Comments
No comments yet. Why don't you start the discussion?