
A cluttered pantry may seem like a minor inconvenience, but it can significantly impact daily life. From expired food hiding behind cans to wasted money on duplicates, disorganization leads to frustration and inefficiency. The good news is that with a clear plan and consistent habits, transforming your pantry into a streamlined, functional space is entirely achievable. This guide provides actionable strategies for decluttering and organizing your pantry so that every item has a purpose and a place.
Assess Your Current Pantry Situation
Before removing anything, take a step back and evaluate what you’re working with. Open all doors and shelves, pull out items systematically, and assess the current state. Look for expired goods, duplicate items, and products you no longer use. This initial audit helps identify patterns—such as overbuying snacks or hoarding condiments—that contribute to clutter.
Ask yourself key questions: How often do I struggle to find ingredients? Do I frequently throw away expired food? Is there visible overcrowding or stacking that makes access difficult? These observations form the foundation of your reorganization strategy.
Step-by-Step Pantry Decluttering Process
Decluttering isn’t just about tossing things—it’s about making intentional decisions. Follow this structured timeline to ensure efficiency without overwhelm.
- Empty the entire pantry. Place all items on counters or tables. Seeing everything at once reveals true inventory and eliminates blind spots.
- Sort by category. Group like items: baking supplies, canned goods, grains, snacks, oils, spices, etc. This makes it easier to spot duplicates and assess usage.
- Check expiration dates. Discard anything past its prime. When in doubt, throw it out—especially for perishable dry goods like flour or nuts.
- Decide what stays. Keep only what you use regularly or have a concrete plan to use within the next few months.
- Clean shelves thoroughly. Wipe down surfaces with mild soap and water. A clean base prevents pests and improves hygiene.
- Reintroduce items mindfully. Return only approved items using an organized system (covered in the next section).
This process typically takes 2–3 hours for an average-sized pantry. Set aside a dedicated block of time when distractions are minimal. Consider doing it just before grocery shopping to avoid restocking unnecessary items.
Smart Organization Systems for Long-Term Success
Once decluttered, the goal is to maintain order through smart storage solutions. Uniformity, visibility, and accessibility are key principles.
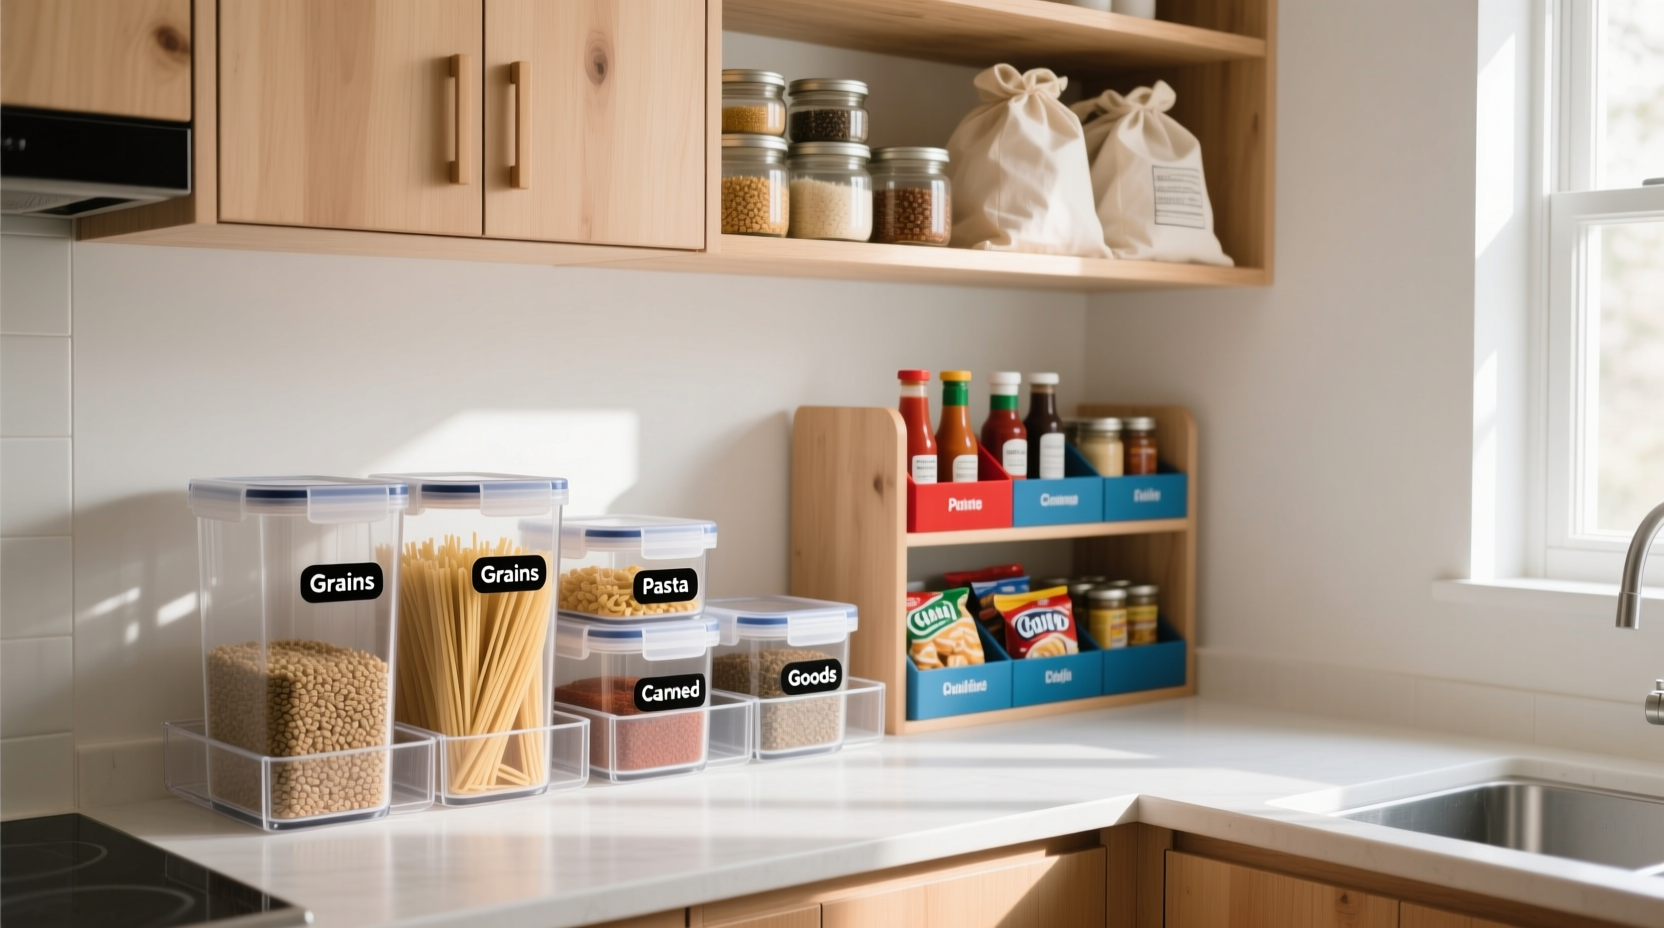
- Use clear, airtight containers for staples like rice, pasta, cereal, and sugar. Label each with contents and expiration date.
- Invest in shelf risers to create vertical layers, allowing you to see items behind others.
- Install door racks for small items like seasoning packets, tea bags, or spice jars.
- Group by meal function rather than strict category—e.g., “breakfast station” with oatmeal, granola, and honey together.
- Place frequently used items at eye level, heavier ones on lower shelves, and rarely used supplies higher up.
| Category | Recommended Storage | Common Mistakes |
|---|---|---|
| Flour & Sugar | Airtight bins with labels | Leaving in original paper bags prone to spills and pests |
| Canned Goods | Facing labels forward on front-facing shelves | Stacking haphazardly, leading to forgotten items |
| Spices | Drawer inserts or tiered turntables | Burying in corners where they’re hard to see |
| Snacks | Small baskets or divided bins by type | Loose packaging causing crumbs and mess |
| Oils & Vinegars | Dedicated low cabinet, away from heat | Storing near stove, accelerating spoilage |
Real-Life Example: Transforming a Family Pantry
Sarah, a mother of three in Portland, struggled with nightly dinner chaos. She’d often buy duplicate ingredients because she couldn’t see what she already had. Her pantry was packed floor-to-ceiling with mismatched boxes, half-empty bags, and expired items buried behind newer purchases.
Over one Saturday morning, Sarah followed the six-step decluttering process. She removed 17 expired items and consolidated 12 open grain packages into labeled bins. By grouping items into zones—“Baking Center,” “Quick Snacks,” “Pasta Night Essentials”—she reduced meal prep time by nearly half. Within two weeks, her family reported fewer last-minute takeout orders and less food waste.
The change wasn’t just physical; it shifted their habits. Now, her kids know exactly where to find granola bars or pancake mix, and weekly grocery lists are based on actual inventory checks.
“The most effective pantries aren’t the fullest—they’re the most intentional.” — Maria Tran, Professional Home Organizer and Author of *Space to Breathe*
Essential Checklist for Pantry Maintenance
To keep your pantry running smoothly, incorporate these actions into your routine:
- ✅ Conduct a full pantry sweep every 3 months
- ✅ Wipe down shelves monthly during deep cleaning
- ✅ Rotate stock using the “first in, first out” rule (older items in front)
- ✅ Reassess container sizes annually based on usage
- ✅ Update labels when contents change
- ✅ Limit impulse buys by checking pantry before shopping
- ✅ Donate unopened, non-perishable excess to local food banks
This checklist ensures sustainability. Without maintenance, even the best systems degrade over time. Integrating small habits prevents backsliding into old patterns.
Frequently Asked Questions
How do I prevent pests after organizing my pantry?
Pests are attracted to open packaging and spilled food. Always transfer dry goods into sealed containers made of glass or thick plastic. Regularly inspect corners and crevices for signs of ants or weevils. If an infestation occurs, discard affected items immediately, clean with vinegar solution, and consider using bay leaves or food-safe diatomaceous earth as natural deterrents.
Should I organize by expiration date or category?
Start with category-based organization for usability, then apply expiration logic within each group. For example, arrange canned soups alphabetically or by type, but place those expiring soonest at the front. This combines practical access with waste reduction.
What if I have limited shelf space?
Maximize vertical space with stackable bins and adjustable shelving. Use under-shelf baskets and door-mounted organizers. Prioritize multi-functional items and eliminate redundancies. Sometimes, reducing inventory is more effective than adding storage.
Conclusion: Build a Pantry That Works for You
A well-organized pantry is more than aesthetically pleasing—it supports healthier eating, smarter shopping, and calmer mealtimes. The effort invested in decluttering pays dividends in time saved, stress reduced, and resources preserved. What sets lasting organization apart isn’t perfection, but intentionality. Every jar, bin, and label should serve a purpose and reflect your household’s real needs.
Start small if needed. Even clearing one shelf and setting up a simple system creates momentum. Over time, your pantry can become a model of efficiency—one where finding the soy sauce doesn’t require excavation and where every ingredient gets used before it expires.


 浙公网安备
33010002000092号
浙公网安备
33010002000092号 浙B2-20120091-4
Comments
No comments yet. Why don't you start the discussion?