
A rice cooker is one of the most reliable kitchen appliances—quiet, efficient, and essential for many households. But over time, mineral deposits, starch buildup, and burnt-on residue can accumulate inside the inner pot and even on the heating plate. While cleaning seems straightforward, many users unknowingly damage their rice cookers by using abrasive tools or harsh chemicals that scratch the non-stick coating. Once scratched, the surface loses its effectiveness, food sticks more easily, and the risk of harmful particles leaching into meals increases.
Cleaning your rice cooker properly isn’t just about appearance—it’s about performance, hygiene, and longevity. With the right techniques, you can restore your appliance to like-new condition without compromising its delicate surfaces. This guide covers proven, scratch-free methods backed by material science and user experience, ensuring your rice cooker remains functional and safe for years.
Why Non-Scratch Cleaning Matters
The inner pot of most modern rice cookers features a non-stick ceramic or Teflon-based coating designed to prevent rice from adhering during cooking. These coatings are durable under normal use but vulnerable to physical abrasion. Steel wool, metal scrubbers, or even stiff nylon brushes can create micro-scratches that:
- Trap food particles and bacteria
- Increase sticking in future uses
- Accelerate coating degradation
- Potentially release toxic compounds when heated (especially with PTFE coatings above 500°F)
According to the U.S. Consumer Product Safety Commission, damaged non-stick surfaces should be replaced to avoid health risks. That makes gentle yet thorough cleaning not just a maintenance issue—but a safety priority.
“Preserving the integrity of the non-stick surface is critical. A single deep scratch can become a hotspot for bacterial growth and compromise both food quality and appliance lifespan.” — Dr. Lena Torres, Appliance Materials Scientist at the Kitchen Technology Institute
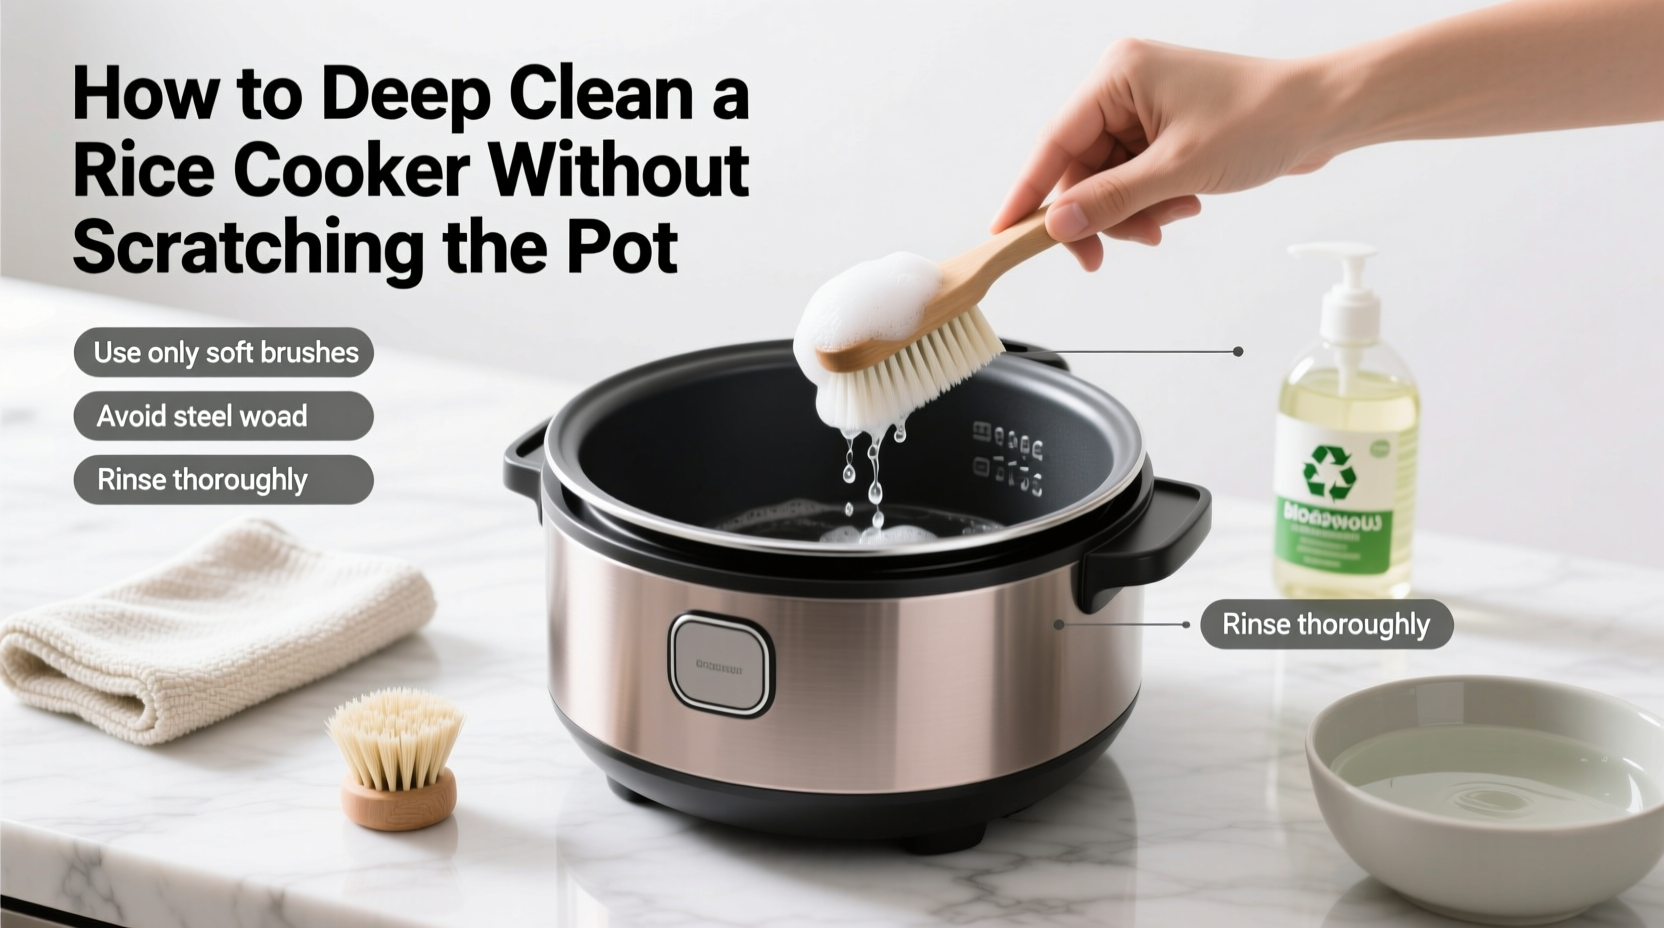
Step-by-Step: Deep Cleaning Without Scratching
This timeline-based method ensures complete sanitation while protecting the pot’s finish. Follow these steps every 4–6 weeks, or immediately after any burning incident.
- Unplug and Cool Down: Always disconnect the rice cooker and let it cool completely before cleaning. Never immerse the base unit in water.
- Remove the Inner Pot: Gently lift the pot out. If residue is stuck, do not force it—proceed to soaking.
- Soak in Warm, Soapy Water: Fill the pot with warm water and add a few drops of mild dish soap. Let sit for 20–30 minutes to loosen stubborn starches and films.
- Use a Soft Sponge or Cloth: After soaking, wipe the interior with a non-abrasive sponge (labeled “non-scratch” or “safe for non-stick”). Focus on discolored areas with gentle circular motions.
- Tackle Stains with Natural Agents: For yellowed or stained spots, make a paste of baking soda and water (2:1 ratio). Apply with a soft cloth and let sit for 10 minutes before wiping. Baking soda is mildly abrasive but safe when used correctly—never sprinkle dry and scrub.
- Deodorize with Vinegar Solution: Mix equal parts white vinegar and water. Pour into the pot and let sit for 15 minutes to neutralize odors and dissolve mineral buildup. Wipe clean afterward.
- Wipe the Heating Plate: Dampen a cloth with vinegar solution and gently clean the exposed heating element. Avoid excess moisture. Use cotton swabs for crevices.
- Dry Thoroughly: Reassemble only when all components are completely dry to prevent electrical hazards.
Do’s and Don’ts: Safe vs. Risky Cleaning Practices
| Do | Don’t |
|---|---|
| Use warm, soapy water and a soft sponge | Scrub with abrasive pads or brushes |
| Apply baking soda paste with a cloth | Sprinkle baking soda dry and scrub aggressively |
| Clean the lid gasket and steam vent regularly | Submerge the base unit in water |
| Wipe seals and vents with a damp cotton swab | Use bleach or ammonia-based cleaners |
| Dry all parts before reassembly | Store with the lid closed while damp |
Maintaining Hard-to-Reach Areas
Beyond the pot, several overlooked zones harbor grime and affect performance:
- Steam Vent: Food particles often clog this small opening, leading to uneven pressure and overflow. Use a toothpick or cotton swab dipped in vinegar to clear debris.
- Rubber Gasket (Sealing Ring): Found on the lid of many models, this silicone ring traps odors and mold if neglected. Remove it (if detachable), soak in soapy water, then rinse and air-dry.
- Lid Interior: Condensation collects here, forming a film. Wipe with a microfiber cloth dampened with vinegar solution.
- Exterior Housing: Wipe with a damp cloth and mild cleaner. Avoid spraying liquid directly onto the unit.
For frequent users, cleaning the gasket weekly prevents odor transfer—especially important if you cook different grains or steam vegetables.
Real Example: Reviving a Neglected Rice Cooker
Sarah, a home cook in Portland, hadn’t cleaned her 3-year-old rice cooker in over a year. After switching to brown rice, she noticed persistent sticking and a faint burnt smell. The pot had visible discoloration and a chalky film near the bottom. Instead of replacing it, she followed the non-scratch deep clean method.
She soaked the pot in warm soapy water for 30 minutes, then applied a baking soda paste with a soft sponge. After rinsing, she used a vinegar-water mix to deodorize and wiped the heating plate carefully. The rubber gasket was removed and soaked separately. Two cleaning cycles later, her rice cooked evenly again, and the sticking stopped.
Sarah now cleans her rice cooker monthly and reports it performs better than when new. Her total investment: less than $1 in household supplies and 45 minutes of effort.
When to Replace the Inner Pot
No amount of cleaning can repair a severely damaged non-stick surface. Watch for these signs:
- Visible scratches where the underlying metal is exposed
- Flaking or peeling coating
- Food consistently sticking despite proper oil and water ratios
- Dark, permanent stains that don’t respond to cleaning
Many manufacturers sell replacement pots individually. Using an OEM (original equipment manufacturer) part ensures compatibility and maintains warranty coverage. Third-party pots may fit but often use inferior coatings.
“Even minor flaking means the protective barrier is compromised. At that point, replacement is the only safe option.” — Marcus Lee, Appliance Repair Technician with 12 years of field experience
Checklist: Monthly Rice Cooker Maintenance Routine
Complete this checklist once per month:
- ☐ Unplug and cool the unit
- ☐ Remove and inspect the inner pot for scratches
- ☐ Soak pot in warm, soapy water for 20–30 minutes
- ☐ Clean interior with soft sponge and baking soda paste if needed
- ☐ Rinse and dry thoroughly
- ☐ Wipe heating plate with a damp cloth
- ☐ Remove and clean rubber gasket (if applicable)
- ☐ Clear steam vent with cotton swab
- ☐ Wipe exterior housing
- ☐ Reassemble only when fully dry
FAQ
Can I put the rice cooker pot in the dishwasher?
Some models are labeled dishwasher-safe, but hand washing is still recommended. Dishwashers use high-pressure jets and alkaline detergents that accelerate coating wear. Even “safe” cycles can degrade the surface over time. Hand washing gives you control and extends the pot’s life significantly.
What if rice is burned onto the bottom?
Never scrape. Instead, fill the pot with warm water and a drop of dish soap. Bring to a simmer on the stove (without the base unit) for 10–15 minutes. The heat loosens the residue. Then, use a wooden spoon or silicone spatula to gently lift softened bits. Finish with a vinegar soak to remove any remaining film.
How can I prevent buildup between cleanings?
Rinse the pot immediately after each use. If you can’t wash it right away, at least fill it with water to prevent dried starch. When cooking, use the correct water-to-rice ratio and avoid overfilling. For frequent use, consider lining the pot with parchment paper (if your model allows) to minimize direct contact.
Conclusion: Protect Your Investment with Gentle Care
Your rice cooker works quietly day after day, delivering consistent results with minimal effort. In return, it deserves thoughtful maintenance that preserves its functionality and safety. By avoiding abrasive tools and embracing simple, chemical-free cleaning methods, you protect the non-stick surface, prevent contamination, and extend the appliance’s lifespan.
Deep cleaning doesn’t require special products or hours of labor—just patience, the right tools, and attention to detail. Whether you’re reviving an old cooker or maintaining a new one, these practices ensure every batch of rice remains perfect, and every use remains safe.


 浙公网安备
33010002000092号
浙公网安备
33010002000092号 浙B2-20120091-4
Comments
No comments yet. Why don't you start the discussion?