
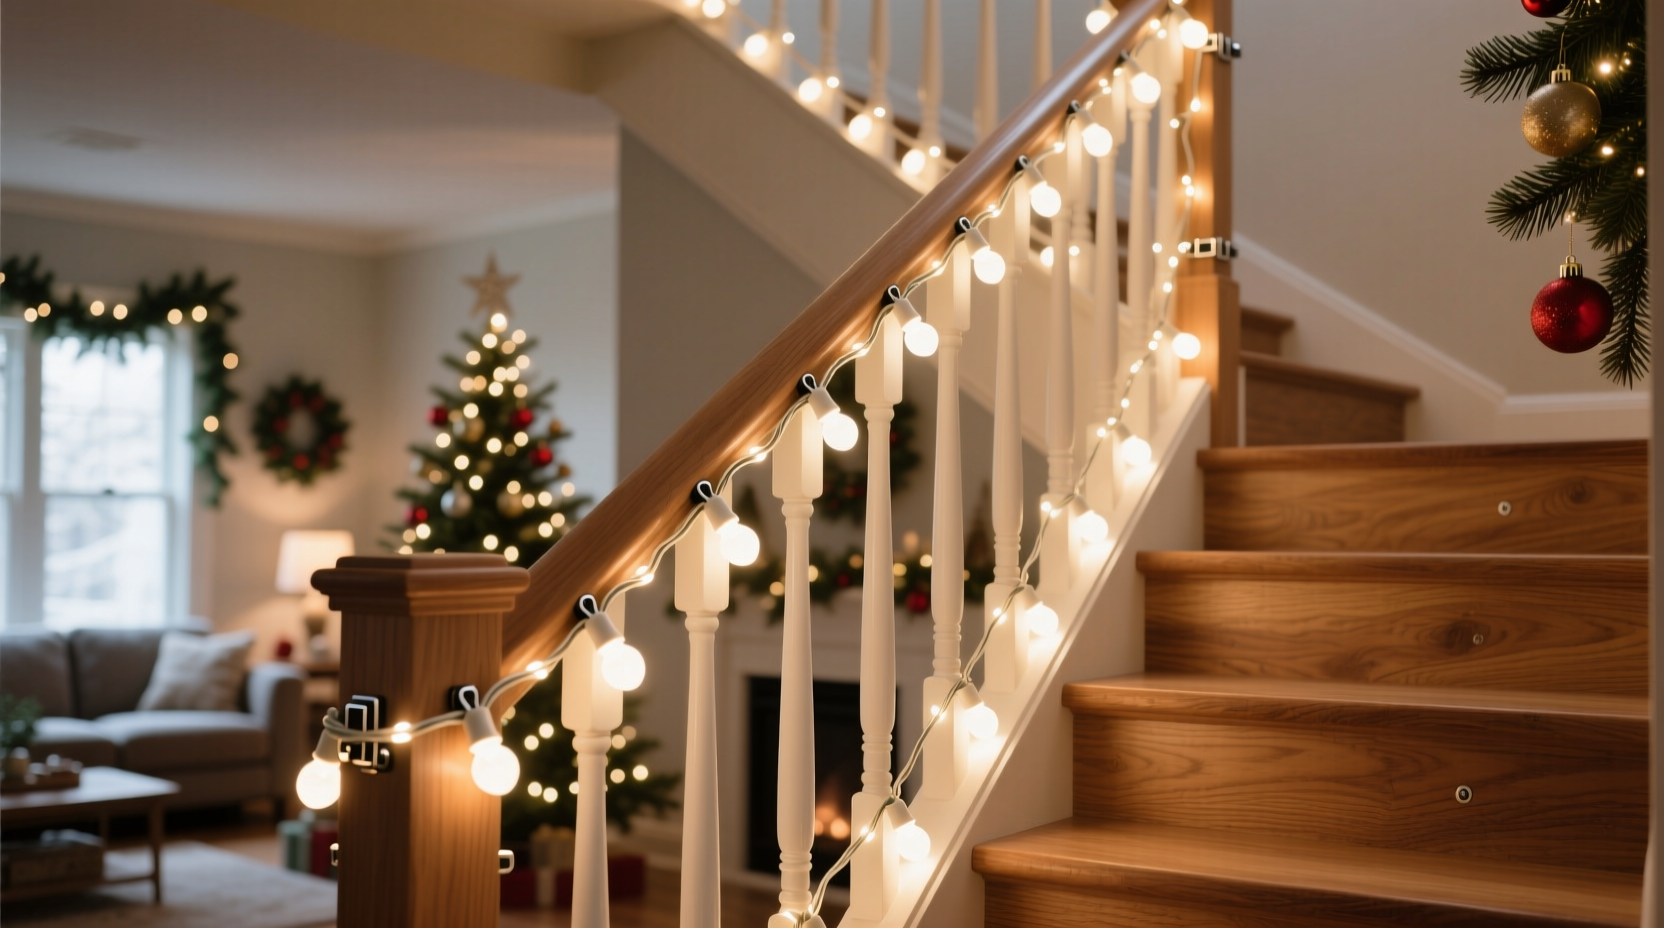
Draping Christmas lights along a staircase railing instantly elevates your holiday decor. But nothing ruins the effect faster than drooping strands that lose their shape within days. Sagging not only looks sloppy—it can also create tripping hazards or damage delicate light strings. The key to a polished, long-lasting display lies in technique, not just materials. With the right approach, you can achieve a professionally styled cascade of light that stays taut from the first night of Hanukkah through New Year’s Day.
Why Lights Sag on Staircase Railings
Sagging occurs when lights are improperly secured or when too much weight is placed between anchor points. Unlike flat walls or eaves, stair railings have curves, angles, and varying heights, making them structurally challenging for even distribution. Over time, gravity pulls down on the wires, especially if LED strands are long or incandescent bulbs add extra heft.
Common causes include:
- Insufficient attachment points
- Using adhesive clips that lose grip over time
- Overlapping too many strands in one area
- Improper tension during installation
- Exposure to temperature changes causing material expansion
Understanding these factors allows you to preempt problems before hanging a single bulb.
The Right Tools Make All the Difference
You don’t need specialty equipment, but choosing the correct fasteners and accessories prevents slippage and reduces strain. Avoid generic tape or zip ties unless reinforced properly. Instead, use solutions designed specifically for indoor lighting displays.
Recommended Supplies
| Item | Purpose | Why It Works |
|---|---|---|
| Plastic railing clips (sold as \"light clips\") | Securely hold wire in place without damaging finish | Fits most spindle widths; reusable year after year |
| Hook-and-loop adhesive strips (e.g., Command™) | Anchor start/end points and high-stress zones | Removable without residue; strong shear strength |
| Flexible wire connectors (green floral wire) | Tighten loose spans discreetly | Bendable and paintable to blend with railing |
| Measuring tape and marker pen | Ensure even spacing | Prevents bunching and uneven weight distribution |
Investing in quality clips pays off. According to interior stylist and seasonal designer Miriam Tran, “The best installations look effortless because they’re anchored intelligently—not hidden, but never obtrusive.”
“Sagging isn’t about the lights failing—it’s about the structure supporting them. Think like an engineer, not just a decorator.” — Miriam Tran, Seasonal Design Consultant
Step-by-Step Guide to Taut, Even Draping
A successful drape balances aesthetics with physics. Follow this methodical process to install lights that stay put.
- Measure the railing length: Use a flexible measuring tape along the handrail’s curve. Note total linear feet to determine how many strands you’ll need. Most pre-lit sets are 25 feet; plan overlaps accordingly.
- Dry-fit the strand: Unplug the lights and loosely lay them along the railing. Observe where natural dips occur—these are potential sag zones. Mark every 12–18 inches along posts or balusters where clips will go.
- Install support clips: Attach plastic clips at each marked point. For wooden railings, screw-in types offer superior hold. On painted metal or composite, use adhesive-backed versions pressed firmly for 30 seconds.
- Begin at the power source: Start near an outlet. Feed the plug through the bottom of the first clip so it rests flush against the post. This keeps cords tidy and reduces tension on the first bulb.
- Weave with consistent tension: Gently press the light string into each clip, maintaining slight upward pull. Do not stretch the cord, but ensure no slack exists between anchors. If using multiple strands, stagger connections so joints fall at posts, not mid-span.
- Use secondary reinforcement at bends: At turns or landings, wrap thin gauge floral wire around both the railing and light cord every 6 inches across the curve. Twist tightly underneath to avoid visibility.
- Test and adjust: Plug in the lights. Walk up and down the stairs to view from multiple angles. Re-tension any section showing looseness by reseating clips or adding temporary mini-clips.
Pro Techniques to Prevent Long-Term Sagging
Even perfect installation can degrade over weeks of use. Temperature shifts, vibrations from foot traffic, and material fatigue contribute to gradual drooping. These advanced strategies help maintain integrity throughout the season.
Interlock Multiple Strands Strategically
If your staircase exceeds the length of one light string, connect additional sets carefully. Never daisy-chain more than three standard strands unless labeled for it—overloading risks overheating and increased sag due to added weight.
Instead:
- Run separate circuits from different outlets when possible
- If chaining is necessary, support the junction point directly on a new clip
- Use heavier-duty extension cords rated for continuous indoor use
Reinforce Mid-Span Weak Points
Long horizontal runs between posts are prone to central sagging. Combat this by installing invisible supports:
- Cut 6-inch lengths of clear nylon fishing line
- Tie one end to the railing above the midpoint of the span
- Loop the other end around the light string and knot securely
- Trim excess; the line blends into the background
This creates a nearly invisible truss system that redistributes downward force.
Choose the Right Light Type
Not all Christmas lights behave the same under stress. Consider these differences:
| Light Type | Weight per Foot | Sag Risk | Best For Staircases? |
|---|---|---|---|
| Micro LED (battery-powered) | Very low | Low | Yes – ideal for narrow railings |
| Standard LED (plug-in) | Low | Medium | Yes – with proper spacing |
| Incandescent mini lights | High | High | No – avoid unless heavily supported |
| Rope lights | Moderate | Low-Medium | Yes – naturally stiffer |
For staircases, lightweight LEDs are optimal. They consume less energy, generate minimal heat, and exert less gravitational pull over time.
Real Example: Fixing a Problematic Spiral Staircase
Jamila R., a homeowner in Portland, OR, struggled annually with her curved iron spiral staircase. Each December, her beautiful C7 multicolored lights would begin sagging by mid-holiday, forming unsightly loops between spindles.
Last year, she applied structured mounting:
- Measured exact circumference of each turn
- Installed 14 custom-sized plastic clips spaced every 10 inches
- Used micro-LEDs instead of traditional bulbs
- Added fishing line supports at two critical mid-turn points
The result? Her display remained taut for 42 days—longer than ever before. Neighbors commented on the “store-window quality” of her design. Jamila now shares photos online as part of a local holiday lighting group.
“It finally looked intentional, not just festive. That made all the difference.” — Jamila R., DIY Decorator
Checklist: Install Lights Without Sagging
✅ Pre-Installation Checklist
- ☐ Measure total railing length
- ☐ Choose appropriate light type (preferably lightweight LED)
- ☐ Purchase enough clips (one per 12–18 inches)
- ☐ Gather tools: scissors, fishing line, measuring tape, markers
- ☐ Test all light strings before mounting
- ☐ Identify outlet locations and plan cord paths
- ☐ Clean railing surface for better clip adhesion
- ☐ Mark clip positions with removable pen
Frequently Asked Questions
Can I use hot glue to secure Christmas lights on railings?
No. Hot glue may damage finishes and becomes brittle over time, increasing the risk of sudden detachment. It’s also difficult to remove without residue. Use mechanical fasteners like clips or hook-and-loop strips instead.
How do I hide the power cord along the railing?
Route the cord along the underside of the handrail whenever possible. Use under-rail clips or small adhesive cable ties to keep it flush. If running down a post, secure it vertically every 8–10 inches to prevent dangling.
What should I do if lights start sagging after a few weeks?
Inspect all clips for loosening. Reattach any that have shifted. Add supplemental supports—such as discreet fishing line—to problem areas. Consider reducing strain by shortening the run or switching to lighter lights next season.
Final Thoughts: Precision Creates Lasting Magic
A beautifully lit staircase doesn’t happen by accident. It results from thoughtful planning, disciplined spacing, and smart reinforcement. While it takes slightly more effort than casually draping lights, the payoff is immense: a display that looks professionally done, lasts the entire season, and becomes a cherished part of your holiday tradition.
By treating your railing like a structural framework rather than just a decorative surface, you give your lights the support they need to shine—literally and figuratively. Whether you're preparing for family gatherings or simply enjoying quiet winter evenings, well-installed lighting adds warmth, charm, and lasting joy.


 浙公网安备
33010002000092号
浙公网安备
33010002000092号 浙B2-20120091-4
Comments
No comments yet. Why don't you start the discussion?