
Charging your iPhone should be a seamless experience, but sometimes it's unclear whether the device is actually drawing power. A dead battery at a critical moment can disrupt your day, especially if you assumed your phone was charging when it wasn’t. Whether due to a faulty cable, a worn-out port, or a misleading screen display, knowing how to quickly and accurately confirm that your iPhone is charging is essential. This guide breaks down straightforward methods—both visual and technical—to help you verify charging status with confidence.
1. Check the Lock Screen and Status Bar Indicators
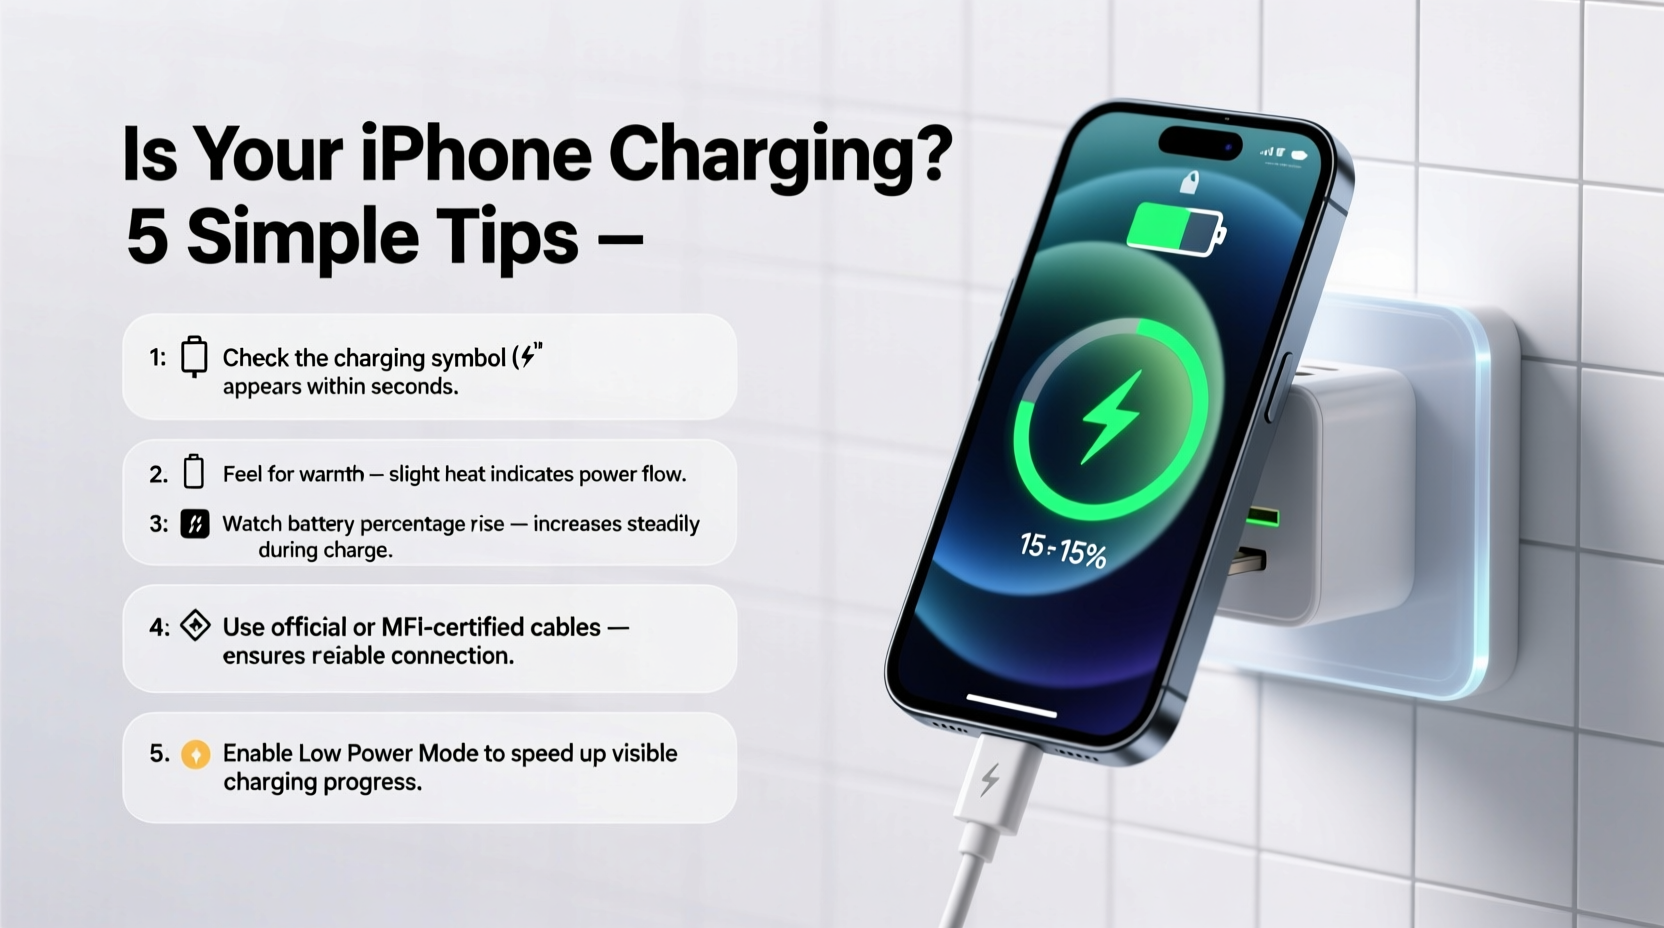
The most immediate way to determine if your iPhone is charging is by observing the screen. When you connect your iPhone to a power source, a visual indicator appears almost instantly.
- If the screen is on, look for a **green battery icon with a lightning bolt** in the top-right corner. This confirms active charging.
- If the screen is off, plug in your iPhone and watch for a brief flash of the Apple logo or a green battery icon on the dark screen.
- On newer iPhones with Always-On Display (iPhone 14 Pro and later), you can see the battery percentage and charging symbol even when the screen appears dormant.
2. Understand What the Battery Icon Colors Mean
iOS uses color-coded battery indicators to communicate different states. Knowing these can prevent confusion:
| Battery Icon Appearance | Meaning | Action Recommended |
|---|---|---|
| Green battery with lightning bolt | Actively charging | None — everything is working |
| White or gray battery with lightning bolt | Connected but not charging (e.g., low-power mode or paused due to heat) | Check for overheating or restart if needed |
| No lightning bolt, only battery percentage | Not connected to power or connection failed | Inspect cable, port, and power source |
| Red battery with lightning bolt | Battery critically low and now charging | Leave plugged in for several minutes before use |
A white or gray battery with a lightning bolt often surprises users. It means the device is receiving power but has temporarily halted charging—usually due to excessive heat. In such cases, remove the case and let the phone cool before resuming charge.
3. Step-by-Step: How to Confirm Charging in 60 Seconds
Sometimes you need a fast, foolproof method. Follow this timeline to verify charging within one minute:
- 0–10 seconds: Plug in your iPhone using a known-good cable and charger.
- 10–20 seconds: Press the side button to wake the screen. Look for the green battery icon with a lightning bolt.
- 20–40 seconds: Open the Control Center (swipe down from top-right on Face ID models, or up from bottom on Home button models). The battery widget will show a charging symbol next to the percentage.
- 40–60 seconds: Monitor the battery percentage. If it increases—even slightly—within this window, charging is confirmed.
4. Troubleshooting: When Your iPhone Isn’t Charging Properly
If no charging indicator appears, don’t assume the worst. Many issues are fixable without visiting a service center.
Common Causes and Fixes
- Faulty cable: Try a certified Lightning or USB-C cable. Frayed wires or bent connectors are common culprits.
- Dust in the charging port: Use a dry, soft brush (like a clean toothbrush) to gently dislodge debris. Avoid metal tools.
- Weak power source: Wall adapters deliver more power than laptops or car chargers. Test with a 20W+ adapter for best results.
- Software glitch: Restart your iPhone. A frozen system process can block charging signals.
- Background app drain: If apps are running intensively, the battery may appear stagnant despite charging.
“Over 60% of ‘not charging’ reports we see are resolved by simply replacing the cable or cleaning the port.” — David Lin, Senior Technician at iFixMobile Solutions
Mini Case Study: Sarah’s Morning Routine Fix
Sarah relied on charging her iPhone overnight, but lately, it ended each morning at the same battery level. She assumed the charger was broken and bought a new one—twice. Frustrated, she brought it to a repair shop. The technician inspected the port and found compacted lint blocking the connector. After a gentle cleaning, the phone charged normally. The issue wasn’t hardware or software—it was physical obstruction. Now, Sarah cleans her port monthly and uses only Apple-certified cables.
5. Advanced Tips for Reliable Charging Verification
For users who want deeper insight, iOS offers subtle but powerful tools beyond basic indicators.
Use Low Power Mode as a Diagnostic Tool
When Low Power Mode is active, the battery icon turns yellow. If you plug in while in this mode and the icon turns green, you’re charging. If it stays yellow, the device isn’t receiving power effectively.
Monitor Charging via Battery Health Settings
Go to Settings > Battery > Battery Health & Charging. Here, you’ll find:
- Peak Performance Capability: Warns if the battery cannot support normal charging.
- Charging Optimization: Shows if features like 'Optimized Battery Charging' are delaying full charge to preserve lifespan.
- Last Full Charge: Indicates when the device last reached 100%, helping track charging patterns.
Listen for Subtle Audio Cues
When connecting a working cable to a powered source, some iPhone models emit a faint “chime” or haptic buzz—especially if the battery was very low. While not guaranteed, this can serve as an early clue that the circuit is complete.
FAQ: Common Questions About iPhone Charging
Why does my iPhone show it’s charging but the battery percentage doesn’t go up?
This often happens when the phone is in use while charging, especially with power-intensive apps. If the energy consumed equals or exceeds the charge input, the percentage stays flat. Let the phone charge while powered off or idle to see real progress.
Can I trust third-party chargers and cables?
Only if they are MFi (Made for iPhone) certified. Non-certified accessories may charge slowly, inconsistently, or damage your battery over time. Look for the MFi logo on packaging.
Is wireless charging less reliable for verification?
Wireless charging lacks a direct visual cue like a cable connection. To verify, place your iPhone on the pad and check for the charging sound, haptic pulse, or green battery icon within 10 seconds. Also, ensure the phone is centered and not wearing a thick case.
Final Checklist: Is My iPhone Charging? Quick Verification Guide
- ✅ Plug in using a known-working cable and adapter.
- ✅ Wake the screen and look for the green battery with lightning bolt.
- ✅ Open Control Center to confirm charging symbol.
- ✅ Wait 1–2 minutes to see if battery percentage increases.
- ✅ Inspect port for dust or damage if no sign appears.
- ✅ Restart device if software seems unresponsive.
Conclusion
Verifying that your iPhone is charging doesn’t require technical expertise—just attention to detail and a few proven methods. From understanding icon colors to performing quick diagnostics, these strategies empower you to avoid unpleasant battery surprises. Charging issues are often simple to resolve once you know what to look for. Take a moment today to test your setup, clean your port, and ensure your cables are in good condition. A little proactive care keeps your iPhone ready when you need it most.


 浙公网安备
33010002000092号
浙公网安备
33010002000092号 浙B2-20120091-4
Comments
No comments yet. Why don't you start the discussion?