
Cloudy, yellowed, or foggy headlights are more than just an eyesore—they reduce visibility, compromise nighttime driving safety, and can make even a well-maintained car look neglected. A quick online search will flood you with DIY fixes: toothpaste, baking soda, vinegar, even cigarette ash. But do these household remedies actually work? Or are they short-term gimmicks that could cause more harm than good?
This article dives deep into the science behind headlight oxidation, evaluates the truth behind popular home remedies like toothpaste and baking soda, and provides a clear roadmap for restoring your headlights safely and effectively—whether you're aiming for a temporary refresh or a lasting professional-grade finish.
The Science Behind Cloudy Headlights
Most modern vehicles use polycarbonate plastic for headlights instead of glass. While lightweight and impact-resistant, this material is vulnerable to UV degradation. Over time, exposure to sunlight, road debris, moisture, and pollutants causes the surface layer to oxidize, forming micro-cracks and a hazy film. This oxidation scatters light, reducing beam intensity by up to 80%, according to the National Highway Traffic Safety Administration (NHTSA).
UV rays break down the protective clear coat on the lens. Once compromised, oxygen and moisture accelerate the deterioration. The result? A milky, yellowed appearance that dulls your vehicle’s front end and weakens illumination.
Understanding this process is key: any solution must address both surface grime and deeper oxidation. Simply wiping away dirt won’t restore clarity. And abrasive household products may strip what little protection remains.
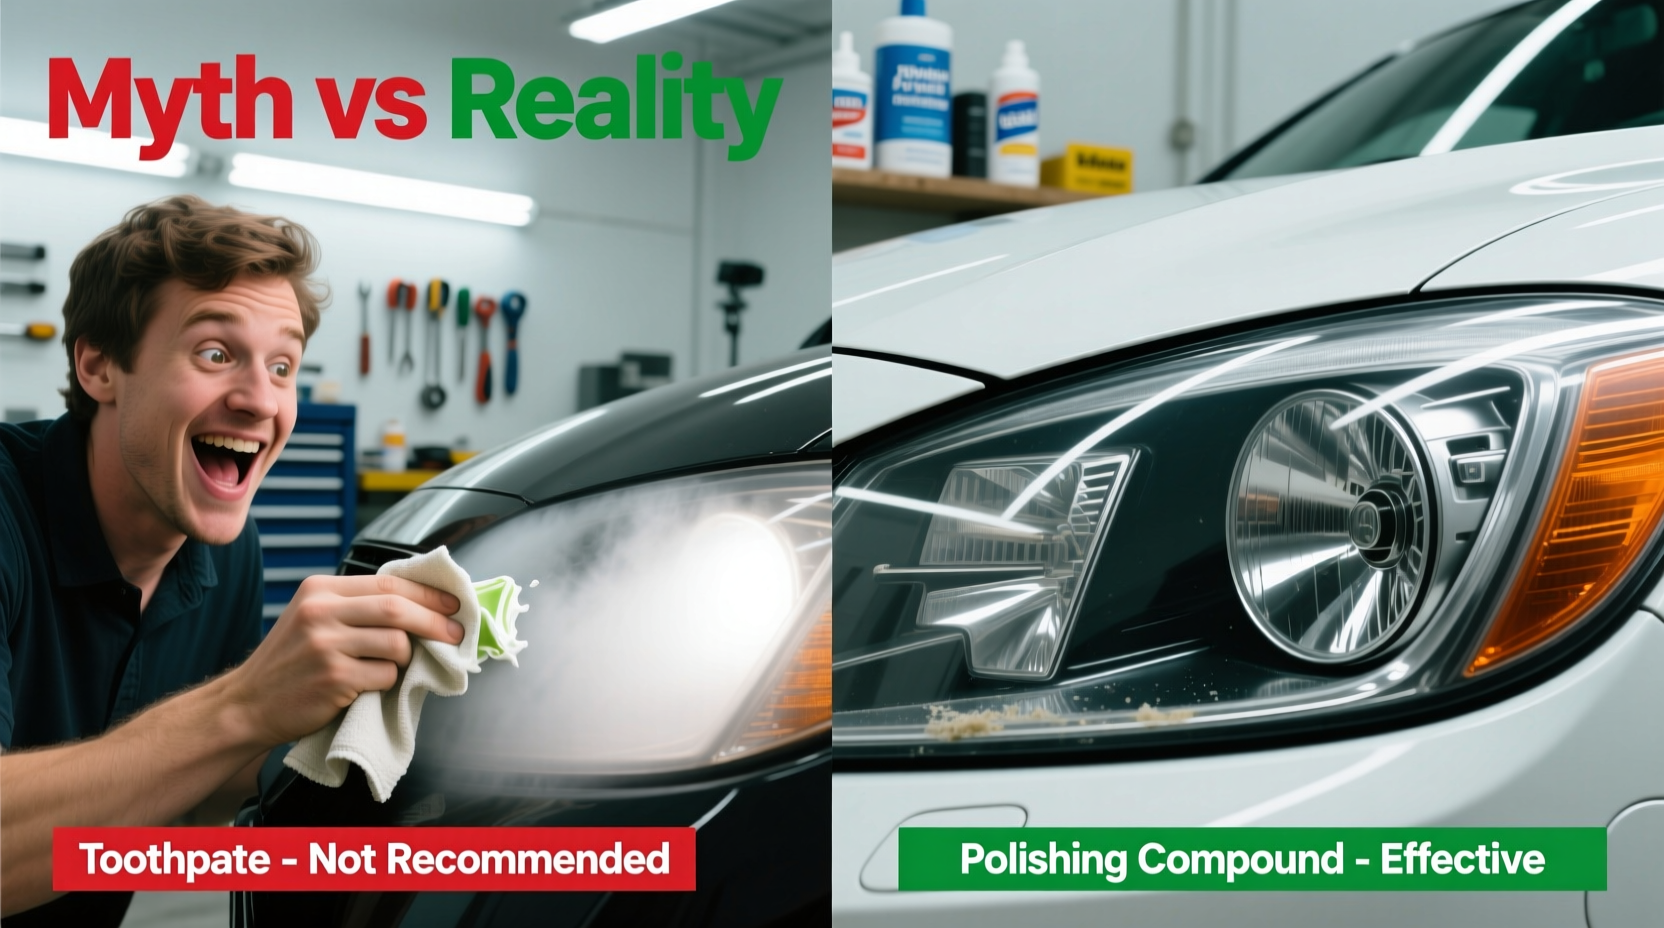
Toothpaste: Myth vs Reality
The idea of using toothpaste to clean cloudy headlights has circulated for years. The logic seems sound: toothpaste contains mild abrasives (like hydrated silica) designed to polish teeth without damaging enamel. So why not apply it to plastic lenses?
In limited cases, it can help. A non-gel, white toothpaste with gentle abrasives may remove very light surface haze by smoothing microscopic imperfections. However, it’s not formulated for automotive plastics and lacks UV inhibitors or sealants necessary for long-term protection.
Worse, many modern toothpastes contain sodium bicarbonate (baking soda), alcohol, or whitening agents that can be overly abrasive or drying. These ingredients may scratch the lens or accelerate future oxidation once the temporary shine fades.
Baking Soda: Does It Work—or Worsen the Problem?
Baking soda (sodium bicarbonate) is another pantry staple touted as a headlight savior. Advocates mix it with water into a paste, claiming it buffs away cloudiness through gentle abrasion.
Reality check: baking soda has a Mohs hardness of around 2.5–3, while polycarbonate plastic rates about 2–2.5. In theory, it shouldn’t scratch—but in practice, uneven application, dry rubbing, or excessive pressure can create fine swirl marks that scatter light further.
Additionally, baking soda is alkaline and hygroscopic (absorbs moisture). Left residue can attract humidity, potentially worsening oxidation over time. There’s also zero UV protection. Any improvement is purely cosmetic and short-lived, often fading within weeks.
“Home remedies like toothpaste or baking soda might offer a temporary visual fix, but they don’t address the root cause: UV degradation. Without proper sealing, clarity returns to its original state quickly—and sometimes worse due to micro-scratches.” — Daniel Reeves, Automotive Restoration Specialist
A Proven Step-by-Step Guide to Restoring Headlights
If you want real, lasting results, follow this detailed restoration process. It balances effectiveness, safety, and affordability—whether you’re doing it yourself or evaluating professional services.
- Clean the Lens Thoroughly
Use automotive soap and water to remove dirt, grease, and contaminants. Dry completely. This prevents debris from grinding into the surface during polishing. - Tape Off Surrounding Areas
Apply painter’s tape to the paint around the headlight to avoid accidental scratches or chemical contact. - Sand with Wet/Dry Sandpaper
Begin with 1000-grit sandpaper soaked in water for 5 minutes. Sand in straight lines (not circles) across the lens until the entire surface appears uniformly frosted. Rinse frequently. Progress to 1500-grit, then 2000-grit for smoothing. - Polish with a Plastic Restorer
Use a dedicated plastic polish (e.g., Meguiar's PlastX or Flitz) applied with a foam pad on a dual-action polisher or by hand. Buff in small sections until clarity returns. - Seal Against UV Damage
Apply a UV-blocking sealant or clear coat specifically designed for headlights. Products like Novus #2 or 3M Headlight Sealant form a protective barrier against future oxidation. - Maintain Regularly
Wash headlights with the rest of the car. Reapply sealant every 6–12 months depending on climate exposure.
Comparison: DIY Methods vs. Professional Restoration
| Method | Cost | Effectiveness | Lifespan | Risks |
|---|---|---|---|---|
| Toothpaste (DIY) | $2–$5 | Low – minor surface cleaning | 1–4 weeks | Micro-scratches, no UV protection |
| Baking Soda Paste | $1 | Low to Moderate – slight polishing | 2–6 weeks | Surface marring, moisture retention |
| Sand & Polish Kit (DIY) | $15–$30 | High – removes oxidation | 6–18 months | Improper sanding can ruin lens |
| Professional Restoration | $75–$150 | Very High – includes UV sealant | 2–4 years | Minimal, if shop is reputable |
| Headlight Replacement | $150–$400+ | Complete renewal | 5+ years | Expensive, unnecessary unless cracked |
Real Example: Sarah’s 2014 Honda Civic
Sarah, a rideshare driver in Phoenix, noticed her headlights had turned almost amber after three summers of daily sun exposure. Her cousin suggested baking soda and vinegar. She tried it—rubbing the paste in with a rag. The lenses looked slightly better for about ten days. Then, after a rainstorm, they appeared cloudier than before.
Frustrated, she bought a $20 sanding and polishing kit. Following online tutorials, she spent two hours carefully wet-sanding and buffing each headlight. After applying a UV sealant, the difference was dramatic: the beams were whiter, brighter, and projected farther down the road. Eight months later, with biannual maintenance, they still look factory-fresh.
Her takeaway? “The baking soda trick wasted my time. The real solution took effort, but it was worth it for safety and savings.”
Checklist: How to Safely Restore Cloudy Headlights at Home
- ☐ Gather supplies: 1000, 1500, 2000-grit wet/dry sandpaper, plastic polish, UV sealant, foam pads, painter’s tape, bucket of water
- ☐ Wash and dry headlights thoroughly
- ☐ Tape off surrounding paint and trim
- ☐ Soak sandpaper in water for 5+ minutes
- ☐ Sand in straight-line motions (top to bottom or side to side), rinsing frequently
- ☐ Repeat with progressively finer grits (1500 → 2000)
- ☐ Apply plastic polish with a clean foam pad using circular motions
- ☐ Wipe off residue with microfiber cloth
- ☐ Apply UV-protective sealant evenly; allow full cure time (usually 1–2 hours)
- ☐ Remove tape and inspect results
Frequently Asked Questions
Can I prevent headlights from getting cloudy again?
Yes. While all polycarbonate lenses will eventually oxidize, you can slow the process significantly. Wash them regularly, apply a UV-blocking sealant every 6–12 months, and park in shade when possible. Some drivers use removable headlight covers for added protection.
Is it safe to drive with cloudy headlights?
Legally, many states require headlights to emit a white or selective yellow light without diffusion. Severely degraded lenses may fail safety inspections. More importantly, reduced output increases accident risk at night or in poor weather. NHTSA studies show vehicles with restored headlights have up to 30% better illumination, improving reaction time.
Are headlight restoration kits worth it?
For most drivers, yes. A quality kit costs less than $30 and lasts multiple restorations. Compared to professional service ($75+) or replacement ($150+ per unit), it’s a cost-effective way to maintain safety and aesthetics. Just ensure the kit includes a UV sealant—this step is critical for longevity.
Conclusion: Skip the Myths, Restore with Confidence
The appeal of fixing cloudy headlights with toothpaste or baking soda lies in simplicity and low cost. But convenience shouldn’t override effectiveness or safety. These methods may provide fleeting visual improvement, but they fail to address the underlying damage and offer no protection against rapid re-clouding.
True restoration requires removing oxidized layers and sealing the lens from UV exposure. Whether you choose a DIY sand-and-seal approach or professional service, prioritize solutions that include UV protection. Your visibility, safety, and vehicle’s appearance depend on it.


 浙公网安备
33010002000092号
浙公网安备
33010002000092号 浙B2-20120091-4
Comments
No comments yet. Why don't you start the discussion?