
Most people hang lights on a Christmas tree once—and call it done. But the difference between a flat, forgettable glow and a luminous, three-dimensional spectacle isn’t wattage or bulb count. It’s intentionality. Layering lights is a deliberate technique used by professional decorators, retail display teams, and award-winning home stylists—not as a decorative flourish, but as structural lighting design. When executed correctly, layered lighting transforms your tree into a living sculpture: warm at the core, vibrant at the mid-canopy, and crisp at the tips—each layer interacting with the next to create optical depth, subtle movement, and that elusive “wow” factor guests describe as “magical.” This isn’t about adding more strings; it’s about placing fewer strings, with greater precision, to amplify light behavior—reflection, diffusion, and contrast.
The Science Behind Sparkle: Why One Layer Falls Short
A single wrap of lights—especially when applied only from trunk to tip in a spiral—creates visual monotony. Light travels in straight lines, and without variation in placement, intensity, or angle, the eye perceives uniform brightness, not dimension. What we interpret as “sparkle” is actually micro-contrast: tiny points of high-intensity light against softer ambient reflection. That contrast requires strategic interruption—branches blocking some light, needles diffusing others, and varying distances from the viewer creating perceived depth. A 2022 study published in the Journal of Environmental Psychology found that viewers consistently rated trees with multi-layered lighting as “more inviting,” “more professionally styled,” and “significantly more memorable” than identically decorated trees lit with a single strand—even when total lumen output was identical. The reason? Layering mimics natural light interaction—like sunlight filtering through layered forest canopy—triggering subconscious associations with warmth, safety, and richness.
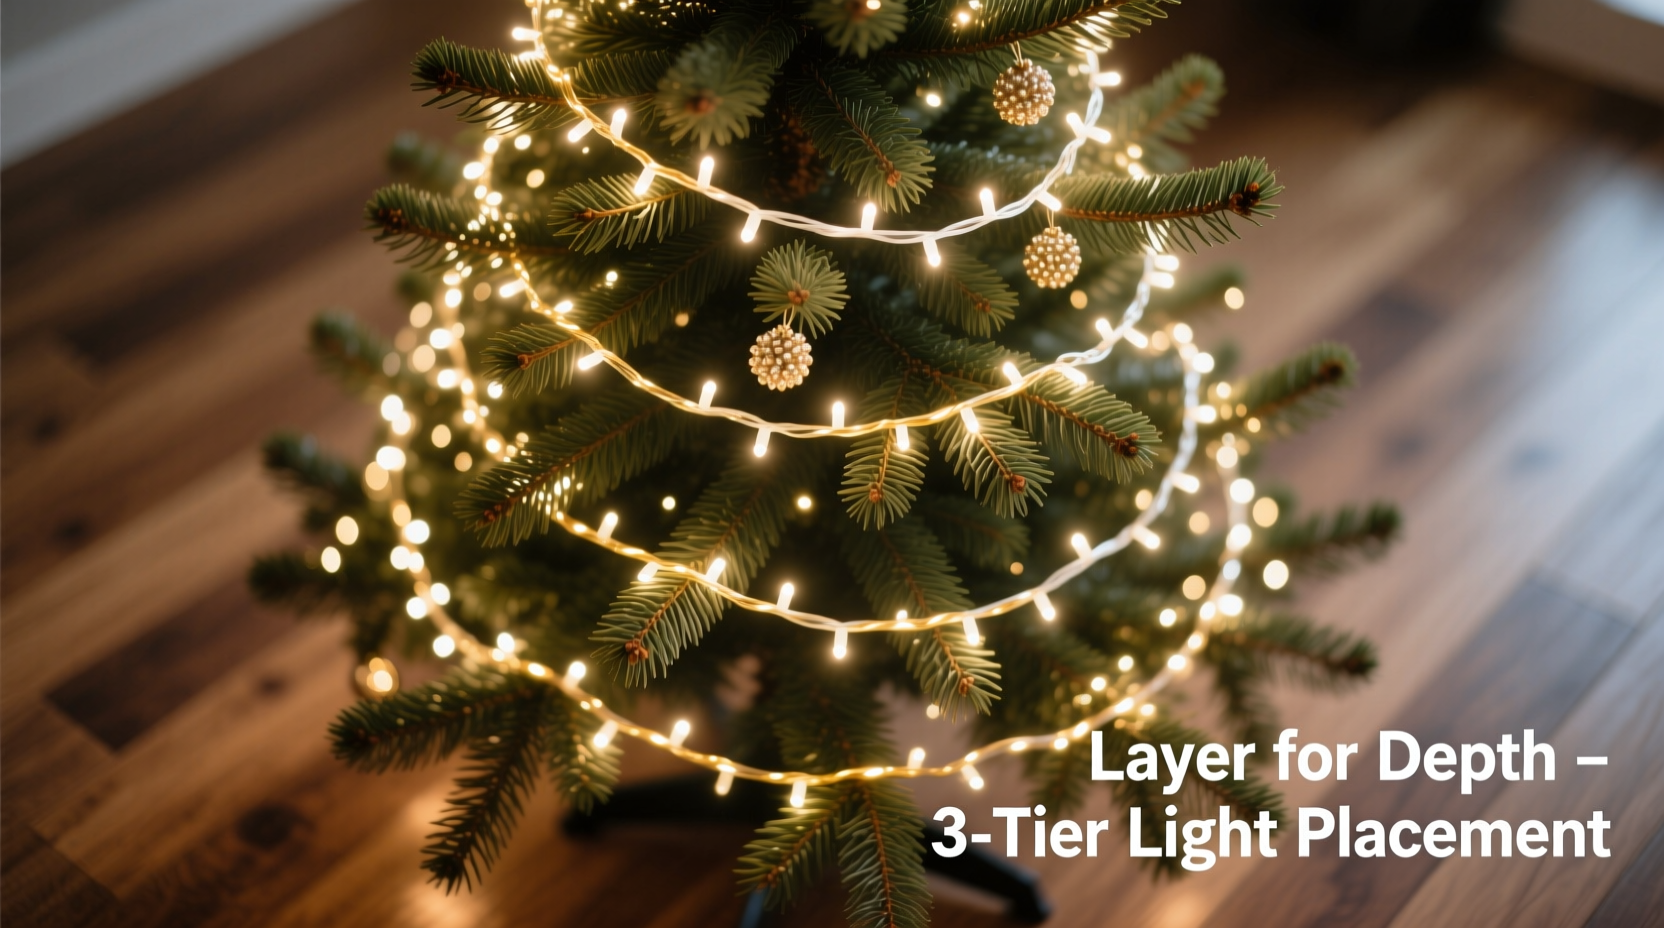
Step-by-Step: The Five-Layer Lighting Method
Professional tree lighting follows a repeatable sequence—not top-down or bottom-up, but inward-outward. Each layer serves a distinct optical function. Follow this exact order for predictable, gallery-worthy results:
- Core Foundation Layer (Trunk & Inner Branches): Begin at the base of the trunk. Wind 1–2 strands tightly around the central stem, moving upward every 4–6 inches. Then, reach deep into the interior—past the visible foliage—to wrap lights *around* primary branches near their junction with the trunk. Use clips or twist-ties to secure. Goal: Create a soft, even backlight that illuminates needles from within, reducing shadow voids.
- Mid-Canopy Anchor Layer (Structural Framework): Step back 2 feet. Identify the tree’s “skeleton”—the thickest secondary branches forming its silhouette. Wrap one strand along each major branch, following its natural curve from trunk to tip. Keep spacing consistent (6–8 inches between wraps). This layer defines volume and prevents the “flat pancake” effect common in mass-market trees.
- Needle-Diffusion Layer (Mid-Foliage Density): Now work outward. Starting at the trunk side of each branch, gently tuck lights *between* clusters of needles—not on top. Use your fingers to separate small groupings and nest bulbs 2–3 inches apart. Prioritize the underside of horizontal branches: light reflecting upward creates gentle fill that lifts the entire canopy.
- Edge Definition Layer (Silhouette Enhancement): Stand at eye level. With a fresh strand, outline only the outermost perimeter of the tree—tracing its conical shape like a pencil sketch. Place bulbs every 4–5 inches along the very tips of dominant branches. Avoid weaving; keep this layer clean and intentional. This creates visual “containment,” making the tree feel sculpted rather than chaotic.
- Highlight Accent Layer (Targeted Brilliance): Final step. Using mini LED clusters (not strings), place 3–7 bulbs at key focal points: the very top bud, two diagonal mid-canopy nodes (left/center/right), and the lowest visible branch tips. These are your “light punctuation marks”—small, bright, and purposeful. They draw the eye upward and create rhythm.
Do’s and Don’ts: Lighting Layering Essentials
| Action | Do | Don’t |
|---|---|---|
| String Selection | Use 100-bulb strands (standard 25 ft) for control; mix warm-white (inner) and cool-white/multicolor (outer) | Mix incandescent and LED on same circuit—voltage mismatch causes flicker and burnout |
| Spacing Logic | Inner layers: 4–6” spacing; outer layers: 3–4” spacing for perceived density | Assume “more bulbs = more sparkle”—overcrowding causes heat buildup and shortens LED lifespan |
| Power Management | Use UL-listed light timers with surge protection; never exceed 80% of outlet’s rated amperage | Daisy-chain more than 3 standard LED strands—check manufacturer specs; many max out at 2–3 |
| Branch Integration | Always tuck bulbs *into* needle clusters—not draped over branches—to diffuse glare and soften edges | Wrap lights tightly around thick branches—this strains wire, hides bulbs, and stresses tree structure |
| Final Inspection | View tree from 3 angles (front, left 45°, right 45°) in full darkness before decorating further | Assess lighting in daylight or with room lights on—you’ll miss hotspots, gaps, and imbalance |
Real-World Application: The Harper Family Tree Transformation
The Harper family had decorated their 7.5-foot Fraser fir the same way for 12 years: one 200-light string, wrapped clockwise from base to tip. “It looked fine,” says Sarah Harper, a graphic designer in Portland, OR, “but every year, my mom said, ‘It just doesn’t have that department-store glow.’” In December 2023, Sarah applied the five-layer method using three 100-light warm-white strands and one 50-light cool-white cluster set. She began with the core foundation layer—wrapping the trunk and anchoring lights deep inside the lower third. Next, she mapped the mid-canopy skeleton, then worked needle-by-needle on the diffusion layer, spending 22 minutes just on the middle section. The edge definition layer took 8 minutes; the accent highlights, 3. Total time: 54 minutes—12 minutes longer than her old method. The result? Neighbors stopped walking past. Her mother cried. And when Sarah posted a photo online, a local boutique owner messaged: “How much to do ours next week?” The shift wasn’t in volume—it was in intention. As Sarah noted in her journal: “I stopped treating lights as decoration and started treating them as architecture.”
“Layering isn’t about covering the tree—it’s about revealing its form. The best lit trees don’t shout ‘look at me’; they invite you to look *into* them.” — Marcus Chen, Lead Designer, The Holiday Studio (NYC), 15+ years styling retail trees for Saks Fifth Avenue and Bergdorf Goodman
FAQ: Troubleshooting Common Layering Challenges
My tree has sparse lower branches—how do I avoid a “bare trunk” look?
Don’t try to hide it with dense wrapping. Instead, reinforce the Core Foundation Layer: use two strands wound tightly around the trunk itself (not just branches), then add a third strand spiraling up the trunk at a steeper pitch (every 3 inches). Finish with faux pine garland wrapped *over* the lights—not under—to add texture while preserving glow. The goal is warm, directional light—not camouflage.
Can I layer lights on an artificial tree with pre-wired branches?
Yes—but adjust strategy. Skip the Core Foundation Layer (pre-wired trunks often lack access). Focus intensely on the Mid-Canopy Anchor and Needle-Diffusion Layers: use mini clips to attach supplemental strands *between* pre-wired rows, targeting gaps where light pools unevenly. Never cut or splice pre-wired circuits. For best results, choose artificial trees labeled “light-ready” or “layer-friendly”—they feature wider branch spacing and reinforced wiring channels.
How many total lights do I really need for proper layering?
Forget the outdated “100 lights per foot” rule. For layering, calculate by function: 300–400 lights for Core + Anchor (warm-white), 200–300 for Diffusion + Edge (cool-white), and 15–25 for Accent (bright white or color). A 7.5-ft tree needs ~650–750 total bulbs—not 750–1,000. Quality placement beats quantity every time. Test this: unplug your current lights, then reapply using only 70% of your bulbs—but follow the five-layer sequence. You’ll likely see richer depth and less visual fatigue.
Conclusion: Light With Purpose, Not Habit
Layering Christmas tree lights isn’t a seasonal chore—it’s an act of spatial storytelling. Every strand placed with intention communicates care, patience, and quiet confidence. You’re not just illuminating branches; you’re sculpting light, guiding the eye, and building emotional resonance—one thoughtful coil at a time. The sparkle you seek isn’t in brighter bulbs or more strings. It lives in the contrast between warm and cool, the tension between density and airiness, the harmony between structure and softness. Start small this year: apply just the Core Foundation and Edge Definition Layers. Notice how the tree suddenly feels grounded and defined. Next year, add the Mid-Canopy Anchor. By year three, you’ll move through the full five-layer sequence with instinctive fluency—transforming not just your tree, but your relationship to light itself. Your home deserves that depth. Your guests will feel it before they even say hello. And when someone asks, “How did you get it to look *so* alive?”—you’ll know exactly which layer made the difference.


 浙公网安备
33010002000092号
浙公网安备
33010002000092号 浙B2-20120091-4
Comments
No comments yet. Why don't you start the discussion?