
Fairy lights bring warmth, charm, and magic to any space—whether draped across a bedroom ceiling, wrapped around a patio railing, or woven through a bookshelf. But anyone who’s wrestled with a knotted mess of wires knows the frustration that comes after just one enthusiastic unboxing. When layering multiple strands for a fuller, more immersive glow, the risk of tangles multiplies significantly. The good news: with the right approach, you can create stunning layered displays while keeping your lights organized, functional, and ready for next season.
This guide dives into practical techniques, tested strategies, and expert-backed methods to help you layer multiple strands of fairy lights efficiently and without the headache. From preparation and planning to coiling, installation, and off-season storage, every step is designed to preserve both the beauty and longevity of your lighting setup.
Plan Your Layout Before Installation
The foundation of a tangle-free fairy light display starts long before you plug anything in. Begin by visualizing where each strand will go. Are you aiming for a cascading effect from the ceiling? A symmetrical grid across a wall? Or perhaps a spiral wrap around a banister?
Sketching a rough diagram—even on paper or mentally—helps determine how many strands you’ll need and how they’ll interact spatially. Overlapping paths increase the likelihood of snags during installation and removal, so plan routes that run parallel or have minimal crossing points.
Consider the power source location. Most fairy light sets come with a lead wire (the non-lit section between the plug and first bulb). Position your outlet strategically so multiple strands can originate nearby without needing extension cords that create clutter or strain.
Choose Compatible Strands for Seamless Layering
Not all fairy lights are created equal—and mixing incompatible types increases complexity. To simplify layering, use strands with consistent features:
- Same length: Uniform lengths make spacing predictable and reduce excess wire.
- Identical plug orientation: Some sets have end-to-end connectors; others don’t. Using mismatched plugs forces awkward routing.
- Matching wire gauge and flexibility: Thicker wires resist bending but may not drape well; thinner ones are pliable but prone to kinking.
If purchasing new lights, opt for commercial-grade LED strings marketed as “connectable” or “daisy-chainable.” These often allow up to 20+ sets to be linked safely, reducing the number of individual power runs.
“Consistency is key when layering lights. Mismatched voltages or connection types not only complicate setup but can also pose fire hazards if overloaded.” — Marcus Lin, Residential Lighting Technician
Step-by-Step Guide: Installing Multiple Strands Without Tangling
Once your materials are selected and layout planned, follow this sequence to install layered fairy lights smoothly and efficiently.
- Unbox and inspect each strand: Lay them flat on a clean surface like a bed or large table. Check for broken bulbs, frayed wires, or loose connections.
- Untangle gently before deployment: If minor knots exist, work them out slowly using the “shake-and-roll” method—hold one end and let the strand fall loosely into your other hand, shaking slightly to loosen snarls.
- Assign roles to each strand: Label them (e.g., “Top Row,” “Center Drop”) with small tags or colored tape to maintain order during installation.
- Install mounting hardware first: Use adhesive clips, curtain rod hooks, or clear zip ties anchored to discreet points. Space them according to your design—typically every 12–18 inches.
- Feed one strand at a time: Start with the outermost or background layer. Thread carefully through clips, avoiding sharp bends or pinching.
- Secure slack neatly: If a strand ends before the power source, coil excess near the outlet using an over-under technique (explained below).
- Add subsequent layers: Only introduce the next strand once the previous one is fully secured. Work from back to front, top to bottom.
- Test incrementally: Plug in each strand individually after placement to ensure functionality before covering it with another layer.
This method prevents accidental entanglement during installation and makes troubleshooting easier if one section fails.
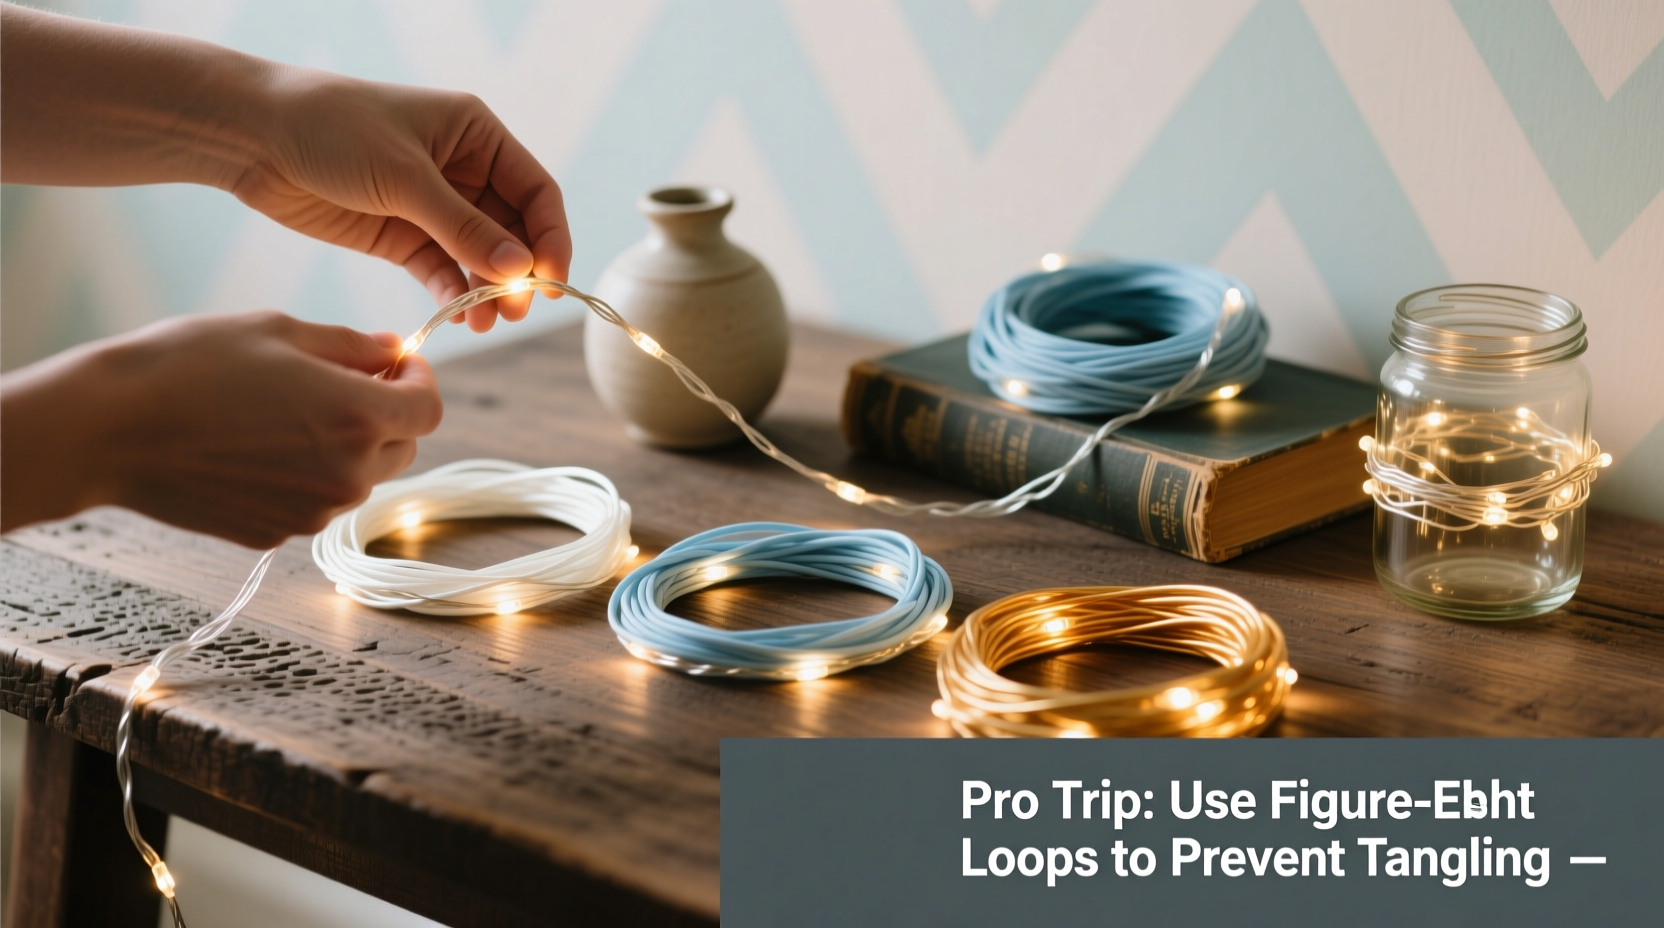
Master the Over-Under Coiling Technique
One of the most effective ways to prevent tangles—not just during storage but also during setup—is mastering proper coiling. The common “wrap-around-elbow” method creates twisted loops that inevitably knot when unraveled.
Instead, use the over-under technique, widely used by electricians and stage technicians:
- Hold the plug end securely in one hand.
- With the other hand, pick up the wire about 12 inches down.
- Create a loop by bringing the wire over the top, then under on the return—alternating each time.
- Continue this pattern: over, under, over, under…
- After every few loops, bundle them together and secure with a soft fabric tie or velcro strap—never metal or tight rubber bands.
This alternating motion cancels out twists, preserving the wire’s natural lay. When uncoiled, the strand feeds out cleanly, almost snake-like, without resistance.
Storage Solutions That Prevent Future Tangles
Even a perfectly installed display can become a nightmare next year if stored improperly. How you pack away your fairy lights determines whether they’ll be ready to go—or require 30 minutes of detangling—with each reuse.
Avoid tossing strands into a box or drawer loose. Instead, adopt one of these proven storage systems:
- Cardboard spool method: Cut a rectangle of corrugated cardboard (6x10 inches), notch both short ends, and wind the light strand around it using the over-under pattern.
- Paper towel roll: Slide the coiled strand into an empty roll. Seal ends with tape and label the outside.
- Original packaging: If retained, original boxes often include built-in wire guides. Reuse them whenever possible.
- Dedicated light reels: Purchase plastic winding reels designed for Christmas or decorative lighting—ideal for heavy or outdoor-duty strands.
Store containers in a cool, dry place away from rodents, which may chew insulation. Avoid attics or garages with extreme temperature swings unless sealed in airtight bins.
Do’s and Don’ts of Fairy Light Storage
| Do | Don’t |
|---|---|
| Use soft ties like fabric strips or velcro | Use rubber bands or metal twist ties |
| Label each strand by location or color | Assume you’ll remember which is which |
| Store in climate-stable areas | Leave in damp basements or hot sheds |
| Inspect before storing and after retrieval | Store damaged or frayed strands without repair |
| Keep spare bulbs and fuses in the same container | Mix indoor and outdoor-rated lights without distinction |
Real Example: Layering Lights in a Studio Apartment Bedroom
Sophie, a freelance designer in Portland, wanted to transform her small bedroom into a cozy retreat. She purchased six 15-foot warm-white fairy light strands to layer across the ceiling in a radial pattern from the center fixture.
Initially overwhelmed by the thought of managing so many wires, she followed a structured process. First, she taped a star-shaped template on the ceiling with marked endpoints. Then, she labeled each strand 1 through 6 and pre-coiled them using the over-under method.
She installed adhesive clips along each spoke of the star, starting with the longest arc. One by one, she fed each strand from the central plug hub outward, securing every 12 inches. After each installation, she plugged it in to confirm operation.
The entire process took 70 minutes—far less than the two hours she’d anticipated—and the result was a seamless, glowing canopy. At season’s end, she removed each strand in reverse order, re-coiled using cardboard spools, and stored them in a labeled bin under her bed. The following year, setup took only 40 minutes thanks to her organization.
“The difference between chaos and calm with fairy lights is five minutes of planning. Sophie’s system could scale to ten strands with no added complexity.” — Lena Tran, Interior Stylist & Lighting Consultant
Checklist: Tangle-Free Fairy Light Layering
Use this checklist before, during, and after installation to ensure smooth results every time:
- ☐ Assess total number of strands needed based on coverage area
- ☐ Choose uniform-length, connectable sets where possible
- ☐ Sketch layout with power source and anchor points marked
- ☐ Inspect each strand for damage before use
- ☐ Label each strand for easy identification
- ☐ Install mounting hardware (clips, hooks) first
- ☐ Use over-under coiling when handling or storing
- ☐ Install one strand at a time, securing fully before adding next
- ☐ Test each strand immediately after placement
- ☐ Coil and store properly after use using protective reels or cardboard
Frequently Asked Questions
Can I mix different colors or styles when layering fairy lights?
Yes, but do so intentionally. Mixing too many colors or bulb shapes can create visual clutter. For a cohesive look, limit combinations to two tones (e.g., warm white and soft gold) or use varied textures (twinkling + steady) in the same hue. Always test the combination lit before final installation.
How many fairy light strands can I safely connect together?
Most manufacturers recommend connecting no more than 4–6 sets end-to-end for standard indoor strings. Check the product label for “maximum connectable” limits. Exceeding this can overload circuits, cause flickering, or create fire risks. Use a power strip with surge protection for additional strands instead of daisy-chaining beyond safe limits.
What should I do if my fairy lights arrive already tangled?
Place the bundle on a flat surface and begin gently loosening the outer loops. Never pull sharply—this tightens knots. Use the shake-and-feed method: hold one end and let gravity help unravel the rest into your palm. For stubborn tangles, lightly mist the wire with water (power off!) to reduce friction, then work knots apart with fingers or a blunt tool like a chopstick.
Conclusion: Illuminate with Confidence
Layering multiple strands of fairy lights doesn’t have to mean sacrificing sanity for sparkle. With thoughtful planning, disciplined handling, and smart storage, you can achieve rich, immersive lighting effects that elevate any room—year after year.
The secret lies not in speed, but in system. Taking a few extra minutes to label, coil correctly, and install methodically pays exponential dividends in ease, safety, and aesthetic quality. Whether you’re creating a dreamy bedroom ceiling, a festive holiday mantle, or a whimsical backyard lounge, the principles remain the same: prepare, protect, and proceed one strand at a time.


 浙公网安备
33010002000092号
浙公网安备
33010002000092号 浙B2-20120091-4
Comments
No comments yet. Why don't you start the discussion?