
As the holiday season approaches, homes come alive with lights, music, and handmade decorations that carry personal meaning. One of the most charming traditions is crafting outdoor or indoor holiday displays—and few figures are as iconic as the reindeer. Instead of purchasing yet another seasonal decoration made from non-recyclable plastics, consider building your own lighted reindeer using materials already in your home. This project transforms discarded items into a glowing centerpiece that’s both sustainable and full of character.
Creating a DIY lighted reindeer from recycled materials isn’t just about saving money—it’s about reducing waste, exercising creativity, and adding a unique touch to your holiday ambiance. With basic tools, a bit of patience, and an eye for repurposing, you can design a festive figure that stands out on your lawn or porch. Whether you're working with cardboard boxes, old wire hangers, plastic bottles, or leftover holiday lights, this guide walks you through every step to bring your eco-conscious reindeer to life.
Why Build with Recycled Materials?
The environmental impact of seasonal decor is often overlooked. Millions of plastic inflatables and light-up figures are produced each year, many of which end up in landfills after only a few uses. By choosing to build with recycled materials, you actively reduce single-use consumption and model sustainable practices for family and neighbors.
Beyond sustainability, there's satisfaction in creating something functional and beautiful from what others might discard. A homemade reindeer made from cardboard tubes, scrap wood, or reclaimed mesh fencing becomes more than decoration—it becomes a statement of ingenuity and care.
“Upcycling holiday decor not only cuts down on waste but fosters deeper connection to the season through hands-on creation.” — Dr. Lila Chen, Environmental Educator & Sustainable Design Advocate
Materials You Can Repurpose
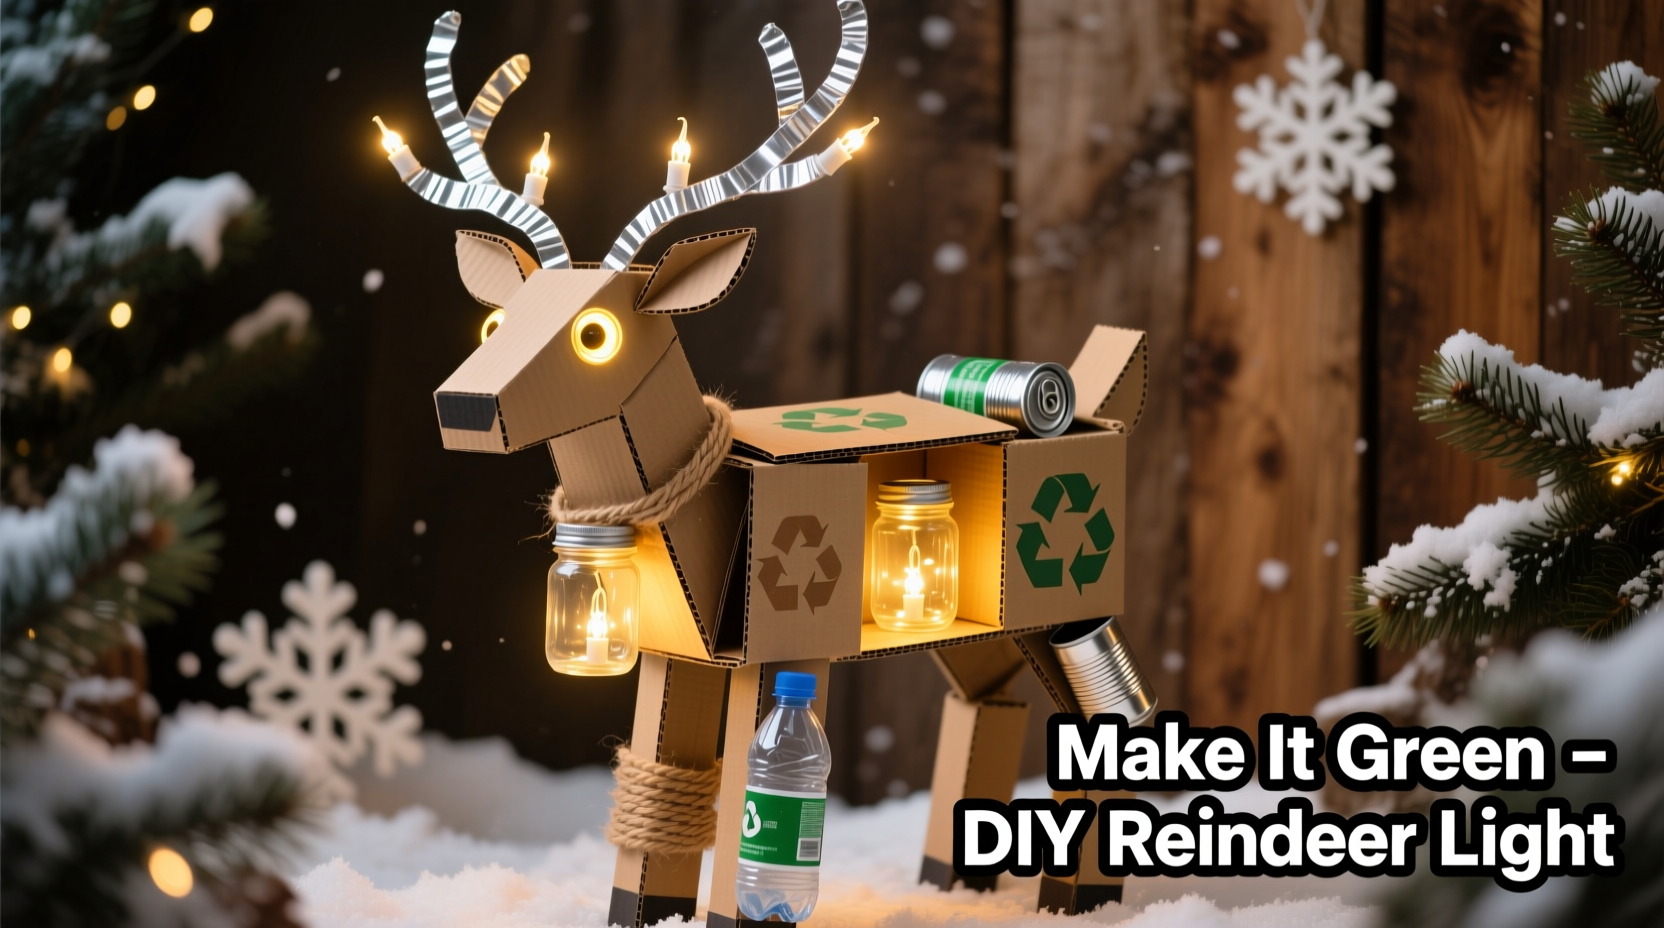
The foundation of any successful recycled craft lies in identifying usable materials before buying anything new. Most households accumulate items perfect for structural framing, body shaping, and lighting integration. Below is a list of common household discards and their potential uses in your reindeer build:
| Material | Source | Best Use in Reindeer Project |
|---|---|---|
| Cardboard boxes (medium to large) | Shipping packages, appliance deliveries | Body panels, head structure, antler base |
| Metal wire hangers | Clothing storage | Antlers, leg supports, internal frame |
| Plastic bottles (1–2L) | Recycling bin | Leg forms, illuminated body sections |
| Old wire shelving or mesh fencing | Garage or garden storage | Skeletal frame, light diffusion layer |
| Leftover holiday string lights (LED preferred) | Pantry or storage closet | Illumination, decorative outlining |
| Wood scraps or broken pallets | Renovation projects | Sturdy base, mounting platform |
| Aluminum cans | Recycling bin | Nose detail, small reflective accents |
Before starting, gather and clean these materials. Flatten cardboard, straighten wires, and remove labels from bottles. Sorting them by function—structure, surface, lighting—will streamline your workflow.
Step-by-Step Construction Guide
Building a lighted reindeer involves three main phases: framing, shaping, and lighting. Follow this timeline-based approach to ensure durability and visual appeal.
- Design Your Reindeer Silhouette (30–60 minutes)
Sketch a side profile of a reindeer on paper—focus on proportions: long neck, arched back, slender legs. Use reference images to capture classic features like perked ears and antlers. Scale your drawing to desired size (e.g., 4-foot height). - Create the Internal Frame (1–2 hours)
Use wire hangers or bent metal rods to form the skeleton. Twist wires together at joints (neck-to-body, legs-to-torso) for stability. For larger builds, reinforce with wooden dowels or scrap lumber. Secure the base to a flat plank for outdoor stability. - Build Body Panels from Cardboard (1–3 hours)
Transfer your sketch to flattened cardboard. Cut two identical side profiles and connect them with horizontal strips of cardboard (like ribs) to give depth. Add cross-supports between legs and along the spine. Seal seams with packing tape for weather resistance. - Shape Antlers and Head Details (45–90 minutes)
Bend wire hangers into branching antler shapes. Attach securely to the head using epoxy or zip ties. Cover thin wires with masking tape to prevent snagging later. For the face, cut eye sockets and a snout opening from cardboard. - Incorporate Lighting (1 hour)
Wrap LED string lights around the wire frame, focusing on edges and contours. Weave lights through mesh sections or coil them inside translucent plastic bottles used as legs. Avoid covering bulbs with flammable materials. Plug into a timer for automatic nightly display. - Weatherproofing (Optional, 30 minutes)
If displaying outdoors, seal exposed cardboard with clear waterproof spray or Mod Podge Outdoor. Wrap electrical connections in electrical tape and elevate off wet ground using small blocks. - Final Assembly & Placement (20 minutes)
Mount the reindeer on its base. Adjust stance for balance. Position in a visible area—near a walkway, beside the front door, or among other yard decor.
Enhancing Visual Appeal
To elevate your reindeer beyond a simple silhouette, consider texture and color. Paint the surface with acrylics in earthy browns or snowy whites. Use crumpled newspaper under a layer of glue-and-water paste (papier-mâché technique) to simulate fur texture. Glue on bottle caps for hooves or use red spray-painted aluminum cans as a glowing nose.
If using plastic bottles for legs, fill them partially with sand for weight and cap tightly. Insert mini LED fairy lights inside for a soft internal glow. These illuminated limbs add dimension and catch attention at night.
Checklist: Building Your Lighted Reindeer
Stay organized with this actionable checklist. Print or save it digitally to track progress:
- ☐ Collect and sort recyclable materials (cardboard, wire, bottles, lights)
- ☐ Clean and prep surfaces (remove labels, flatten cardboard)
- ☐ Sketch reindeer design to scale
- ☐ Build internal wire frame and secure to base
- ☐ Cut and assemble cardboard body panels
- ☐ Shape and attach antlers
- ☐ Integrate LED string lights along frame and key features
- ☐ Seal exposed surfaces if intended for outdoor use
- ☐ Test lighting setup and timer function
- ☐ Place reindeer in chosen display location
A Real Example: The Neighborhood Upcycled Display
In Portland, Oregon, community member Marcus Reed transformed his front yard into a winter wonderland using only recycled materials. Last December, he built a trio of lighted reindeer from discarded appliance boxes, old Christmas lights, and salvaged chicken wire. Each reindeer stood over five feet tall, with coiled copper wires forming intricate antlers and milk jugs painted white serving as glowing legs.
“I didn’t want to buy another inflatable,” Marcus said. “My kids helped cut the cardboard, and we spent weekends assembling them. Neighbors started stopping by just to see the display. One even asked how they could make one themselves.”
His reindeer lasted the entire month, surviving light rain thanks to a quick coat of outdoor sealant. After the holidays, the cardboard was composted, wires saved for future projects, and lights reused. Marcus estimates he spent less than $10 overall—mostly on glue and paint.
Safety and Practical Considerations
While creativity is encouraged, safety must remain a priority—especially when combining electricity and outdoor elements.
- Use only UL-listed or certified LED lights, preferably battery-operated or with GFCI-protected extension cords.
- Never bury cords under snow or run them through puddles. Elevate connections using bricks or plastic risers.
- Avoid open flames near any part of the structure, especially cardboard or plastic.
- Supervise children during construction—wire ends can be sharp; hot glue guns require caution.
- Disassemble promptly after the season to prevent moisture damage and pest nesting.
For renters or those without outdoor space, scale down the design for indoor use. A tabletop version fits on mantles or shelves and still delivers festive charm.
Frequently Asked Questions
Can I leave my DIY reindeer outside all winter?
Only if properly sealed against moisture. Unprotected cardboard degrades quickly in rain or snow. Use waterproof sprays and place under eaves or temporary cover. For long-term outdoor use, consider switching to more durable recycled materials like PVC pipes or metal mesh.
What kind of lights work best?
LED string lights are ideal—they produce minimal heat, consume little energy, and last thousands of hours. Choose warm white for a cozy glow or multicolor for playful flair. Battery-powered sets offer cord-free flexibility but require frequent replacements.
How do I store the reindeer for next year?
If reusable, disassemble carefully. Store flat cardboard pieces in a dry closet, wrap wires to prevent tangling, and keep lights coiled in labeled containers. Note any damage for repairs next season. However, composting worn cardboard and reusing components may be more sustainable than long-term storage.
Conclusion: Light Up the Holidays Sustainably
Creating a DIY lighted reindeer from recycled materials blends artistry, resourcefulness, and environmental responsibility. It turns everyday waste into a symbol of joy and imagination, reminding us that celebration doesn’t require excess. Every twisted wire, painted bottle, and glowing bulb tells a story of renewal and care.
This holiday season, skip the mass-produced decor and invest time in something meaningful. Invite family members to join, turning construction into a shared tradition. Share photos online with #UpcycledReindeer to inspire others. When your reindeer lights up the night, know that it shines not just with electricity—but with purpose.


 浙公网安备
33010002000092号
浙公网安备
33010002000092号 浙B2-20120091-4
Comments
No comments yet. Why don't you start the discussion?