
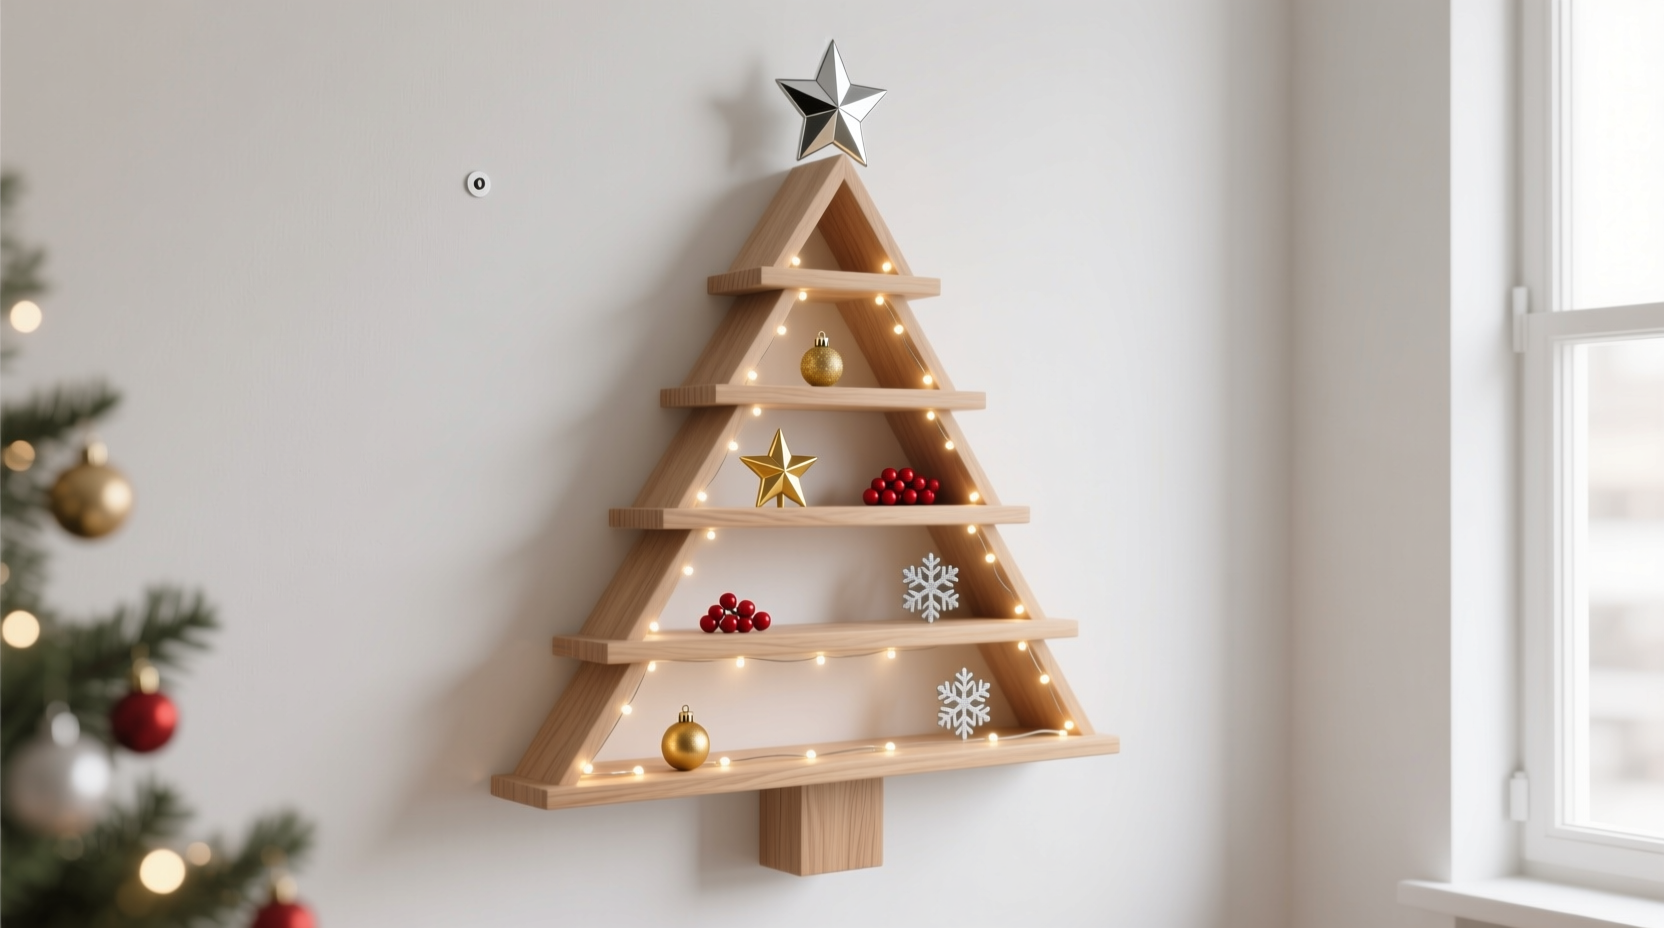
When square footage is scarce—whether you’re in a 300-square-foot studio, a college dorm room, or a compact urban apartment—the traditional freestanding Christmas tree becomes an impractical luxury. Floor space is precious. Corners are occupied. Doorways are narrow. Yet the desire for holiday warmth, visual cheer, and seasonal ritual remains undiminished. That’s where the floating shelf Christmas tree comes in: a clever, minimalist, and surprisingly festive solution that transforms a simple wall-mounted shelf into a vertical evergreen silhouette. It’s not just décor—it’s spatial intelligence dressed in pine-scented ingenuity.
This isn’t a compromise. It’s a reimagining. With careful planning, thoughtful material selection, and attention to balance and safety, a floating shelf tree delivers genuine holiday presence without claiming a single square inch of floor. It anchors the room visually, invites personalization, and works beautifully in kitchens, hallways, home offices, or above mantels—even in rental units where drilling into walls requires permission (and where removable solutions matter).
Why This Works Where Other Trees Don’t
The floating shelf Christmas tree succeeds because it answers three core constraints of tiny-space living:
- Floor-free footprint: No base, no stand, no trunk taking up valuable real estate—just clean wall integration.
- Modular scalability: You choose how tall (3 shelves? 5? 7?) and how wide (narrow hallway vs. broad accent wall) based on your available vertical space—not arbitrary “tree height” standards.
- Rental-friendly adaptability: Most floating shelves use toggle bolts or heavy-duty drywall anchors that leave minimal, repairable marks—far less intrusive than drilling for a full-height wall-mounted tree frame.
Interior designer Lena Ruiz, who specializes in micro-housing solutions, confirms its growing appeal:
“Clients used to ask, ‘How do I fit a tree in here?’ Now they ask, ‘How do I make the wall feel like the heart of the season?’ The floating shelf tree shifts the question from limitation to intention.” — Lena Ruiz, Founder of Compact Living Studio
Materials & Tools: What You’ll Actually Need (No Overbuying)
Unlike DIY projects that demand specialty lumber or power tools, this build prioritizes accessibility and affordability. Most components are available at hardware stores, craft suppliers, or online marketplaces—and many can be repurposed from existing household items.
| Item | Purpose | Recommended Specs | Notes |
|---|---|---|---|
| Floating shelves | Structural “branches” forming the tree shape | 3–7 shelves; 12–24\" deep; 6–10\" wide; solid wood or high-density MDF preferred | Avoid particleboard with visible edges—finish matters for aesthetics. Pre-finished oak, walnut, or white-painted options reduce prep time. |
| Wall anchors | Secure mounting (critical for safety) | Heavy-duty toggle bolts (for drywall) or lag screws (for studs); rated for ≥50 lbs per shelf | Always locate studs using a reliable stud finder. If mounting between studs, toggles must support the *combined* weight of shelf + décor + potential accidental bump. |
| Tree template | Layout guide for shelf placement | Printable A4/Letter PDF or hand-drawn full-scale outline on kraft paper | Essential for symmetry. A true isosceles triangle layout ensures visual balance—base widest, top narrowest. |
| Decorations | Creating the “evergreen” effect | Miniature ornaments (wood, ceramic, felt), garlands (burlap, eucalyptus, faux pine), string lights (warm white, battery-operated), small figurines | Weight distribution is key: heavier items low, lighter items high. Avoid glass ornaments if shelf edges are unguarded. |
| Finishing touches | Polish & cohesion | Matte clear sealant (if staining raw wood), shelf edge trim (optional), small hook screws for hanging garlands vertically | A subtle 1/4\" bevel on shelf front edges softens the look and reduces visual harshness. |
Step-by-Step Build Guide: From Wall to Wonder
Follow this sequence precisely. Skipping steps—especially anchoring verification—risks instability and undermines the entire concept’s elegance.
- Measure & Plan Your Triangle: Identify your target wall area. Measure height (minimum 48\", ideal 60–72\") and width (max 36\"). Sketch an isosceles triangle within those bounds. Mark the apex (top shelf center point) and base corners (widest shelf endpoints). Use painter’s tape to lightly outline the triangle on the wall—this is your visual guide.
- Select Shelf Count & Spacing: For stability and proportion, use an odd number of shelves (3, 5, or 7). Space them 10–14\" apart vertically. The bottom shelf should sit 12–18\" above floor or furniture (e.g., above a desk or sideboard). The top shelf should land at least 6\" below ceiling or crown molding.
- Locate & Mark Studs: Use a digital stud finder to identify every stud in your marked zone. Mark centers with pencil. If your shelf positions don’t align with studs, plan toggle anchor placement now—account for drywall thickness (typically ½\" or ⅝\") when selecting toggle length.
- Mount Shelves—Top-Down & Level-Critical: Start with the top shelf. Drill pilot holes, insert anchors, and secure with level held flush against shelf underside. Recheck level *after* tightening—wood can shift slightly. Repeat for each shelf, using your taped triangle as alignment reference. Let anchors fully set (24 hours if recommended by manufacturer) before decorating.
- Style with Intentional Layering: Begin with garlands draped diagonally across shelves to imply boughs. Add ornaments in descending size and weight: largest/heaviest on lowest shelf, smallest/lightest on top. Tuck battery-powered micro LED strings beneath garlands for soft ambient glow. Finish with 1–3 focal pieces—a ceramic star, a brass reindeer, or a tiny woven basket—centered on the top shelf.
Real Example: Maya’s 220-Sq-Ft Downtown Studio
Maya, a graphic designer living in a converted loft with exposed brick and 9-foot ceilings, had exactly 24 inches of unbroken wall space beside her Murphy bed. Her previous “tree” was a single potted rosemary plant she’d decorated with red ribbons—charming but underwhelming. She opted for a five-shelf version using reclaimed maple shelves (14\" deep, finished with matte tung oil).
Her breakthrough came in styling: instead of uniform ornaments, she grouped items by texture—burlap-wrapped cinnamon sticks on the second shelf, matte ceramic stars on the fourth, and delicate dried orange slices strung with twine on the top. She added a single strand of warm-white fairy lights running vertically along the left edge of the triangle, anchored behind the shelves with adhesive clips. “It doesn’t look like a ‘substitute’ tree,” she says. “It looks like the wall *chose* to celebrate. And I vacuum under it every week—no hassle.”
Crucially, Maya mounted all shelves into studs (she got lucky—the brick wall had wooden furring strips behind plaster). Total build time: 3.5 hours. Cost: $89 (shelves, anchors, lights, ornaments). Result: A focal point that guests consistently photograph—not as a novelty, but as intentional design.
Do’s and Don’ts: Safety, Style & Sanity
These distinctions separate a polished, enduring installation from a precarious afterthought.
| Do | Don’t |
|---|---|
| Use identical shelf depths for clean geometry—even if spacing varies slightly | Mount shelves at uneven angles hoping “it’ll look organic” (it won’t—it’ll look unstable) |
| Anchor into studs whenever possible—or use commercial-grade hollow-wall anchors rated for dynamic load (not static weight alone) | Assume command strips or adhesive hooks can hold a decorated shelf (they cannot) |
| Choose decorations with low center-of-gravity: flat-backed ornaments, shallow bowls, or items that nest into shelf corners | Hang heavy glass balls or metal figurines near shelf edges without backing support |
| Test balance before finalizing: gently nudge each shelf corner. Any wobble means recheck anchors or add shims | Overcrowd shelves—leave 30% negative space for visual breathing room and light diffusion |
| Add subtle scent: tuck a few drops of fir essential oil onto a cotton ball tucked behind garland on the lowest shelf | Use scented candles or open-flame elements near shelves (fire hazard + heat warping) |
FAQ: Practical Questions Answered
Can I hang this on plaster or brick walls?
Yes—with appropriate anchors. For historic plaster (lath-and-plaster), use snap-toggle anchors designed for brittle substrates. For brick, use masonry screws with a hammer drill and carbide-tipped bit. Never use plastic anchors in masonry—they will fail. Consult a hardware specialist with photos of your wall type if unsure.
How do I keep ornaments from falling off angled shelves?
Two proven methods: First, apply museum putty (reusable, non-staining, holds up to 2 lbs per pea-sized dab) to ornament bases. Second, mount small, discreet L-brackets (1\" x 1\") to shelf fronts using finish nails—then rest ornaments against the vertical leg. Both are invisible from the front view and easily removed.
What if my wall has outlets or switches in the triangle zone?
Work around them. Shift your triangle layout slightly left or right—human eyes perceive symmetry within a 3-inch tolerance. Alternatively, integrate them: place a small battery-operated candle or miniature lantern directly over an outlet cover plate. The key is consistency: if you hide one switch, hide them all in the same way (e.g., with matching decorative plates).
Conclusion: Your Space, Elevated
A floating shelf Christmas tree does more than solve a spatial problem—it embodies a thoughtful, intentional approach to living well in constrained environments. It rejects the idea that festivity requires excess. Instead, it celebrates precision, curation, and quiet joy. Every shelf you mount, every ornament you place, every light you weave is a declaration: “This space is mine, and it deserves beauty—even in miniature.”
You don’t need vaulted ceilings or sprawling floors to create warmth. You need clarity of purpose, respect for your environment, and the willingness to see walls not as boundaries, but as canvases. The tools are accessible. The process is forgiving. And the result—a slender, luminous, deeply personal symbol of the season—is profoundly satisfying.
Start small: sketch your triangle tonight. Measure your wall tomorrow. By weekend’s end, you could have the first shelf secured—ready for its first ornament by Monday. That’s the power of this idea: it fits not just in tiny spaces, but into tight schedules and cautious budgets too.


 浙公网安备
33010002000092号
浙公网安备
33010002000092号 浙B2-20120091-4
Comments
No comments yet. Why don't you start the discussion?