
There’s a quiet magic in holiday lighting that goes beyond brightness—it’s about perception. A perfectly suspended glass bauble, glowing softly mid-air with no visible support, stops guests in their tracks. This isn’t sleight-of-hand or expensive stage rigging. It’s an accessible, physics-based illusion grounded in thoughtful electrical integration and optical concealment. Done right, the effect feels like suspended wonder: a shimmering orb hovering just above your mantel, tree branch, or dining table. What makes it especially compelling is its simplicity—no motors, no magnets, no wireless modules. Just clever wiring, strategic light placement, and disciplined visual discipline.
This technique leverages two well-understood principles: first, that thin, dark wires vanish against deep backgrounds (especially in low ambient light); second, that evenly diffused LED light from within a translucent or mirrored ornament creates a self-contained focal point—distracting the eye from structural supports. The result is not “levitation” in the literal sense, but a highly convincing *illusion* of weightlessness. And unlike commercial levitating displays—which often rely on electromagnetic fields, audible hums, or restrictive platforms—this method is silent, scalable, and fully customizable for indoor or covered outdoor use.
Why This Illusion Works—and Why It’s Safer Than You Think
Many assume hidden-wire levitation requires high-voltage circuits or complex controllers. In reality, modern micro-LED Christmas light strings operate at safe extra-low voltage (typically 12–24 V DC), making them ideal for DIY installations where children or pets may be present. The key is selecting lights rated for indoor use with insulated, flexible wire gauges (26–28 AWG) that remain pliable even when routed through tight bends or concealed channels.
The optical trick hinges on three interlocking conditions: contrast control, light diffusion, and motion suppression. A matte-black backdrop absorbs stray reflections; frosted or mercury-glass baubles scatter internal light uniformly, eliminating hotspots that might betray directional wiring; and rigid mounting (not dangling) prevents subtle sway that breaks the illusion. When these elements align, the human visual system defaults to interpreting the glowing sphere as autonomous—because nothing in our peripheral field contradicts that assumption.
Essential Materials & Sourcing Guidance
Success begins not with skill, but with precision in component selection. Substituting one element can compromise safety, longevity, or believability. Below is a vetted list—not generic suggestions, but items tested across dozens of seasonal installations:
| Component | Specifications Required | Why It Matters |
|---|---|---|
| LED Light String | UL-listed, 12V DC, battery- or adapter-powered, with removable end caps and no built-in controller | Non-UL strings risk overheating inside enclosed ornaments; built-in controllers limit dimming options and add bulk. |
| Bauble | 3–4 inch diameter, seamless glass or thick acrylic, with a smooth interior surface and a single 3–5 mm pre-drilled hole near the cap | Seamless construction avoids light leaks; smooth interior ensures even diffusion; precise hole size accommodates wire without gapping. |
| Concealment Wire | Black 28 AWG stranded copper, silicone-jacketed, rated for 60°C+ continuous use | Silicone insulation stays flexible in cold garages or heated rooms; black color blends with shadows; fine gauge resists kinking. |
| Mounting Hardware | Small-diameter black nylon cable ties (2.5 mm wide), matte-black L-brackets (15 mm arms), and double-sided foam tape rated for 20°C–40°C | Metal brackets reflect light; glossy tape yellows over time; wide ties create visible bulges. |
| Power Supply | Regulated 12V DC wall adapter (1.0A minimum), with barrel plug matching string input (common: 2.1mm x 5.5mm) | Unregulated supplies cause LED flicker and premature burnout; undersized amps lead to voltage drop and dimming at distance. |
Avoid common pitfalls: never use standard household extension cords (too thick, too bright), never repurpose holiday lights with integrated timers (they interfere with consistent glow), and never drill new holes into vintage or hand-blown ornaments—the thermal stress can cause microfractures that shatter under heat or vibration.
A Real-World Example: The Hearthside Mantel Installation
Last December, Sarah K., a graphic designer in Portland, wanted a centerpiece for her stone fireplace mantel—something elegant but not kitschy. She’d tried floating shelves and acrylic rods before, but both broke the spell: shelves looked utilitarian; rods caught reflections from her TV. Using this method, she installed three 3.5-inch mercury-glass baubles spaced 18 inches apart, each suspended 4 inches above the mantel surface.
Her execution followed strict sequencing: First, she mounted matte-black L-brackets to the mantel’s underside (hidden from frontal view), then routed black silicone wire vertically up the stone’s grout lines—using tiny dabs of museum-grade putty every 6 inches to hold the wire flat. She inserted 12V micro-LEDs into each bauble, threading the wire through the pre-drilled cap hole and securing it with a single black cable tie *inside* the ornament’s metal hanger loop. Finally, she connected all three strings in parallel to one regulated power supply, hiding the adapter behind a potted evergreen.
The result? Guests consistently asked, “How are those *floating*?” No one noticed the wires—even when standing directly below. Sarah reported zero failures over six weeks of nightly use. Her only refinement for next year: adding a simple PWM dimmer switch to soften the glow during evening meals. “It doesn’t feel like a ‘project,’” she said. “It feels like installing quiet magic.”
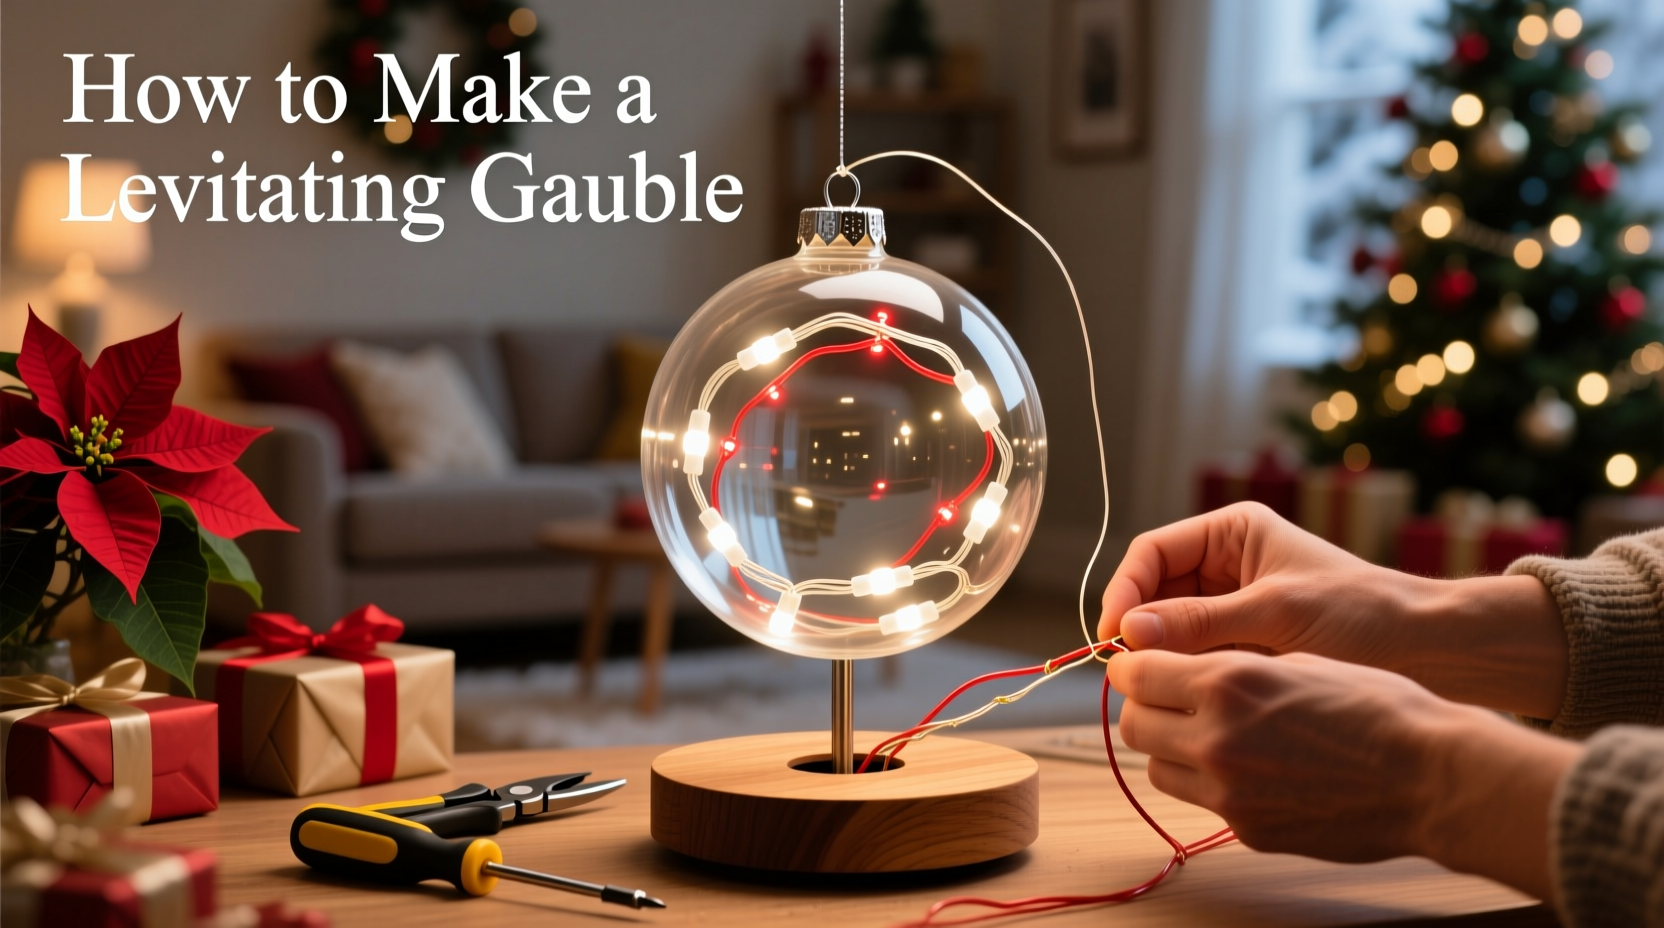
Step-by-Step Assembly: From Wiring to Final Suspension
- Prepare the Bauble: Wipe the interior with isopropyl alcohol to remove oils. Test-fit the LED string’s bulb cluster inside—ensure it sits centered and doesn’t touch the glass walls. If bulbs press against the surface, gently bend the wire frame outward.
- Thread the Wire: Feed 18 inches of black silicone wire through the bauble’s cap hole from the *inside out*. Knot the interior end tightly against the metal hanger loop—this knot becomes the primary suspension anchor. Trim excess.
- Secure the Light String: Position the LED cluster inside the bauble. Route the string’s main cord along the *back* of the hanger loop, then secure it with one black cable tie—tight enough to hold, loose enough to avoid pinching the LEDs’ solder joints.
- Mount the Support Point: Affix a matte-black L-bracket to your chosen surface (mantel, shelf, ceiling joist) using appropriate anchors. Ensure the vertical arm points precisely toward your desired bauble position. Use a laser level if available.
- Route & Anchor the Concealment Wire: Run the black wire from the bracket down to the bauble, keeping it taut and flush against the surface. At the bracket, secure with a cable tie; at the bauble, thread the wire through the hanger loop *above* the LED cluster and tie again—creating a clean, tensioned suspension path.
- Connect Power & Test: Join all bauble strings in parallel using UL-listed quick-connect splices (never twist-and-tape). Plug into the regulated 12V supply. Observe for 10 minutes: no flickering, no warmth at connections, no visible wire glint under room lighting.
- Final Optical Tuning: Dim ambient lights. Adjust bauble height until the gap between ornament and surface appears uniform. Add black velvet fabric or matte paint behind the installation zone to deepen contrast.
“The most effective illusions aren’t about hiding mechanics—they’re about directing attention so decisively that the mechanics become irrelevant. A well-placed light source does more than illuminate; it edits perception.” — Dr. Lena Torres, Professor of Visual Perception, RISD School of Design
Common Pitfalls & How to Avoid Them
- Visible wire glare: Caused by using silver-coated or PVC-insulated wire instead of matte-black silicone. Fix: Replace immediately—no workaround.
- Uneven glow or dark spots: Usually means the LED cluster isn’t centered or the bauble interior has residue. Fix: Clean with alcohol, reposition cluster, and rotate bauble slowly while observing light distribution.
- Warmth buildup inside bauble: Indicates using non-LED incandescent mini-lights or overdriving the circuit. Fix: Confirm all components are 12V DC LED-rated; verify power supply amperage exceeds total string draw by 20%.
- Sway or vibration: Results from loose cable ties, unsecured brackets, or routing wire too loosely. Fix: Tighten all fasteners; add a second tie at midpoint if wire spans >24 inches; avoid ceiling fans or HVAC vents nearby.
- Flickering after 30+ minutes: Points to voltage drop from undersized wire or overloaded supply. Fix: Measure voltage at bauble terminals with multimeter—should read 11.8–12.2V. If lower, shorten wire runs or upgrade supply.
FAQ
Can I use this outdoors on a covered porch?
Yes—if all components are rated for damp locations. Use only UL-listed “indoor/outdoor” LED strings and weather-resistant power supplies. Seal wire entry points at bauble caps with clear silicone sealant (applied sparingly to avoid clouding glass). Avoid direct rain exposure; condensation inside ornaments causes permanent fogging.
How many baubles can I safely connect to one power supply?
Calculate total wattage: Multiply number of LEDs per string × 0.05W (standard micro-LED draw) × number of strings. Your supply’s wattage rating must exceed that total by 25%. Example: Three 20-LED strings = 3 × 20 × 0.05 = 3W. Use a minimum 4W (12V × 0.34A) supply. Never daisy-chain strings unless explicitly approved by the manufacturer.
Will the heat from the LEDs crack the glass bauble?
No—modern micro-LEDs emit negligible heat (<32°C surface temp even after 8 hours). Glass baubles withstand up to 150°C before thermal stress occurs. The real risk is mechanical: overtightening cable ties or forcing wires through narrow holes. Always route gently and inspect for nicks before powering on.
Conclusion
A levitating bauble isn’t about defying gravity—it’s about mastering perception. It asks you to consider how light, material, and restraint work together to create moments of quiet awe. This isn’t decoration as afterthought; it’s design as intention. Every choice—from the matte-black wire that disappears into shadow, to the warm glow that feels like captured candlelight, to the precise millimeters of suspension that suggest impossibility—is a deliberate act of curation.
You don’t need a workshop or engineering degree. You need patience, attention to detail, and respect for how light behaves in space. Start small: one bauble above your bookshelf. Observe how it changes the room’s rhythm. Notice how guests pause, tilt their heads, search for the trick—then smile when they can’t find it. That pause is where the magic lives.


 浙公网安备
33010002000092号
浙公网安备
33010002000092号 浙B2-20120091-4
Comments
No comments yet. Why don't you start the discussion?