
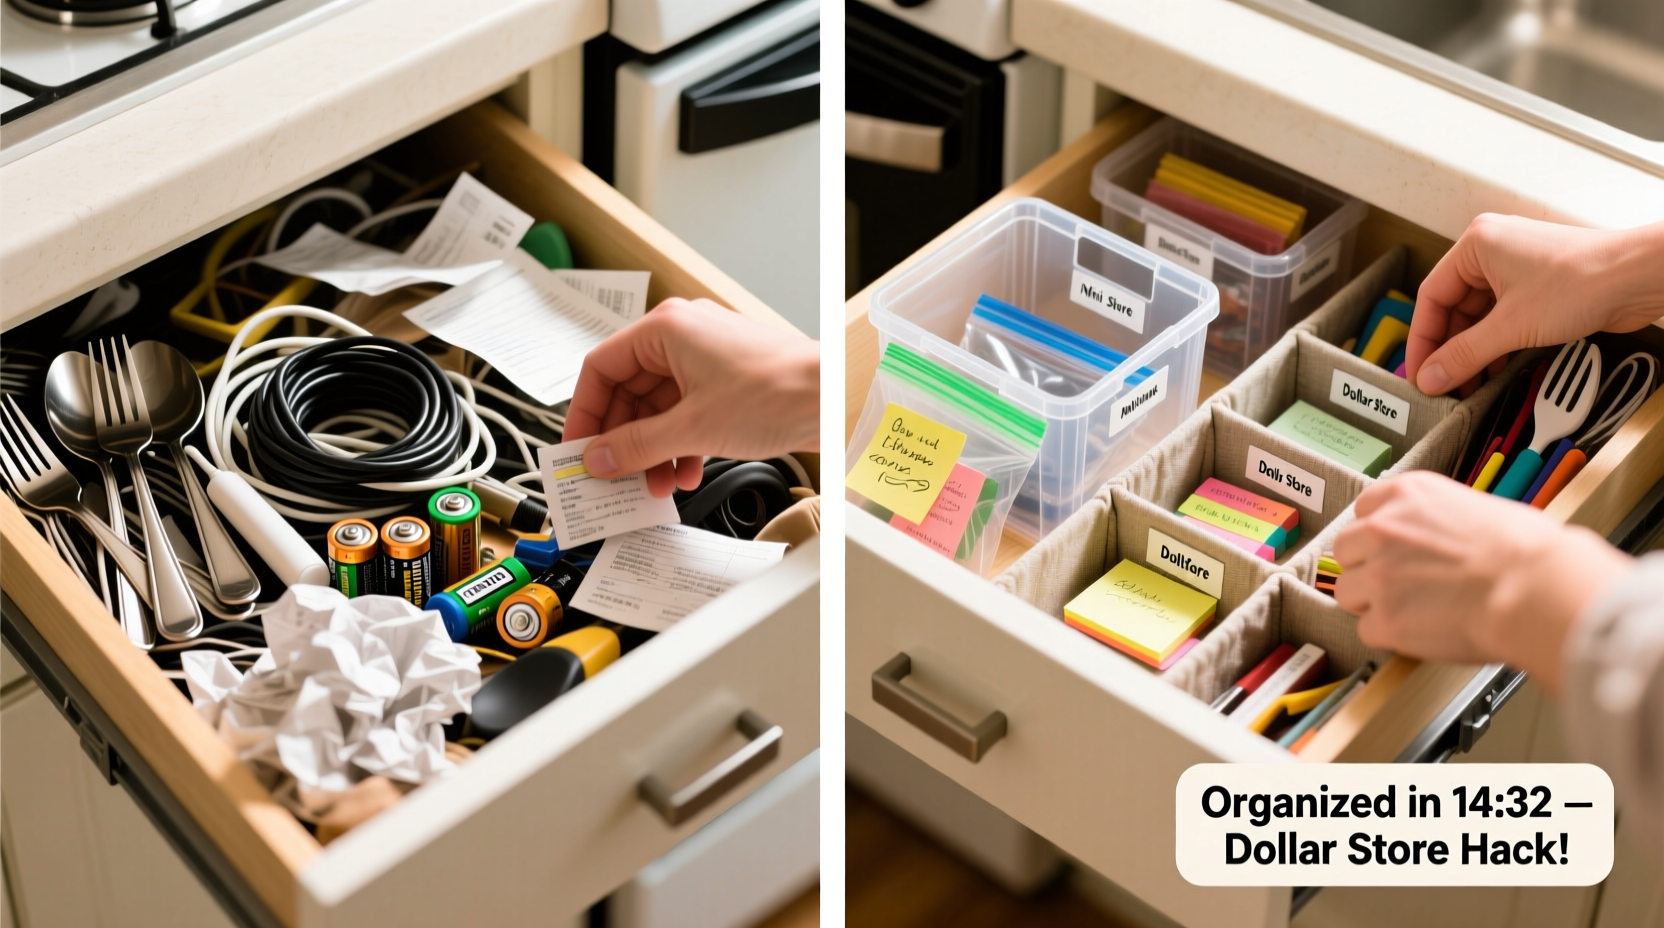
A junk drawer is supposed to be convenient—a catch-all for the small essentials that don’t have a home. But over time, it becomes a black hole of tangled cords, expired coupons, mismatched batteries, and mystery items. The good news? You don’t need expensive organizers or hours of free time to fix it. With a few smart strategies and budget-friendly tools from your local dollar store, you can transform chaos into clarity in under 15 minutes.
The key isn’t just cleaning—it’s creating a system that makes sense for how you use the space. This guide walks through a proven method that uses accessible, low-cost supplies to deliver lasting results. No special skills, no fancy tools—just practical steps anyone can follow.
Why Dollar Store Supplies Work Best
When organizing a junk drawer, spending a lot on containers doesn’t make sense. Most organizers are used for small, frequently accessed items that change often. Dollar stores offer surprisingly functional options: small bins, trays, dividers, and adhesive hooks—all under $2. These aren’t meant to last decades, but they’re perfect for short-term organization systems that can be easily replaced or adjusted.
According to organizational psychologist Dr. Lila Thompson, “Affordable solutions reduce the pressure to get everything ‘perfect.’ When people feel they can experiment without financial risk, they’re more likely to maintain order.”
“Affordable solutions reduce the pressure to get everything ‘perfect.’ When people feel they can experiment without financial risk, they’re more likely to maintain order.” — Dr. Lila Thompson, Organizational Psychologist
Dollar store supplies also encourage flexibility. If one container doesn’t work, swap it out next trip. There’s no sunk cost. Plus, buying locally supports accessibility—everyone deserves an organized home, regardless of income.
Step-by-Step: The 15-Minute Junk Drawer Reset
This timeline is designed for speed and efficiency. Each step fits neatly into a two-to-three-minute window, adding up to a total of 13 minutes—with two minutes to celebrate your win.
- (0–2 min) Empty the drawer completely. Pull everything out and place it on a clean surface. Don’t sort yet—just remove all contents.
- (2–4 min) Wipe down the interior. Use a disinfecting wipe or damp cloth to clean the drawer walls, base, and sides. Let dry briefly.
- (4–7 min) Sort items into categories. Group like with like: batteries, tape, pens, rubber bands, charging cables, etc.
- (7–10 min) Toss what’s trash. Discard dried-up markers, broken clips, old receipts, dead batteries, and anything unusable.
- (10–13 min) Assign homes using dollar store containers. Place dividers, bins, or trays where needed. Nest smaller items inside larger ones for control.
- (13–15 min) Return items and label if desired. Put each group back into its designated spot. Optional: use masking tape and marker to label sections.
Essential Dollar Store Supplies & How to Use Them
You don’t need a shopping list longer than the drawer itself. Here are five must-have dollar store items and exactly how to apply them:
- Plastic partition trays (often sold as hardware organizers) – Ideal for screws, batteries, thumbtacks, or USB drives. Keep tiny metal objects from clumping together.
- Small plastic bins (3x2 inches) – Perfect for holding tape, scissors, or travel-sized toiletries. Stackable if vertical space allows.
- Velcro cord wraps or zip ties – Wrap charging cables, earbuds, or headphone cords to prevent tangling. Label with permanent marker if multiple look alike.
- Magnetic strips with mini hooks – Stick inside the drawer lid to hang bobby pins, small scissors, or tweezers. Frees up floor space.
- Repositionable putty or adhesive tabs – Secure containers in place so they don’t shift when opening and closing the drawer.
| Item | Best For | Budget Cost |
|---|---|---|
| Hardware organizer tray (6-8 compartments) | Batteries, paper clips, nails, USB sticks | $1.25 |
| Mini plastic storage bin (pack of 3) | Tape, sticky notes, small tools | $1.00 |
| Velcro cable ties (pack of 10) | Phone chargers, earbuds, extension cords | $1.00 |
| Magnetic strip with hooks | Scissors, tweezers, safety pins | $1.50 |
| Adhesive mounting squares | Securing bins to drawer base | $1.00 |
Do’s and Don’ts of Junk Drawer Organization
Even with the right supplies, common mistakes can undo your progress. Avoid these pitfalls by following this simple guide:
| Do | Don’t |
|---|---|
| Group items by frequency of use—most-used near the front | Store food or medications in the junk drawer |
| Use labels—even handwritten ones—for quick identification | Let unrelated items pile up “for now” |
| Limit the drawer to true utilities (tools, office supplies, household fixes) | Overfill containers—leave room for easy access |
| Reassess monthly—spend 90 seconds checking for clutter buildup | Keep broken or obsolete items “just in case” |
| Use drawer liners to prevent sliding and protect surfaces | Store wet or dirty items without wiping first |
Real Example: Maria’s Kitchen Junk Drawer Turnaround
Maria, a working mom of two in Columbus, Ohio, had a kitchen junk drawer that spilled over every time she opened it. It held rubber bands, loose batteries, a cracked phone charger, expired coupons, and a half-empty roll of duct tape. “I’d spend more time digging than actually finding what I needed,” she said.
On a Wednesday evening, while waiting for dinner to cook, she set a 15-minute timer. She emptied the drawer onto the counter, wiped it down with a disinfectant wipe, and sorted items into six piles. She tossed the expired coupons, dried-up glue stick, and frayed charging cord. Then, she visited her local dollar store the next day and bought a compartment tray ($1.25), a small bin for tape ($1.00), and a pack of Velcro ties ($1.00).
She assigned zones: left side for batteries and electronics, center for tape and scissors, right for random tools like lightbulbs and spare keys. She secured the bin with adhesive squares and labeled each section with masking tape. Total time invested: 17 minutes (including shopping). “Now I grab what I need in seconds,” Maria shared. “And my kids can actually help because they know where things go.”
Checklist: Your 15-Minute Junk Drawer Rescue Plan
Print or save this checklist to stay on track:
- ☐ Remove all contents from the drawer
- ☐ Wipe down the interior with a cleaning wipe
- ☐ Sort items into logical groups (e.g., office, tech, tools)
- ☐ Discard broken, expired, or useless items
- ☐ Visit dollar store (or use existing supplies):
- ☐ Compartment tray
- ☐ Small bins
- ☐ Cable organizers
- ☐ Adhesive tabs or putty
- ☐ Assign each category a designated container or zone
- ☐ Secure containers if needed to prevent shifting
- ☐ Return items to their new homes
- ☐ Label sections for clarity (optional)
- ☐ Test drawer function—open and close gently to check stability
Frequently Asked Questions
Can I really organize a junk drawer in under 15 minutes?
Yes—if you stick to the process. The secret is limiting decision fatigue. Instead of over-planning, use broad categories and accept “good enough.” Perfection isn’t the goal; usability is. Most people finish within 12–14 minutes once they’ve done it once.
What if I don’t have a dollar store nearby?
Many grocery stores, pharmacies, and convenience stores carry similar low-cost organizers in their seasonal or household sections. Look for travel toiletry kits, fishing tackle boxes, or craft supply cases—they often double as excellent drawer dividers and cost under $3.
How do I keep the drawer organized long-term?
Build a habit of the “one-minute reset”: whenever you take something out, pause before closing the drawer to ensure everything is still in its place. Also, schedule a 5-minute review every month. Consistency beats intensity—small efforts prevent big messes.
Make Order the New Normal
A junk drawer doesn’t have to be a source of frustration. With less than $5 and a quarter of an hour, you can create a system that saves time, reduces stress, and makes daily tasks smoother. The beauty of this method lies in its simplicity: no perfection required, no major investment, just immediate improvement.
Organization isn’t about owning the most containers—it’s about making things easier to find, use, and return. By leveraging dollar store supplies, you embrace a flexible, low-pressure approach that adapts to real life. And once you see how fast and satisfying it is, you might find yourself looking for the next cluttered corner to conquer.


 浙公网安备
33010002000092号
浙公网安备
33010002000092号 浙B2-20120091-4
Comments
No comments yet. Why don't you start the discussion?