
A cluttered pantry doesn’t just make meal prep frustrating—it can lead to wasted food, duplicated grocery purchases, and unnecessary stress. For those living in small apartments, older homes with compact storage, or simply working with limited space, the challenge is real. But here’s the good news: you don’t need to spend hundreds on matching bins or custom shelving to create an efficient, functional pantry. With thoughtful planning and resourceful use of what you already own, even the tiniest pantry can be transformed into a streamlined hub for your kitchen essentials.
The key lies not in purchasing the latest organizing gadget, but in rethinking how you use space, categorize items, and maintain order over time. This guide walks through practical, no-cost or low-cost methods to maximize every inch of your pantry—without relying on store-bought containers or trendy accessories.
Declutter First: The Foundation of Organization
Before arranging anything, it's essential to clear out and assess what you're working with. A full pantry that hasn't been reviewed in months likely contains expired spices, half-used bags of grains, duplicate condiments, and forgotten snacks. Start by removing everything from the shelves. Yes, everything.
As items come out, sort them into three categories:
- Keep: Items still within their shelf life and regularly used.
- Donate/Relocate: Unopened, non-perishable goods you won’t use (e.g., gifts, duplicates) that can go to a food bank or another area of the home.
- Discard: Expired, stale, or damaged products.
This step often reveals how much physical space was being wasted on things that aren’t actually serving you. Once the pantry is empty, wipe down the shelves, check for pests, and consider lining them with inexpensive shelf paper for easier cleaning in the future.
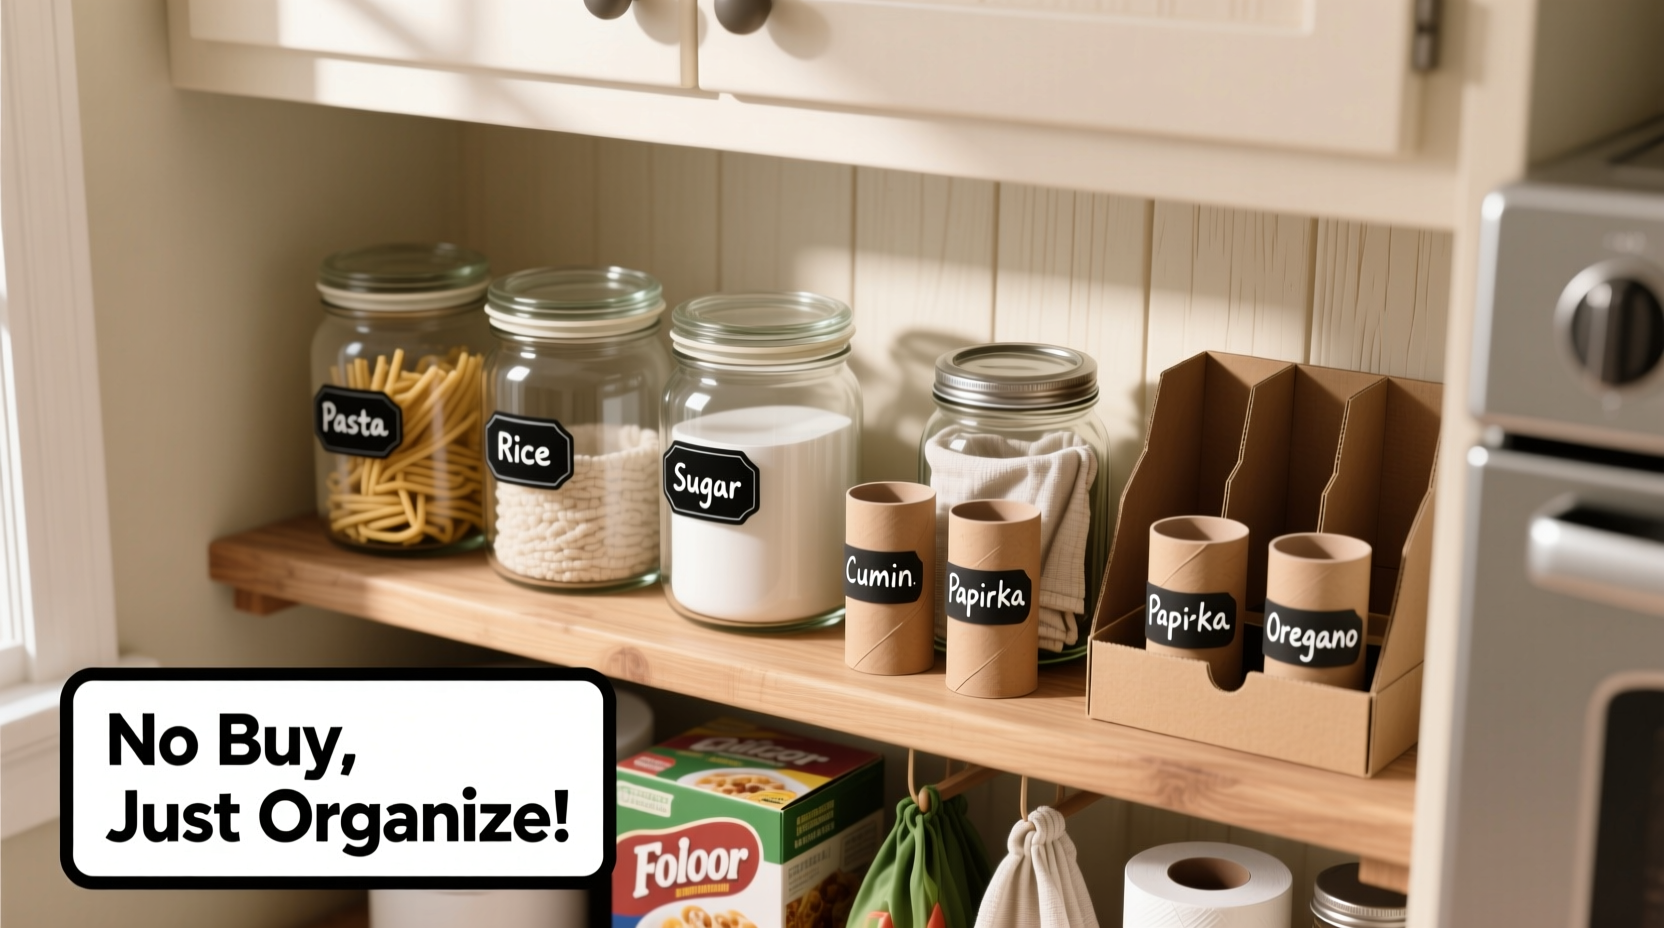
Use What You Already Own: Repurpose Household Containers
One of the most effective—and cost-free—strategies is repurposing containers you already have at home. Instead of rushing to buy glass jars or stackable bins, look around your kitchen and recycling bin for usable vessels.
Common household items that double as pantry organizers include:
- Glass jars from pasta sauce, pickles, or jam—ideal for dry goods like rice, lentils, oats, or coffee.
- Plastic yogurt or hummus tubs—great for snacks, tea bags, or bulk items.
- Clean tin cans (soup, beans)—perfect for holding small spice portions or utensils if stored upright.
- Cardboard boxes (cereal, crackers)—can be reused temporarily to corral similar items.
Wash containers thoroughly and remove labels if desired. While uniformity looks nice, it’s not required. Function matters more than aesthetics. Label each container with masking tape and a marker, or use sticky notes that can be updated as contents change.
“Organization isn’t about perfection; it’s about creating systems that reduce decision fatigue.” — Maria Sanchez, Home Efficiency Consultant
Create Zones Based on Usage and Frequency
Even in a small space, zoning helps you access what you need quickly. Think about how you cook and eat daily. Group items based on usage patterns rather than arbitrary categories.
For example:
- Everyday Essentials Zone: Place frequently used items like cooking oil, canned tomatoes, or breakfast cereal at eye level.
- Baking Supplies Zone: Flour, sugar, baking powder—store together in one corner, ideally in repurposed jars or labeled boxes.
- Snack Zone: Dedicate a lower shelf or bin for kids’ snacks or quick bites. Use shoeboxes or reusable produce bags to separate types (chips, granola bars, nuts).
- Spice & Condiment Zone: Keep oils, vinegars, soy sauce, and spices near the front or in a door rack if available.
If your pantry has a door, utilize its backside. Attach a tension rod between the frame to hang spray bottles or small baskets. Alternatively, use adhesive hooks for aprons, measuring cups, or reusable shopping bags.
| Zone Type | Ideal Location | Best Storage Method |
|---|---|---|
| Everyday Staples | Middle shelf, front row | Open containers or original packaging |
| Bulk Dry Goods | Lower shelf or floor | Repurposed jars or large tubs |
| Infrequently Used | Top shelf or back row | Stacked boxes or behind larger items |
| Snacks | Easy-to-reach shelf | Divided containers or labeled bags |
Maximize Vertical and Hidden Space
In a tiny pantry, horizontal space is limited—but vertical space is often underused. Stack items wisely, but avoid creating unstable towers that collapse when you reach for something in the back.
Instead, adopt a staggered stacking method: place taller items toward the back and shorter ones in front so everything remains visible. Use books or sturdy cardboard platforms (cut from shipping boxes) to elevate items and create “shelves within shelves,” making lower-level goods accessible.
Door storage is another overlooked asset. If your pantry has a shallow depth, install over-the-door shoe organizers made of fabric. These pockets are perfect for holding spice packets, seasoning blends, tea bags, or small condiment bottles. No drilling or hardware required.
Floor space can also be optimized. If the pantry floor is clear, use a single rolling cart or low bin to hold heavier items like potatoes, onions, or large beverage bottles. Choose one that slides easily in and out to prevent blocking access.
Mini Case Study: Transforming a 2x3 Foot Pantry
Sophie, a freelance writer living in a 600-square-foot apartment in Chicago, struggled with her narrow pantry closet. It measured just two feet wide and three feet tall, yet somehow felt perpetually chaotic. After moving in, she found herself buying extra pasta because she couldn’t see what she already had, and snacks were buried under baking supplies.
She decided to tackle it over a weekend. First, she emptied the entire space and discarded expired items—filling nearly half a trash bag. Then, she washed the shelves and lined them with brown kraft paper for a clean base.
Next, Sophie gathered glass jars from sauces, yogurt containers, and a set of mismatched Tupperware. She transferred oats, quinoa, sugar, and flour into these, labeling each with painter’s tape. Canned goods were grouped by type and stacked in rows. Snacks went into a hanging shoe organizer on the inside of the door.
Finally, she created a simple system: “first in, first out.” New groceries went to the back; older items moved forward. Within a week, she noticed fewer duplicate purchases and faster dinner prep. The total cost? $0.
Step-by-Step Guide to a Budget-Friendly Pantry Makeover
Follow this six-step process to organize your tiny pantry without spending money:
- Empty the pantry completely. Remove all items and place them on a nearby counter or table.
- Sort and purge. Discard expired goods, donate extras, and keep only what you’ll realistically use.
- Gather reusable containers. Collect clean jars, tubs, and boxes from around your home.
- Group items into logical zones. Think about cooking flow—what do you reach for first?
- Assign locations and store vertically. Use height, doors, and risers to increase capacity.
- Label and maintain. Mark containers clearly and commit to a monthly review to reset the system.
This approach takes less than three hours and relies entirely on existing resources. The result is a pantry that supports your habits—not fights against them.
Do’s and Don’ts of Tiny Pantry Organization
| Do | Don't |
|---|---|
| Store heavy items on lower shelves | Overfill shelves until items are unreachable |
| Label containers clearly | Assume you’ll remember what’s inside unlabeled jars |
| Use door space for small items | Hang heavy objects on flimsy over-the-door organizers |
| Rotate stock using FIFO (first in, first out) | Push new items to the front, burying older ones |
| Review inventory monthly | Wait until you’re out of something to restock |
FAQ
Can I organize a walk-in pantry the same way?
Absolutely. While walk-in pantries offer more space, the principles remain the same: declutter first, zone by use, and use what you have. The main difference is you may have more room for larger repurposed crates or furniture-like solutions (e.g., a secondhand bookshelf), but expensive organizers still aren’t necessary.
What if my pantry has no shelves?
No shelves? No problem. Use stackable bins, crates, or even sturdy cardboard boxes placed on the floor in designated zones. Elevate items off the ground with wooden planks or old cutting boards if moisture is a concern. Anchor the system with consistent labeling so you know where everything belongs.
How do I keep pests out without fancy containers?
Transfer dry goods like flour, cereal, and pet food into sealed repurposed jars or plastic tubs with tight lids. Avoid storing items in original cardboard or thin plastic packaging, which pests can chew through. Regularly wipe shelves and vacuum crumbs to eliminate attractants.
Checklist: Organize Your Tiny Pantry for Free
- ☐ Remove everything from the pantry
- ☐ Discard expired or unused items
- ☐ Clean shelves and repair any damage
- ☐ Collect jars, tubs, and boxes from around the house
- ☐ Sort items into usage-based categories
- ☐ Assign zones and place frequently used items at eye level
- ☐ Store vertically and use door space
- ☐ Label all containers clearly
- ☐ Implement a “first in, first out” rotation system
- ☐ Schedule a monthly pantry check-in
Conclusion
Organizing a tiny pantry doesn’t require a big budget or a renovation. It requires intention, a few hours of focused effort, and a willingness to work with what you already have. By clearing clutter, repurposing everyday containers, and designing a system that fits your actual habits, you can turn a cramped, chaotic space into a functional asset.
The best part? This kind of organization is sustainable. When you’re not dependent on special tools or perfect-looking setups, maintenance becomes simpler. You’re more likely to stick with it because it’s built on realism, not retail therapy.


 浙公网安备
33010002000092号
浙公网安备
33010002000092号 浙B2-20120091-4
Comments
No comments yet. Why don't you start the discussion?