
Every holiday season, thousands of households wrestle with tangled Christmas lights—coiled in disarray, colors mixed, lengths mismatched. The result? Hours lost untangling, testing, and matching strands just to begin decorating. But there’s a smarter way. By organizing your Christmas light strands by both color and length before storing them, you can cut setup time in half, reduce frustration, and ensure a seamless lighting display year after year.
This guide breaks down a practical, sustainable system that turns chaos into clarity. Whether you're managing 10 strands or 100, this method scales efficiently and pays dividends every November when the boxes come out.
Why Organization Matters: The Hidden Cost of Disorganized Lights
Disorganized Christmas lights aren’t just an annoyance—they’re a productivity drain. A study by the National Retail Federation found that the average American spends nearly four hours assembling holiday decorations each season. Of that, over 40% is spent on troubleshooting faulty or tangled lights.
When lights are stored haphazardly, several problems arise:
- Tangling: Mixed strands knot together, making unspooling difficult and increasing the risk of wire damage.
- Mismatched colors: White lights get confused with warm white, cool white, or colored sets, leading to inconsistent displays.
- Unclear lengths: Without knowing exact measurements, you may under- or over-decorate eaves, trees, or railings.
- Damaged connections: Repeated yanking and pulling from tangles can break sockets or strain plug ends.
Organizing by color and length eliminates these issues at the source. It transforms decoration day from a chore into a smooth, predictable process.
Step-by-Step Guide: Organizing Your Lights Efficiently
Follow this seven-step process at the end of each holiday season to keep your lights ready for next year. The time invested now saves hours later.
- Unplug and dismantle all displays. Remove lights from trees, roofs, fences, and indoor fixtures. Work in sections to avoid confusion.
- Test each strand thoroughly. Plug in every set to check for dark bulbs, flickering, or complete failures. Replace bulbs or retire non-functional strands.
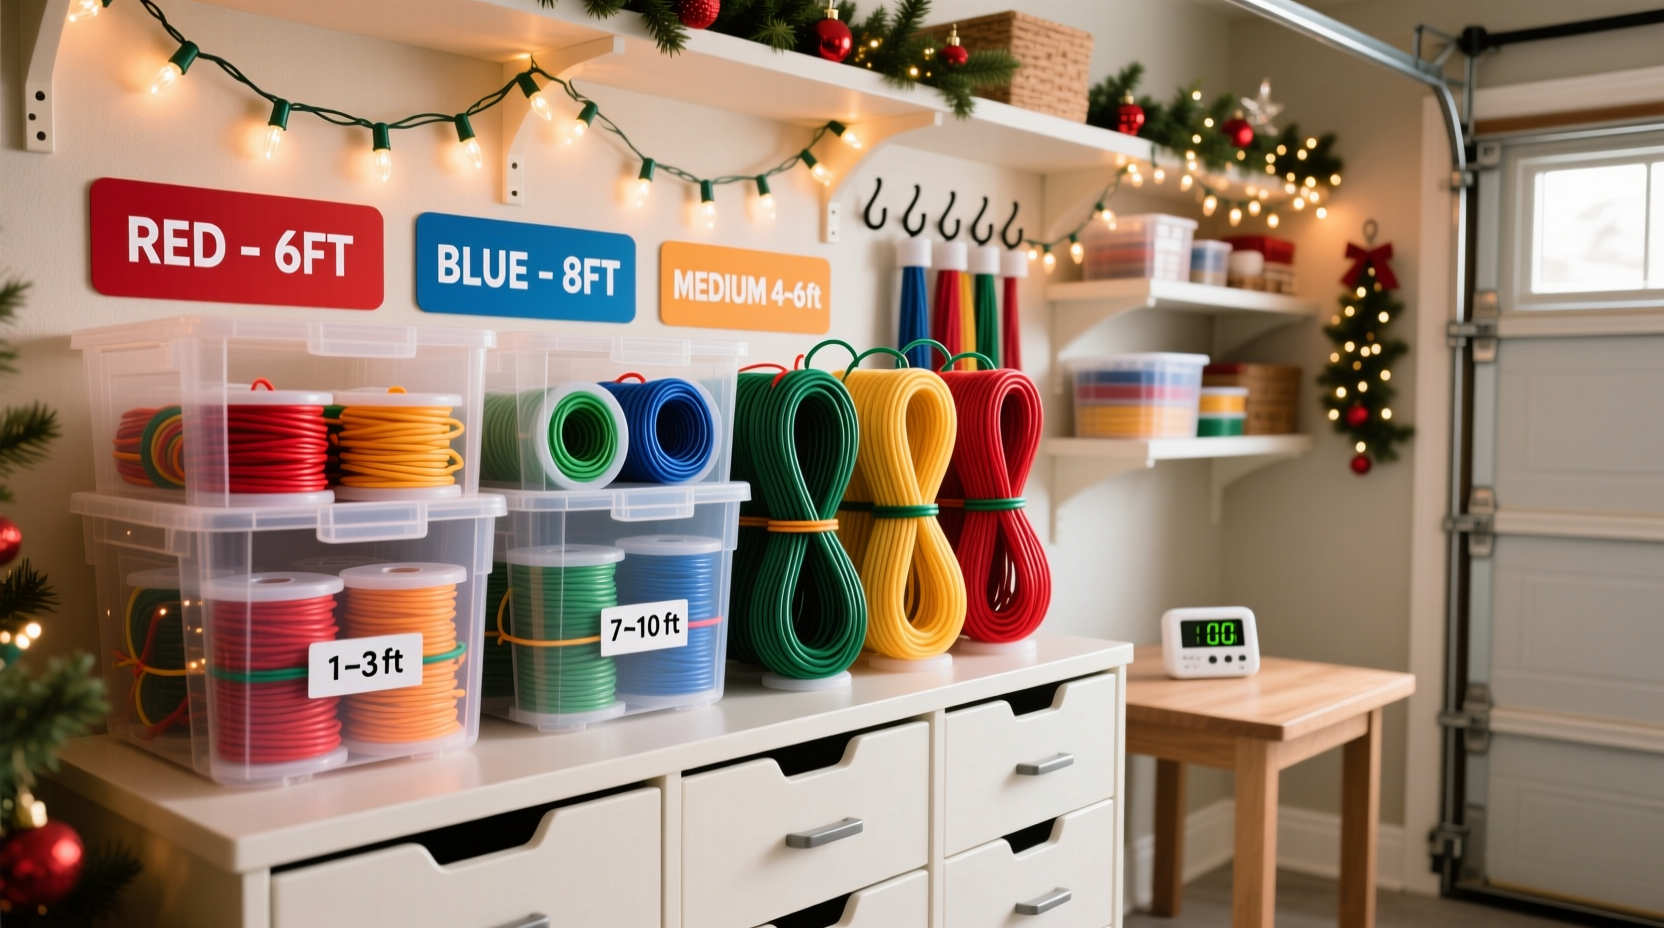
- Sort by color first. Group identical hues: warm white, cool white, multicolor, red, blue, green, etc. Be precise—warm and cool whites look different once hung.
- Measure and categorize by length. Use a tape measure or marked string to determine exact lengths (e.g., 25 ft, 50 ft, 100 ft). Record this on labels.
- Spool each strand neatly. Wrap around a piece of cardboard, plastic reel, or your hand using the “over-under” technique to prevent twists.
- Label clearly with color and length. Use waterproof tags or permanent markers on masking tape affixed to the plug end.
- Store in dedicated containers by category. Use clear bins divided by color groups, or separate bags within a larger tote.
Once organized, store containers in a climate-controlled space—avoid attics or garages where temperature swings degrade insulation and solder joints.
Storage Solutions: Choosing the Right System
The best storage method protects lights while maintaining organization. Here are three proven systems, ranked by effectiveness:
| Method | Pros | Cons | Best For |
|---|---|---|---|
| Cardboard spools + ziplock bags | Cheap, customizable, prevents tangling | Cardboard warps over time; bags not durable | Beginners, small collections |
| Plastic reels with locking lids | Durable, stackable, keeps shape | Higher upfront cost | Medium to large setups |
| Labeled fabric sleeves in clear bins | Breathable, tangle-free, easy to sort | Requires sewing or purchase | Premium long-term use |
Regardless of method, consistency is key. Choose one system and stick with it annually. Reusing the same format builds muscle memory and makes retrieval intuitive.
“The most efficient decorators don’t work faster—they prepare better. Organization cuts setup time more than any tool.” — Daniel Reeves, Holiday Lighting Designer & Author of *Lighting the Season*
Real Example: How One Family Cut Setup Time by 70%
The Thompson family in Portland, Oregon, used to spend two full weekends installing their 85-light outdoor display. Strands were thrown into two large bins, with no labeling or sorting. Each year, they’d spend Saturday morning untangling and testing lights, often discovering dead strands mid-installation.
In January 2022, they implemented the color-and-length system. They tested every strand, grouped them into six color categories, and labeled each by length. They stored them in clear plastic reels inside labeled bins: “Warm White – 50ft,” “Cool White – 100ft,” “Multicolor – 25ft,” etc.
The following November, they retrieved the bins and began setup. Because they knew exactly which strands went where—roof lines needed 100-ft warm white, porch railings used 50-ft multicolor—the entire display was up in under five hours. Total setup time dropped from 16+ hours to less than 5.
“It felt like cheating,” said Mark Thompson. “We weren’t rushing—we just didn’t have to stop and fix things. Everything worked, everything was ready.”
Checklist: End-of-Season Light Organization
Use this checklist every January to maintain order:
- ☐ Unplug and remove all light strands from displays
- ☐ Test each strand for functionality
- ☐ Replace burnt bulbs or retire damaged sets
- ☐ Sort by color (include shade variations)
- ☐ Measure each strand and record length
- ☐ Wind neatly using over-under technique
- ☐ Label plug end with color and length
- ☐ Store in designated container by category
- ☐ Keep in dry, temperature-stable location
- ☐ Update inventory list (optional but recommended)
For larger collections, consider creating a simple spreadsheet with columns for color, length, quantity, location used, and notes. This becomes a reference guide for future planning.
Advanced Tips for Large Displays
If you manage a commercial display, neighborhood project, or extensive home setup, take organization further:
- Create a layout map. Sketch your house or property and note where each color and length will go. Refer to it during installation.
- Color-code extension cords. Match cord labels to light categories so power sources align seamlessly.
- Group by circuit or controller channel. If using smart lighting systems (e.g., Wi-Fi or RF controllers), store strands by channel number.
- Use consistent winding direction. Always wrap clockwise (or counterclockwise) to minimize internal stress on wires.
- Inspect connectors annually. Clean metal contacts with isopropyl alcohol to prevent corrosion and poor conductivity.
One professional installer we interviewed uses custom-made wooden racks with numbered hooks—each assigned to a specific light type. “I walk in, grab hook 7 and 12, and I know those are my 100-foot cool whites for the roof peak,” he said. “No thinking required.”
Frequently Asked Questions
Can I mix LED and incandescent lights if they’re the same color?
No. Even if labeled the same (e.g., “warm white”), LED and incandescent bulbs emit different color temperatures and brightness levels. Incandescents typically appear more yellow, while LEDs offer a crisper, more uniform glow. Mixing them creates a patchy effect. Store and use them separately.
How do I handle lights with multiple functions (twinkle, fade, steady)?
Include the function in your labeling. For example: “Multicolor – 25ft – Twinkle Mode.” If you use controllers, label both the strand and the corresponding remote or app setting. Consider grouping functional types together for quick access during themed displays.
What should I do with old-style C7 or C9 bulbs?
These larger bulbs are often used for outlines or vintage looks. Since they’re bulkier and less common, store them in rigid containers to prevent crushing. Label clearly, as their size makes them unsuitable for delicate areas. Many decorators reserve C7/C9 sets exclusively for rooflines or fence posts—assign them accordingly.
Conclusion: Turn Chaos Into Confidence
Organizing Christmas light strands by color and length isn’t just about neatness—it’s about reclaiming your time, reducing stress, and elevating your holiday display. What begins as a modest investment in January delivers exponential returns each season. No more guessing, no more tangles, no more last-minute trips to the store.
Start small if needed. Even sorting your warm whites from cool whites and labeling lengths will make a noticeable difference. Over time, refine the system until it fits your needs perfectly. The goal isn’t perfection—it’s progress.


 浙公网安备
33010002000092号
浙公网安备
33010002000092号 浙B2-20120091-4
Comments
No comments yet. Why don't you start the discussion?