
A cluttered makeup drawer isn’t just frustrating—it wastes time, ruins products, and makes getting ready feel like a chore. Yet, transforming it into a streamlined, professional-style station doesn’t require expensive organizers or a complete overhaul. With the right strategy and affordable dividers, you can create a system that’s both functional and visually pleasing. This guide walks you through every step, from decluttering to categorizing, choosing budget-friendly tools, and maintaining order long-term.
Step 1: Empty and Assess Your Current Collection
The first move toward an organized drawer is starting with a clean slate. Remove everything from your makeup drawer and lay it out on a flat surface. This visual audit helps identify expired items, duplicates, and products you no longer use.
Check expiration dates—most liquid foundations last 6–12 months, mascaras should be replaced every 3 months, and powders can last up to 2 years. Toss anything that’s dried out, smells off, or shows signs of bacterial growth.
While sorting, ask yourself: Have I used this in the past six months? Does it still suit my skin tone or style? Is it worth keeping for special occasions? Be honest. The fewer items you maintain, the easier organization becomes.
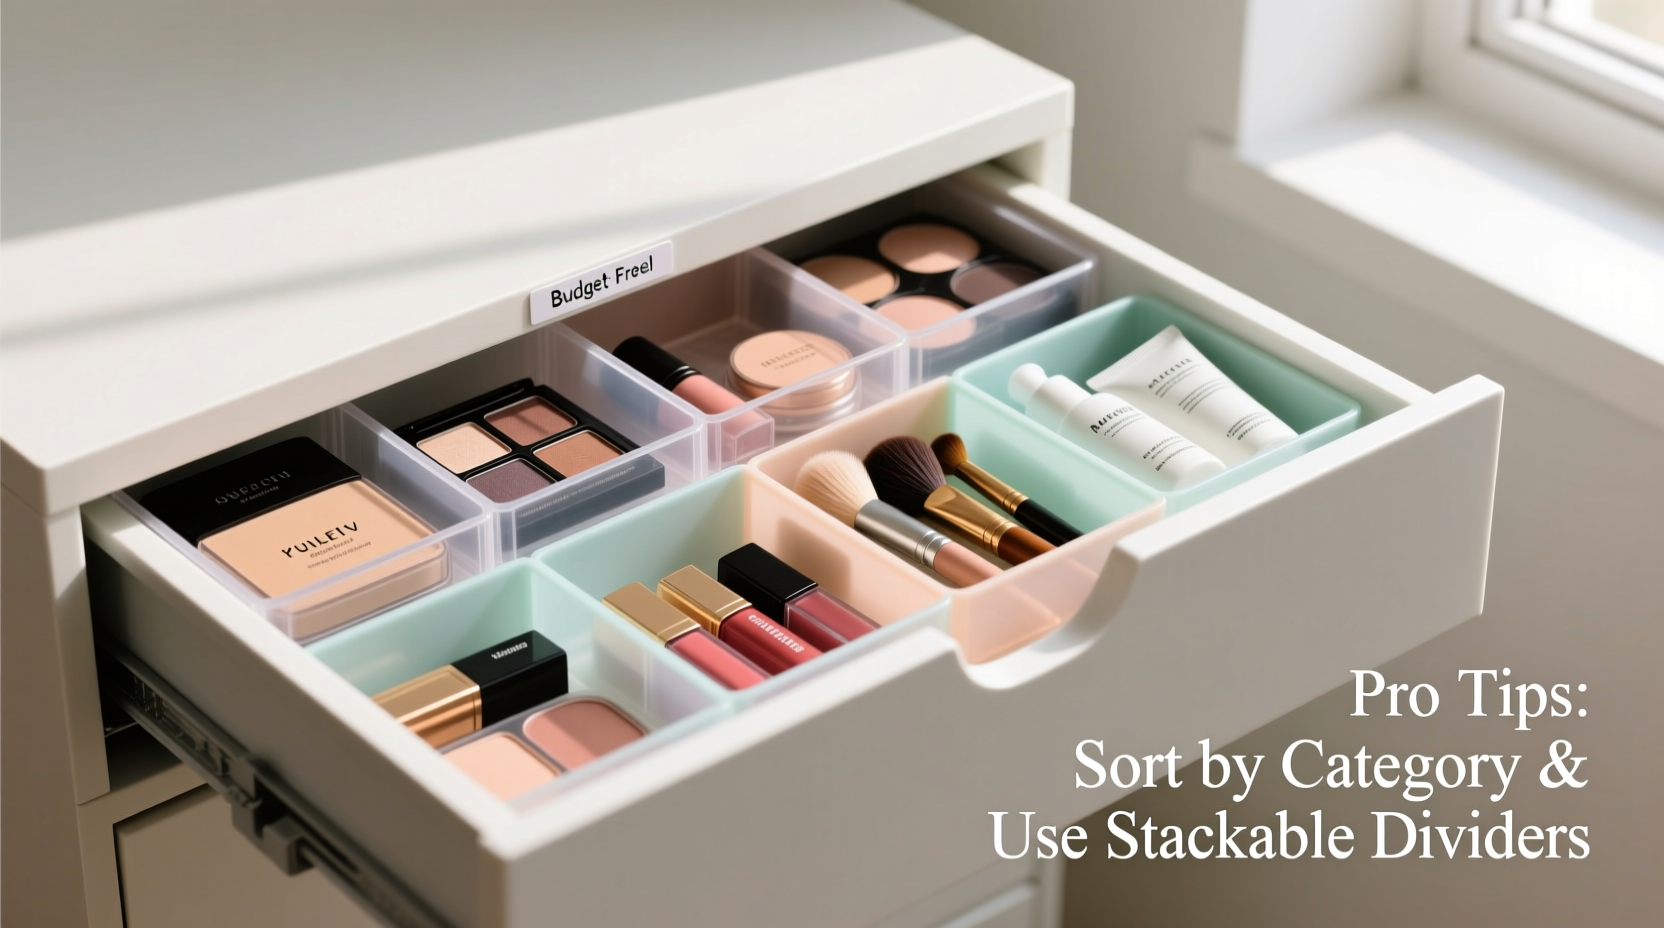
Step 2: Categorize by Product Type and Frequency of Use
Once you’ve narrowed down what stays, group your makeup into logical categories. Common groupings include:
- Face (foundation, concealer, powder, blush, bronzer)
- Eyes (mascara, eyeliner, eyeshadow palettes, brow products)
- Lips (lipsticks, glosses, liners)
- Tools (brushes, sponges, tweezers)
- Skin prep (primers, setting sprays)
Within these groups, further sort by frequency of use. Daily essentials should be front and center; seasonal or occasion-based items can go toward the back or in separate compartments.
“Organization isn’t about perfection—it’s about accessibility. If you can’t find your go-to lipstick in the morning, the system isn’t working.” — Lila Chen, Professional Makeup Organizer & Beauty Consultant
Step 3: Choose the Right Affordable Dividers
Not all organizers are created equal. The key is finding dividers that fit your drawer dimensions and adapt to your product mix—all without breaking the bank. Here’s a breakdown of common types:
| Type | Pros | Cons | Price Range |
|---|---|---|---|
| Adjustable Acrylic Trays | Durable, customizable layout, easy to clean | Can be bulky, limited availability in small sizes | $12–$25 |
| Foam Insert Trays | Inexpensive, lightweight, ideal for travel | Less durable, not adjustable | $5–$10 |
| Plastic Grid Organizers | Budget-friendly, stackable, modular | May yellow over time, less aesthetic appeal | $7–$15 |
| DIY Cardboard or Foam Board | Free or very low cost, fully customizable | Less durable, requires crafting effort | $0–$5 |
For most users, plastic grid organizers or adjustable acrylic trays offer the best balance of function and affordability. Look for modular designs that allow expansion as your collection grows.
Step 4: Build a Custom Layout Using Smart Zoning
Think of your drawer like a workspace. Just as a chef organizes their kitchen by prep, cooking, and plating zones, your makeup drawer should reflect usage flow. Implement a zoning strategy:
- Zone 1: Daily Essentials – Foundation, concealer, mascara, favorite lip color. Place these in the front third of the drawer.
- Zone 2: Frequent Use – Eyeshadows, blush, brow pencils. Keep within easy reach but slightly behind Zone 1.
- Zone 3: Occasional/Specialty – Glitters, bold lip colors, seasonal palettes. Store at the back or in stackable trays.
- Vertical Storage – Use upright dividers for brushes or roll-up cases to save horizontal space.
If your drawer has depth, consider tiered trays so you can see products in the back. Avoid stacking loose items—this leads to forgotten products and broken compacts.
Mini Case Study: From Chaos to Clarity
Sophia, a graphic designer and busy mom of two, had a deep, wide drawer filled with jumbled tubes, broken compacts, and half-used samples. She spent 10–15 minutes each morning searching for her tinted moisturizer. After following this system, she invested in a $13 modular plastic organizer from a discount retailer. She grouped products by category, discarded expired items, and placed daily-use makeup in the front row. Now, her routine takes under five minutes, and she says, “I actually enjoy doing my makeup again because it doesn’t feel like digging for treasure.”
Step 5: Maintain the System Long-Term
An organized drawer won’t stay that way without maintenance. Incorporate quick habits to preserve order:
- Return items to their designated spots immediately after use.
- Wipe down containers weekly to remove powder residue or foundation smudges.
- Reassess every three months—discard expired items and reevaluate what you actually use.
- Keep a small pouch in the drawer for sample-sized products until you decide whether to adopt them.
Labeling compartments can help—especially if you share the space or have multiple kits (e.g., work vs. evening). Use removable labels so you can adjust as your routine evolves.
Smart Shopping Tips for Budget-Friendly Dividers
You don’t need luxury brands to get pro-level organization. Try these cost-effective sources:
- Dollar Stores: Often carry small plastic bins perfect for lipsticks or brushes.
- Office Supply Stores: Desk organizers with adjustable compartments work great for palettes and bottles.
- Hardware Stores: Drawer inserts designed for toolkits can be repurposed for large makeup collections.
- DIY Solutions: Cut foam board or use empty tissue boxes lined with contact paper to create custom sections.
One creative approach: use ice cube trays for small items like bobby pins, glitter pots, or sample eyeliners. They’re inexpensive, come in various sizes, and are easy to clean.
Checklist: Your 7-Step Makeup Drawer Reset
Follow this actionable checklist to transform your drawer in under an hour:
- Empty the entire drawer onto a clean surface.
- Discard expired, dried-out, or unused products.
- Group remaining items into categories (face, eyes, lips, tools).
- Sort by frequency of use—daily, weekly, occasional.
- Measure drawer dimensions and select appropriate dividers.
- Assign zones and place dividers accordingly.
- Label compartments (optional) and commit to a 5-minute nightly reset.
FAQ: Common Questions About Makeup Drawer Organization
How do I keep my makeup from getting dusty or dirty in open trays?
Opt for organizers with lids when possible. Otherwise, wipe down products and trays weekly with a dry microfiber cloth. Store powders face-down if they have exposed pans to minimize airborne particles.
Can I use kitchen drawer organizers for makeup?
Absolutely. Many kitchen utensil dividers are perfectly sized for brushes or bottles. Just ensure they’re made of non-porous materials and clean them thoroughly before use. Stainless steel or BPA-free plastic works best.
What if my drawer is too shallow for standard organizers?
Use flat, low-profile trays or magnetic strips mounted inside the drawer lid. Attach small metal tins or compacts with adhesive magnets. You can also store bulkier items in a countertop caddy while reserving the drawer for daily essentials.
Conclusion: Turn Routine Into Ritual
An organized makeup drawer isn’t just about neatness—it’s about respect for your time, your tools, and your self-care ritual. With affordable dividers and a clear system, you can eliminate daily frustration and make your beauty routine feel intentional and enjoyable. The best part? You don’t need designer trays or a minimalist collection. You just need a plan, a little effort, and the willingness to maintain it.


 浙公网安备
33010002000092号
浙公网安备
33010002000092号 浙B2-20120091-4
Comments
No comments yet. Why don't you start the discussion?