
Succulents are among the most forgiving and rewarding houseplants, prized for their sculptural forms, drought tolerance, and striking colors. But one of their most magical traits is their ability to grow new plants from a single leaf. This process, known as leaf propagation, allows gardeners to multiply their collection at no cost—transforming one plant into dozens over time. For beginners, it’s an accessible entry point into plant propagation that requires minimal tools and space. With the right technique, even a dropped leaf can become a thriving new succulent.
Why Propagate Succulents from Leaves?
Leaf propagation isn’t just a clever gardening trick—it’s a natural survival mechanism many succulents have evolved. In arid environments, where conditions are harsh and unpredictable, being able to regenerate from a detached leaf increases the chances of species survival. For home growers, this trait offers a sustainable way to expand a collection without spending money or relying on nurseries.
Beyond saving money, propagating your own succulents deepens your understanding of plant biology and care. You’ll learn to recognize signs of health, root development, and ideal growing conditions by observing each stage of growth. Plus, there’s undeniable satisfaction in watching a tiny green nub emerge from what once seemed like a lifeless leaf.
Which Succulents Can Be Propagated from Leaves?
Not all succulents respond equally well to leaf propagation. The best candidates are those with fleshy, well-hydrated leaves that store enough energy to support new growth. Species in the Echeveria, Graptopetalum, Sedum, and Crassula genera are particularly reliable.
Here’s a breakdown of common succulents and their propagation suitability:
| Succulent Type | Leaves Suitable? | Success Rate (Beginner-Friendly) | Notes |
|---|---|---|---|
| Echeveria | Yes | High | Best with outer, mature leaves |
| Graptopetalum paraguayense (Ghost Plant) | Yes | Very High | Rapid rooting, high success rate |
| Crassula ovata (Jade Plant) | Yes | Moderate | Slow to root but reliable |
| Sempervivum (Hens & Chicks) | Yes | High | Also produces offsets naturally |
| Haworthia | Limited | Low-Moderate | Better via offsets or pups |
| Aloe vera | No | Poor | Use offsets (\"pups\") instead |
| Kalanchoe tomentosa (Panda Plant) | Yes | Moderate | Fuzzy leaves take longer to callous |
Plants like cacti, agave, or aloes do not propagate well from leaves and rely more on division or stem cuttings. Always research your specific succulent before attempting propagation to avoid frustration.
“Leaf propagation taps into the resilience of succulents—their ability to regenerate from minimal tissue is nothing short of botanical magic.” — Dr. Lila Nguyen, Botanist & Horticultural Educator
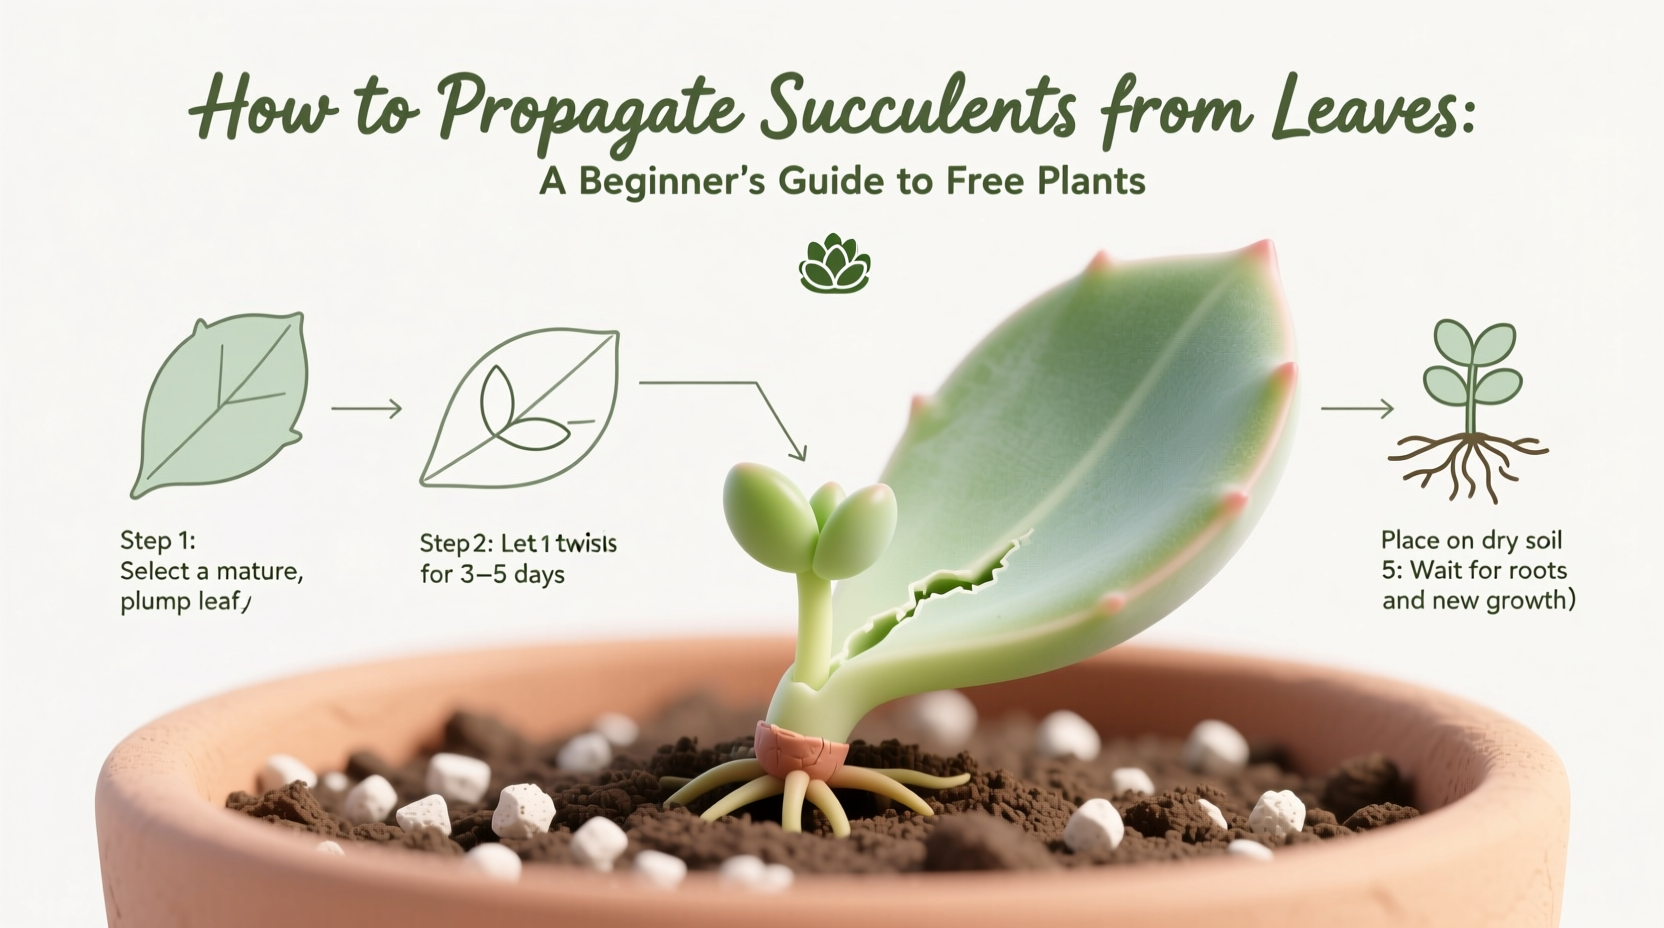
Step-by-Step Guide to Leaf Propagation
Propagating succulents from leaves is straightforward when you follow a consistent method. Success hinges on three key phases: leaf removal, callousing, and placement. Rushing any step reduces your chances of healthy new plants.
- Select Healthy Leaves: Choose full, firm leaves from the lower or outer part of the plant. Avoid yellowing, shriveled, or insect-damaged foliage.
- Remove Leaves Correctly: Gently wiggle the leaf side-to-side until it detaches cleanly at the base. A clean pull ensures the entire leaf, including the meristem tissue, comes off. Torn or partial leaves rarely survive.
- Let Leaves Callous Over: Place the removed leaves on a dry surface out of direct sunlight. Allow them to rest for 3–7 days until the broken end forms a hard, dry seal. This prevents rot when placed on soil.
- Prepare the Growing Medium: Use a fast-draining mix such as cactus soil blended with perlite or pumice (50/50 ratio). Fill shallow trays or small pots and lightly moisten the surface.
- Position Leaves Properly: Lay the calloused leaves flat on the soil surface or place the cut end slightly into the medium. Do not bury them.
- Wait Patiently: Place the tray in bright, indirect light. Mist the soil lightly every 7–10 days only if completely dry. Roots and tiny rosettes typically appear in 3–6 weeks.
- Transplant Seedlings: Once the baby plant has grown several leaves and the mother leaf has withered, carefully transplant it into its own pot with drainage.
Common Mistakes That Cause Failure
Many beginners assume propagation is instant or effortless. While the process is simple, certain missteps dramatically reduce success rates.
- Using damp or humid environments: Excess moisture causes leaves to rot before they can form roots.
- Watering too early or too often: Overwatering is the leading cause of failed propagation. Wait until roots appear before misting.
- Impatience during callousing: Skipping the drying phase invites fungal infection.
- Placing in direct sun: Intense sunlight scorches delicate new growth. Bright, filtered light is ideal.
- Touching or moving leaves frequently: Disturbing the leaf disrupts root formation. Let nature take its course.
Real Example: From One Echeveria to a Full Windowsill
Sophie, a first-time succulent grower in Portland, started with a single pink Echeveria elegans she bought at a local market. After reading about propagation, she carefully removed six healthy lower leaves during a routine pruning session. She let them dry on a windowsill for five days, then arranged them on top of a perlite-soil mix in a recycled takeout container with holes poked in the bottom.
She placed the tray near a north-facing window and resisted the urge to water. After four weeks, tiny pink rosettes emerged from three of the leaves. By week eight, two had developed strong root systems. Sophie transplanted them into small terracotta pots. Within six months, she had ten new plants—some from secondary offsets on the babies—and gifted several to friends. Her original plant remained healthy and continued producing new leaves for future propagation.
This case illustrates how minimal investment—a few leaves, reused containers, and patience—can yield significant results. No special equipment or greenhouse was needed.
Checklist: Succulent Leaf Propagation Success Plan
Follow this checklist to maximize your chances of successful propagation:
- ☑ Choose plump, undamaged leaves from healthy parent plants
- ☑ Remove leaves with a clean twist to ensure full detachment
- ☑ Allow leaves to callous for 3–7 days in a dry, shaded area
- ☑ Use a well-draining soil mix (cactus soil + perlite)
- ☑ Place leaves on the soil surface, cut-end down
- ☑ Position in bright, indirect light (no direct sun)
- ☑ Mist soil lightly every 7–10 days only after roots appear
- ☑ Wait for mother leaf to wither before transplanting
- ☑ Transplant only when baby plant has 3–5 leaves and stable roots
- ☑ Label and date each batch for tracking progress
Frequently Asked Questions
How long does it take for succulent leaves to root?
Root development typically begins within 2–4 weeks, though some species may take up to 6 weeks. Tiny plantlets usually follow 1–2 weeks after roots appear. Total time from leaf to transplantable plant is generally 6–10 weeks, depending on species and environment.
Can I propagate succulents in water instead of soil?
While possible, water propagation is less reliable for succulents. Constant moisture increases rot risk, and roots adapted to water struggle when transferred to soil. Soil propagation mimics natural conditions better and yields stronger, more resilient plants.
Why did my leaf turn brown and mushy?
This is a sign of rot, usually caused by excessive moisture or insufficient callousing. If the leaf feels soft or smells foul, it won’t recover. Remove it immediately to prevent mold from spreading to nearby leaves.
Optimizing Conditions for Best Results
While succulents are tough, creating an ideal microclimate improves propagation efficiency. Temperature, light, and airflow play critical roles.
The sweet spot for propagation is between 65°F and 75°F (18°C–24°C). Cooler temperatures slow growth; hotter ones increase evaporation and stress. A warm room with consistent temperatures—like a heated bedroom or sunroom—is ideal.
Light should be bright but indirect. An east-facing window provides gentle morning sun without scorching young tissue. If natural light is limited, a basic LED grow light for 10–12 hours daily works well.
Air circulation helps prevent fungal issues. Avoid sealing trays in plastic unless humidity is extremely low. A small fan on low setting a few feet away can improve airflow without drying out the leaves too quickly.
What Happens When It Works—And When It Doesn’t
Successful propagation follows a predictable pattern: first, tiny white roots emerge from the calloused end. Then, a small green bump appears—this is the embryonic rosette. Over time, it grows into a miniature version of the parent plant. The original leaf gradually shrinks as its stored energy transfers to the offspring.
Failure usually looks like discoloration (yellow, black, or translucent), soft texture, or complete disintegration. This indicates rot or desiccation. Some leaves simply dry up without producing anything—this is normal. Not every leaf will succeed, and that’s okay. Even a 50% success rate is excellent for beginners.
Remember, propagation is a numbers game. Start with more leaves than you need. Even if half fail, you’ll still gain new plants.
Conclusion: Grow Your Garden for Free
Propagating succulents from leaves is one of the most rewarding practices in indoor gardening. It transforms a simple act—removing a fallen leaf—into the beginning of new life. With minimal supplies and consistent care, anyone can turn a single plant into a lush collection. The process teaches patience, observation, and respect for the quiet persistence of nature.
Start small. Try three or four leaves from a plant you already own. Track their progress, learn from what works and what doesn’t, and build confidence over time. Before long, you’ll find yourself sharing baby succulents with friends, decorating your home with self-grown greenery, and marveling at the quiet miracle unfolding on your windowsill.


 浙公网安备
33010002000092号
浙公网安备
33010002000092号 浙B2-20120091-4
Comments
No comments yet. Why don't you start the discussion?