
Sneakers are more than just footwear—they're an expression of personal style, often worn through seasons, cities, and countless miles. Over time, even the most beloved pairs show signs of wear: scuffs, dull soles, yellowed midsoles, or faded uppers. While replacing them might seem like the easiest option, a thoughtful restoration can breathe new life into your favorite kicks—without compromising the integrity of the materials or altering their original color.
The key lies in understanding your sneaker’s construction and choosing cleaning and care techniques tailored to its fabric, leather, mesh, or synthetic components. Done correctly, refreshing old sneakers preserves both aesthetics and function, extending their lifespan while maintaining resale or sentimental value.
Understand Your Sneaker Materials First
Not all sneakers are created equal. A one-size-fits-all cleaning approach can lead to irreversible damage—think cracked leather, discolored mesh, or glue breakdown in bonded soles. Before applying any product, identify the primary materials used in your shoe’s upper, lining, sole, and laces.
| Material Type | Common Locations | Cleaning Sensitivity |
|---|---|---|
| Nubuck/Suede | Uppers, accents | High – water causes stains; requires specialized brushes |
| Leather (Full-grain/Smooth) | Uppers, toe boxes | Medium – avoid soaking; use pH-balanced cleaners |
| Knit/Mesh | Modern athletic uppers (e.g., Flyknit, Primeknit) | High – abrasive scrubbing damages fibers |
| Canvas | Vintage styles (e.g., Converse, Vans) | Low-Medium – machine-washable if unlaminated |
| Synthetic Rubber/EVA | Midsoles, outsoles | Low – resistant but prone to oxidation (yellowing) |
Mixing materials complicate cleaning further. For example, a sneaker with a leather upper and mesh tongue demands different tools for each section. Always test any cleaner on a small, hidden area—like the inside heel collar—before full application.
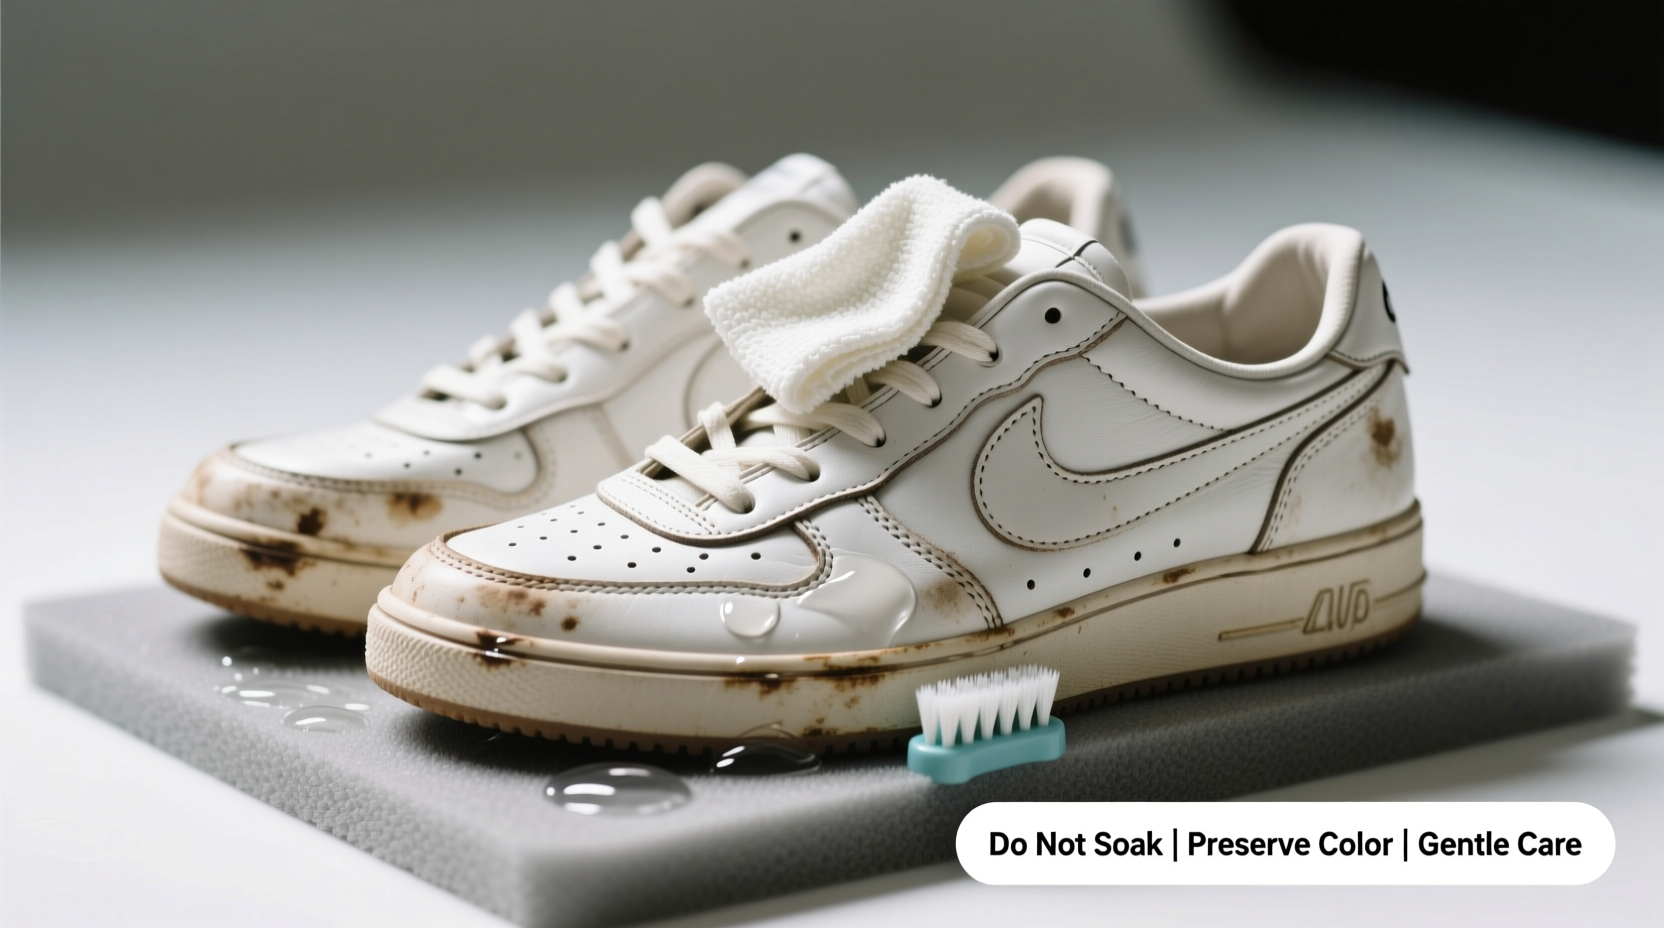
Step-by-Step Guide to Safely Refresh Sneakers
A methodical process ensures thorough cleaning without risking structural or visual damage. Follow this timeline-based approach to restore your sneakers gradually and effectively.
- Remove Laces and Insoles (Day 1)
Take out the laces and pull the insoles. Soak laces in warm water with mild detergent or oxygen-based cleaner (like OxiClean) for 30 minutes. Hand-scrub with a soft brush, rinse, and air-dry flat. Insoles should be wiped with a damp cloth and left to dry separately—never machine-washed unless specified. - Dry Brush Debris (Day 1)
Use a soft-bristle brush (an old toothbrush works) to remove surface dirt from the upper, midsole, and tread. Focus on seams and grooves where grime accumulates. This prevents scratching during wet cleaning. - Spot-Clean Problem Areas (Day 2)
Mix a few drops of mild dish soap with warm water. Dip a microfiber cloth or soft brush into the solution, wring thoroughly, and gently clean stained areas. For mesh, use circular motions; for leather, use straight strokes. Avoid oversaturating—damp, not wet. - Tackle Yellowed Midsoles (Day 3)
Oxidation causes white rubber to yellow over time. To reverse this safely:- Create a paste of baking soda and hydrogen peroxide (2:1 ratio).
- Apply with a toothbrush along the discolored edge.
- Wrap the sole in plastic wrap to retain moisture.
- Leave for 2–4 hours in indirect sunlight (UV helps break down stains).
- Rinse and dry completely before proceeding.
- Final Wipe & Dry (Day 4)
Wipe the entire upper with a clean, damp microfiber cloth to remove residue. Stuff shoes with paper towels to maintain shape and absorb moisture. Air-dry at room temperature, away from radiators or direct sun, which can warp glue and fade colors.
This four-day cycle allows materials to rest between treatments, reducing stress and preventing warping or delamination.
Do’s and Don’ts by Material Type
Even experienced sneaker owners make mistakes when reviving old pairs. The following table outlines best practices and common pitfalls based on material composition.
| Material | Do’s | Don’ts |
|---|---|---|
| Nubuck/Suede | Use a suede eraser for scuffs; follow with a brass or nylon brush to lift nap. Apply protective spray after cleaning. | Never use water-heavy solutions or standard shoe polish. Avoid heat exposure. |
| Leather | Clean with pH-neutral leather wipes. Condition quarterly with lanolin-free cream to prevent cracking. | Don’t soak or use vinegar solutions—they strip natural oils and cause stiffness. |
| Knit/Mesh | Use a gentle enzymatic cleaner designed for technical fabrics. Blot, don’t rub. | Never machine-wash unless manufacturer-approved. Avoid stiff brushes. |
| Canvas | Hand-scrub with mild soap and water. Can be machine-washed in a pillowcase on cold, gentle cycle. | Don’t tumble dry—heat shrinks fabric and peels logos. |
| Rubber Soles | Scrub treads with a dedicated sole brush. Use oxidizing paste for yellowing. | Avoid acetone or nail polish remover—they dissolve adhesives and degrade foam. |
Expert Insight: Preserving Value Through Care
For collectors and casual wearers alike, proper maintenance impacts both longevity and potential resale value. We spoke with Marcus Lin, a sneaker authentication specialist with over a decade in luxury consignment:
“Most people think cleaning is just about looks. But improper methods—like using harsh detergents or high heat—break down adhesives, separate layers, and create micro-tears in fabric. That’s what kills resale value. A well-maintained vintage Air Force 1 can fetch triple the price of a heavily worn pair—even if both started as identical models.” — Marcus Lin, Senior Authenticator at SoleVerify
His advice? Treat your sneakers like archival items. “Store them with silica gel packs, rotate wear, and document care routines. Buyers notice attention to detail.”
Real Example: Reviving a 3-Year-Old Runner
Jamie, a recreational runner in Portland, wore her performance trainers nearly every day for two years. By month 36, the knit uppers were gray with embedded dirt, the midsoles had yellowed, and the laces were frayed. She considered discarding them—until she followed a careful refresh protocol.
She began by removing laces and insoles, then dry-brushed the upper with a soft pet-grooming brush. Using a mixture of Nikwax Tech Wash (designed for technical textiles), she spot-cleaned the mesh with a microfiber pad. After air-drying, she treated the midsole with a baking soda–hydrogen peroxide wrap under indirect sunlight for three hours. New cotton laces and a light application of fabric protector completed the transformation.
The result? A pair that looked two years newer, with no fiber damage or color loss. More importantly, the shoe retained its structural support and breathability—critical for continued use.
Essential Checklist for Safe Sneaker Refreshing
Before starting your next sneaker revival project, run through this checklist to ensure safety and effectiveness:
- ✅ Identify all materials used in the shoe (check brand website if unsure)
- ✅ Remove laces and insoles for separate cleaning
- ✅ Test any cleaner on a hidden area first
- ✅ Use only soft brushes and non-abrasive cloths
- ✅ Avoid soaking—apply damp, not wet, cleaning methods
- ✅ Never use bleach, acetone, or ammonia-based products
- ✅ Allow 24+ hours of air-dry time at room temperature
- ✅ Re-lace with fresh or cleaned laces; consider replacement if frayed
- ✅ Apply material-specific protectant (e.g., suede guard, leather conditioner)
- ✅ Store properly post-cleaning (see below)
Proper Storage to Maintain Results
Refreshing your sneakers is only half the battle. How you store them determines how long they stay fresh. Exposure to humidity, UV light, and poor airflow accelerates aging.
Store sneakers in a cool, dry place away from windows. Use breathable cotton shoe bags—not plastic—to prevent trapped moisture and mold. Insert shoe trees or crumpled acid-free paper to maintain shape and absorb residual sweat.
If you own multiple pairs, rotate them weekly. Continuous wear compresses cushioning and heats up materials, leading to faster degradation. Even durable synthetics need recovery time.
Frequently Asked Questions
Can I put my sneakers in the washing machine?
Only if the manufacturer explicitly states it's safe—typically limited to canvas or simple textile models. Most modern sneakers contain adhesives, foams, and layered composites that break down under agitation and moisture. Hand-cleaning is always safer and more precise.
Why do white soles turn yellow after cleaning?
Yellowing is usually due to oxidation, not dirt. Some cleaning methods—especially those involving UV exposure without proper rinsing—can accelerate this. The baking soda and hydrogen peroxide method reverses existing yellowing, but prolonged sun exposure afterward will re-trigger it. Store white-soled sneakers away from light when not in use.
How often should I refresh my sneakers?
Light surface cleaning every 2–3 weeks keeps buildup minimal. A full refresh (deep clean + sole treatment) is recommended every 3–4 months for regularly worn pairs. Daily commuters or athletes may need monthly touch-ups depending on conditions.
Conclusion: Give Old Sneakers a Second Life—Safely
Reviving old sneakers isn’t about hiding wear—it’s about honoring craftsmanship, sustainability, and personal attachment. With the right knowledge, you can restore appearance without sacrificing material integrity or original color. From identifying fabrics to applying targeted treatments and storing with care, each step plays a role in preserving both form and function.
Whether you’re prepping a rare collectible for resale or simply refusing to part with a comfortable favorite, thoughtful maintenance pays off. These aren’t just shoes—they’re stories in motion. Treat them with respect, and they’ll keep moving with you for miles to come.


 浙公网安备
33010002000092号
浙公网安备
33010002000092号 浙B2-20120091-4
Comments
No comments yet. Why don't you start the discussion?