
Removing gel nail extensions may seem intimidating, especially if you're concerned about weakening or peeling your natural nails. Many people assume it requires a salon visit, but with the right tools and technique, you can safely remove them at home—without causing harm. The key lies in patience, proper preparation, and avoiding aggressive methods that strip or rip the nail surface. When done correctly, at-home removal can preserve nail strength and even promote healthier regrowth.
Gel extensions are typically bonded using UV-cured gels that adhere strongly to the natural nail plate. Unlike acrylics, they don’t require filing down completely, which makes gentle removal possible. However, rushing the process or using improper techniques—like prying or scraping—can lead to thinning, splitting, or lifting of the natural nail. This guide walks through a safe, effective method for removing gel extensions at home while protecting your nail health every step of the way.
Why Safe Removal Matters
Your natural nails are made of keratin, similar to hair, and are susceptible to damage from excessive moisture, chemicals, and mechanical stress. Gel polish and extensions create a barrier that limits oxygen and moisture exchange. Over time, this can dehydrate the nail bed, making the nail more brittle. When removed improperly, the trauma can result in:
- Nail thinning or layer separation (onycholysis)
- Peeling and flaking
- Increased sensitivity or pain
- Long-term weakening affecting future growth
According to Dr. Dana Stern, a board-certified dermatologist specializing in nail disorders, “The most common cause of post-extension nail damage isn’t the application—it’s the removal. Aggressive filing or picking leads to micro-trauma that compromises the nail matrix.”
“Never force off a gel extension. If it doesn’t come off easily after soaking, give it more time. Patience is the best tool you have.” — Dr. Dana Stern, Nail Health Specialist
Step-by-Step Guide to At-Home Gel Extension Removal
Follow this detailed timeline to ensure a safe and effective removal process. Allow 30–60 minutes depending on nail thickness and product used.
- Trim and File Down the Extensions
Use nail clippers to shorten the length of the gel extensions. Then, gently file the shiny top layer using a 180-grit file. This breaks the seal of the gel, allowing acetone to penetrate more effectively. Do not file down to the natural nail—only roughen the surface of the gel. - Cut Foil Wraps or Prepare Cotton Pads
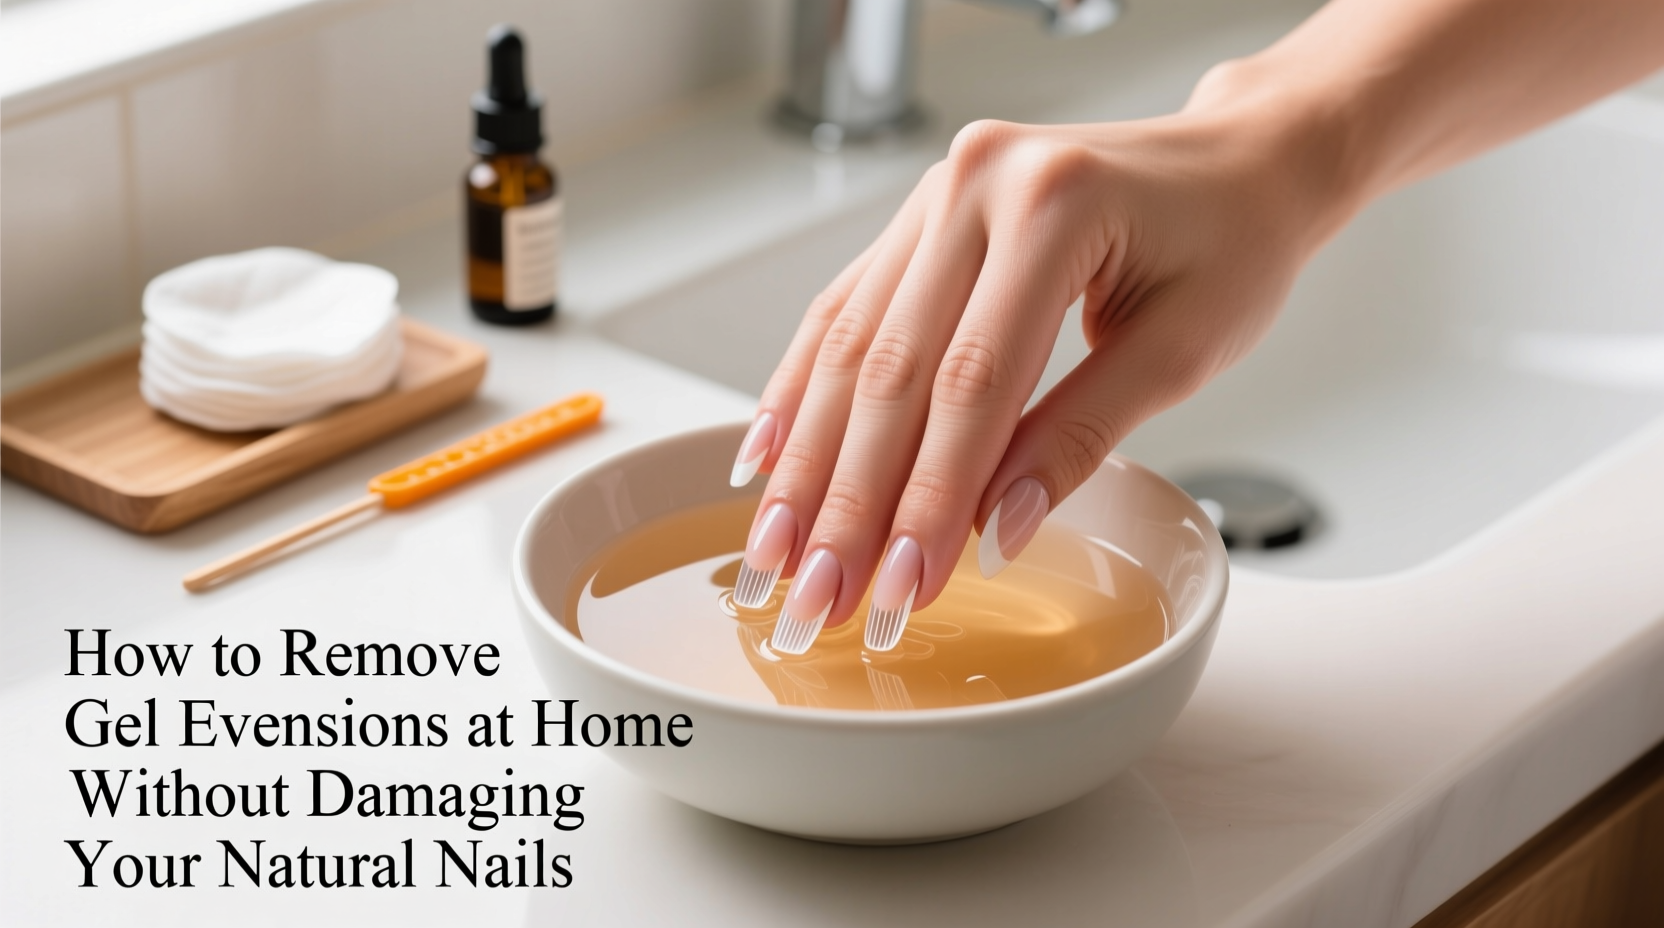
Cut small squares of aluminum foil (about 2x2 inches) or use pre-made nail clips. Soak small cotton pads or balls in pure acetone (not nail polish remover with additives). - Apply Acetone and Wrap Each Nail
Place a soaked cotton pad over each nail. Wrap the fingertip with foil to hold the cotton in place and prevent evaporation. Repeat for all ten fingers. - Wait 15–20 Minutes
Let the acetone soften the gel. Avoid moving your hands too much to keep the cotton in contact. Re-wet the cotton if it dries out before time is up. - Gently Push Off the Gel
After soaking, unwrap one finger at a time. Use a wooden cuticle stick or orangewood stick to gently nudge the softened gel from the cuticle outward. If it resists, rewrap and wait another 5–10 minutes. - Moisturize and Buff Lightly (If Needed)
Once all gel is removed, wash hands with warm, soapy water. Apply a nourishing cuticle oil or hand cream. If any residue remains, lightly buff with a 100/180 grit buffer—never metal files. - Rehydrate the Nails and Cuticles
For the next 48 hours, apply cuticle oil 2–3 times daily. Consider wearing gloves when doing dishes or cleaning to protect newly exposed nails.
What Not to Do During Removal
| Don't | Why It’s Harmful | Safer Alternative |
|---|---|---|
| Peel or pick at the gel | Causes layers of the natural nail to lift and tear | Soak longer and gently push off |
| Use non-acetone remover | Ineffective; prolongs exposure and increases friction | Use 100% pure acetone |
| Scrape with metal tools | Scratches nail plate and increases infection risk | Use wooden or rubber implements |
| File down to the skin | Thins the nail and exposes sensitive nail bed | Only buff residual gel lightly |
| Leave gel remnants for days | Traps moisture and bacteria under the nail | Complete removal within 24 hours |
Essential Tools and Products Checklist
To perform a safe and efficient removal, gather these items before beginning:
- 100% pure acetone (check label for no added oils or conditioners)
- Fine-grit nail file (180 grit)
- Orangewood sticks or rubber cuticle pusher
- Aluminum foil or nail removal clips
- Cotton pads or balls
- Nail clippers (if extensions are long)
- Cuticle oil (jojoba, vitamin E, or almond oil)
- Hand cream or restorative nail serum
Avoid \"acetone-free\" removers—they won’t break down gel properly. While pure acetone has a strong odor, it’s the only solvent effective enough to dissolve cured gel. For sensitive users, ventilate the room or wear a mask. You can also place a drop of essential oil on a tissue nearby to help neutralize the smell without interfering with the process.
Real Example: A Cautionary Home Removal Experience
Sophie, a graphic designer from Portland, tried removing her gel extensions after four weeks. She skipped the soaking step and began filing aggressively, thinking she could save time. Within minutes, she noticed white streaks and flaking on her nails. By the third day, two nails had split vertically near the cuticle. “I thought I was being careful,” she said, “but I didn’t realize how much the gel had bonded to my natural nail. Now I have to wait months for them to grow back strong.”
After consulting a dermatologist, Sophie learned that excessive filing had stripped multiple layers of her nail plate. Her doctor recommended a six-week recovery routine: nightly cuticle oil, biotin supplements, and no polish. Today, her nails are recovering—but she now swears by the soak-and-patience method. “It takes longer, but it’s worth it. My nails haven’t been this healthy in years.”
Post-Removal Nail Care: Rebuilding Strength
Once the gel is gone, your nails may appear dull, thin, or slightly discolored. This is normal. The nail needs time to rebalance its moisture and regenerate. Follow these steps to support recovery:
- Hydrate daily: Apply cuticle oil morning and night. Look for formulas with jojoba oil, which closely mimics the skin’s natural sebum.
- Take biotin or collagen supplements: Studies suggest biotin can improve nail thickness and reduce brittleness over 6–8 weeks.
- Avoid polish for 1–2 weeks: Let your nails breathe. If you must polish, choose breathable, formaldehyde-free options.
- Wear gloves during chores: Water exposure softens nails, making them prone to bending and peeling.
- Limit gel use frequency: Wait at least 4–6 weeks between gel applications to allow full recovery.
Frequently Asked Questions
Can I reuse my gel extensions at home?
No. Gel extensions are not designed for reuse. Once removed, the material is compromised and cannot be reapplied safely. Attempting to reattach them increases the risk of bacterial buildup and uneven adhesion.
How often can I remove gel extensions at home?
You can remove them as needed—at the end of each wear cycle (typically every 2–3 weeks). However, frequent application and removal (more than once per month) can weaken nails over time. Allow at least 2–3 weeks of bare-nail recovery between sets.
Is acetone safe for natural nails?
In moderation, yes. Pure acetone is a powerful degreaser and can dry out nails and cuticles, but short, controlled exposure during removal is not harmful. The real danger comes from prolonged or repeated exposure without moisturizing afterward. Always follow up with oil and cream.
Final Thoughts: Prioritize Nail Health Over Speed
Removing gel extensions at home doesn’t have to mean sacrificing nail integrity. With the right approach, you can achieve clean, complete removal while preserving the strength and appearance of your natural nails. The temptation to rush—by peeling, scraping, or skipping steps—often leads to avoidable damage that takes months to reverse.
Think of your nails as living structures that respond to care and trauma alike. Every time you remove extensions gently, you’re investing in long-term resilience. Whether you’re transitioning to natural nails, switching styles, or just taking a break, treat the removal phase with the same attention as the application.


 浙公网安备
33010002000092号
浙公网安备
33010002000092号 浙B2-20120091-4
Comments
No comments yet. Why don't you start the discussion?