
Accidents happen—especially in homes with children or during busy events where markers are within reach. When a bold streak of permanent marker ends up on your freshly painted wall, panic can set in. The good news is that you don’t need to repaint or refinish the entire surface. With the right techniques and household products, it’s entirely possible to lift permanent ink safely while preserving the integrity of your paint.
The key lies in understanding the chemistry of both the marker and the wall surface. Permanent markers contain alcohol-based inks designed to adhere to many materials, but they aren’t invincible. Most modern interior paints—especially latex or acrylic finishes—are non-porous enough that the ink sits mostly on the surface, making removal feasible if addressed promptly and correctly.
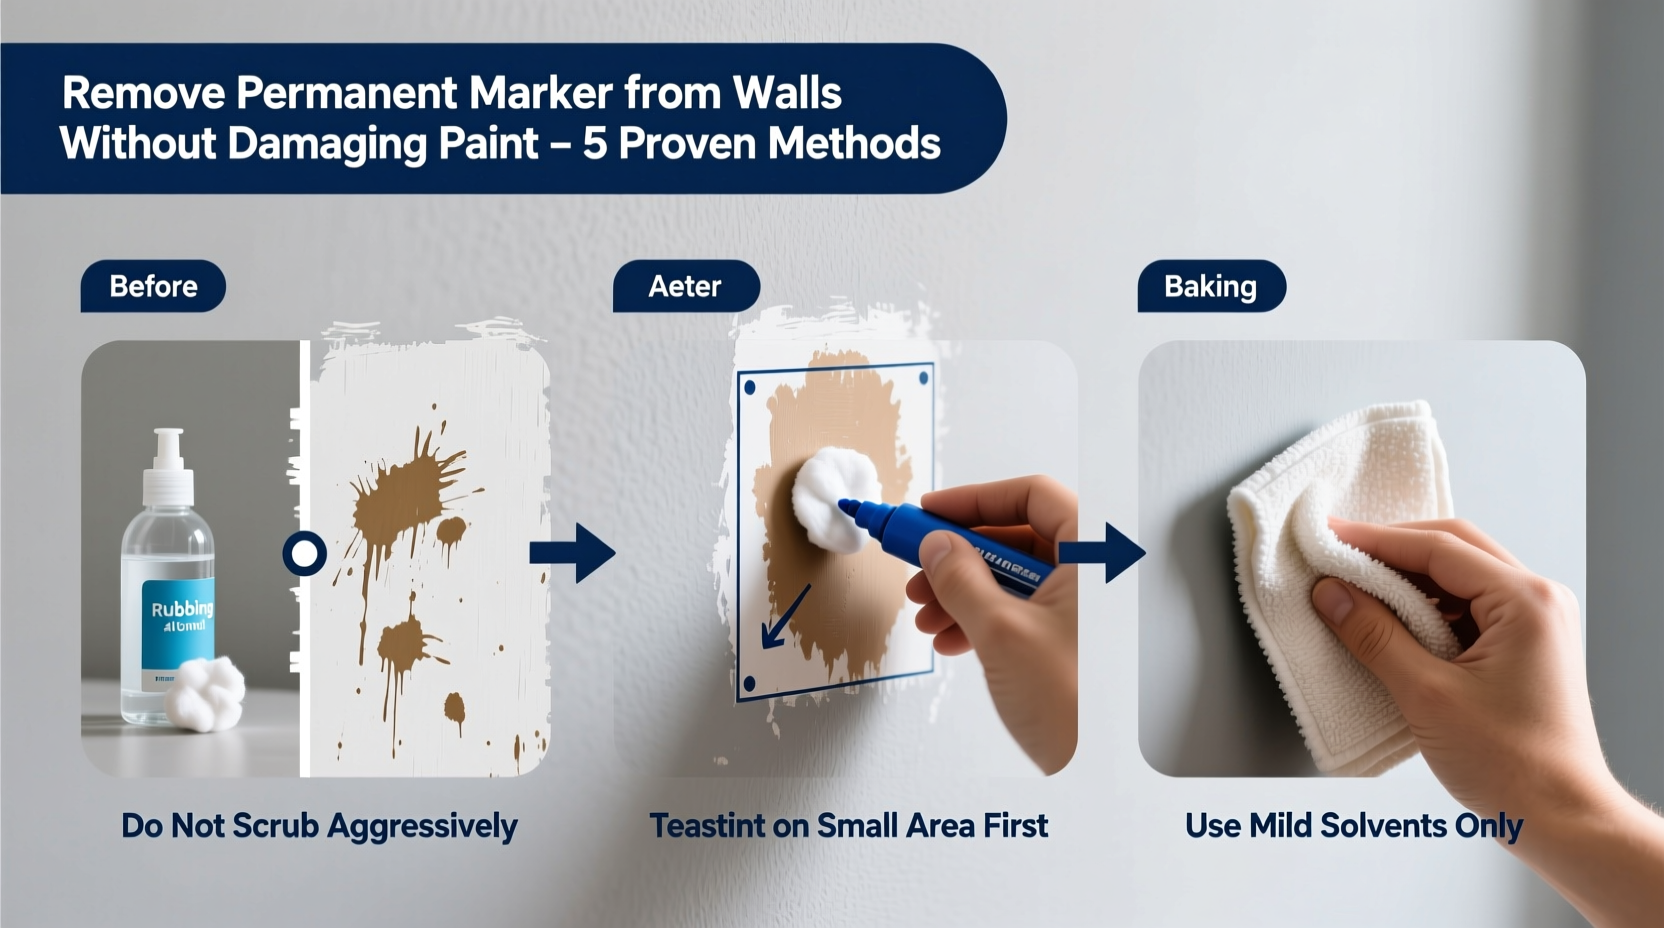
This guide walks through tested, paint-safe methods, outlines what tools work best, and reveals common mistakes that could lead to damage. Whether it's a crayon-like scribble across a nursery wall or an accidental line near a doorway, these strategies will help restore your walls to their original condition—without sanding, patching, or repainting.
Understanding Wall Surfaces and Ink Behavior
Before applying any cleaning agent, it's crucial to identify the type of paint and finish on your wall. Different surfaces react differently to solvents, abrasives, and moisture. The most common interior wall finishes include:
- Matte/Flat Paint: Offers no shine but is more porous and delicate. Harsh scrubbing or strong chemicals can easily strip or discolor this finish.
- Eggshell: Slight sheen, more durable than flat paint, moderately resistant to stains.
- Satin and Semi-Gloss: Smooth, wipeable surfaces that resist moisture and stains better—ideal candidates for solvent-based cleaning.
- Gloss: Highly durable and reflective, easiest to clean without damaging the paint layer.
Permanent marker ink bonds quickly to surfaces via its alcohol carrier, which evaporates, leaving behind pigment and resin. On non-porous or semi-gloss finishes, the ink remains largely on the surface, making it easier to dissolve. On flat or porous paints, some penetration may occur, requiring gentler approaches to avoid lifting the paint along with the ink.
“Most permanent marker stains on walls are fixable if treated early and with the right pH-balanced cleaner. Avoid anything abrasive—it does more harm than good.” — Linda Ruiz, Residential Painting Specialist with 18 years of restoration experience
Step-by-Step Guide to Removing Permanent Marker Safely
Follow this systematic process to maximize effectiveness while minimizing risk to your paint:
- Test First: Always test your chosen method on a small, inconspicuous area (behind a door, near baseboard) to ensure no discoloration or texture change occurs.
- Act Quickly: Fresh ink is easier to remove. Older stains may require repeated treatments.
- Gather Supplies: Use soft cloths, cotton swabs, and non-abrasive sponges. Avoid steel wool, rough brushes, or scouring pads.
- Start Mild: Begin with gentle solutions like soapy water or baking soda paste before progressing to stronger agents.
- Blot, Don’t Rub: Use a dabbing motion to lift ink rather than scrubbing, which can spread the stain or wear down paint.
- Rinse Afterward: If using chemical cleaners, wipe the area with a damp cloth afterward to neutralize residue.
- Dry Thoroughly: Pat dry with a clean towel to prevent water spots or mildew in humid environments.
Top 5 Safe and Effective Cleaning Methods
Not all cleaners are created equal when it comes to protecting painted walls. Below are five reliable techniques, ranked by safety and efficiency:
1. Baking Soda and Water Paste
A natural, non-toxic option that uses mild abrasion to lift ink. Mix two parts baking soda with one part water to form a thick paste. Apply with a soft cloth, gently rub in circular motions, then wipe clean with a damp sponge. Ideal for flat and eggshell finishes.
2. Isopropyl Alcohol (70% or higher)
Highly effective due to its ability to break down alcohol-based inks. Dip a cotton ball in rubbing alcohol, press gently onto the stain, and let sit for 10–15 seconds before wiping. Works best on satin, semi-gloss, and gloss paints. Avoid prolonged exposure on matte finishes.
3. Magic Eraser (Melamine Foam)
Famous for tackling tough stains, melamine foam works at a microscopic level to abrade surface contaminants. Moisten the eraser slightly and apply light pressure. While effective, use sparingly—overuse can dull glossy finishes or thin paint layers over time.
4. Hairspray Method
Many aerosol hairsprays contain alcohol and polymers that dissolve permanent ink. Spray directly onto the mark, wait 30 seconds, then blot with a clean cloth. Choose alcohol-based sprays (check ingredients); avoid oil-heavy formulas that could leave residue.
5. White Toothpaste (Non-Gel, Fluoride-Free)
Standard white toothpaste contains mild abrasives and surfactants. Apply a pea-sized amount to a soft toothbrush, gently brush the stain in small circles, then wipe clean. Best for small marks and not recommended for large areas.
| Method | Safety for Paint | Effectiveness | Best For |
|---|---|---|---|
| Baking Soda Paste | ★★★★★ | ★★★☆☆ | Matte/eggshell paint, light stains |
| Isopropyl Alcohol | ★★★☆☆ | ★★★★★ | Semi-gloss/gloss, fresh stains |
| Magic Eraser | ★★☆☆☆ | ★★★★☆ | Smooth walls, older stains |
| Hairspray | ★★★☆☆ | ★★★★☆ | Quick fixes, accessible solution |
| White Toothpaste | ★★★★☆ | ★★★☆☆ | Small marks, child-safe homes |
Common Mistakes That Damage Paint
Even well-intentioned efforts can backfire if improper techniques are used. Avoid these frequent errors:
- Using Acetone or Nail Polish Remover: These are too aggressive and will almost certainly strip paint, especially latex-based finishes.
- Scrubbing Too Hard: Excessive pressure, even with soft cloths, can wear away the topcoat or create shiny patches.
- Applying Heat: Hairdryers or steam cleaners can soften paint binders, causing irreversible lifting.
- Skipping the Patch Test: What works in one room may damage another due to variations in paint age, brand, or formulation.
- Layering Cleaners: Mixing alcohol, bleach, ammonia, or vinegar increases chemical reactivity and risks etching or discoloration.
Real-World Example: Removing Marker from a Child’s Bedroom Wall
In suburban Chicago, Sarah Thompson discovered her 5-year-old had drawn a detailed “spaceship” across the blue eggshell-finished wall of his bedroom. Panicked at first, she resisted the urge to scrub with bleach wipes. Instead, she started with a baking soda paste. After two gentle applications, most of the lighter lines faded, but darker outlines remained.
She then tried isopropyl alcohol on a cotton pad, testing behind the closet door first. Seeing no damage, she carefully dabbed the remaining marks. Within ten minutes, the wall was nearly spotless. She finished by wiping the area with a damp cloth and drying it immediately. No repainting was necessary, and the finish looked uniform.
Sarah later installed low-height whiteboards nearby to redirect creative energy—a preventive measure that reduced future incidents.
Prevention and Long-Term Protection Strategies
Once the stain is gone, consider steps to prevent recurrence and protect vulnerable walls:
- Install removable vinyl wall decals or chalkboard panels in high-risk zones like playrooms.
- Use washable paint in family areas—brands like Sherwin-Williams Duration Home or Benjamin Moore Aura offer scrubbable, stain-resistant finishes.
- Keep a wall-cleaning kit stocked with microfiber cloths, baking soda, and rubbing alcohol for quick response.
- Educate children about appropriate drawing surfaces using positive reinforcement.
- Apply a clear, matte protective sealant over painted walls in high-traffic areas (consult a painter for compatible products).
“The best wall stain strategy is a combination of quick action and long-term planning. A little preparation saves hours of repair work.” — Mark Delaney, Interior Renovation Contractor
Frequently Asked Questions
Can I use hand sanitizer to remove permanent marker from walls?
Yes, many hand sanitizers contain 60–70% alcohol, making them effective for breaking down marker ink. Apply a small amount to a cloth—not directly on the wall—and blot gently. Rinse the area afterward to remove sticky residue.
Will vinegar remove permanent marker from painted walls?
Vinegar alone is generally ineffective against permanent marker because it lacks the solvent strength needed to dissolve alcohol-based pigments. While safe on most paints, it won’t penetrate the ink’s bond. For better results, combine vinegar with baking soda—but even then, performance lags behind alcohol-based solutions.
What should I do if the paint comes off during cleaning?
If minor paint loss occurs, touch-up paint is your best remedy. Keep leftover paint from your original job stored in a cool, dark place. If unavailable, take a sample to a hardware store for color matching. Apply with a fine brush, feathering edges to blend seamlessly.
Final Checklist: Quick Reference Guide
- Identify paint type and finish
- Perform a patch test in an inconspicuous area
- Start with the mildest method (baking soda paste)
- Progress to alcohol or magic eraser if needed
- Use gentle, dabbing motions—no harsh scrubbing
- Rinse and dry the cleaned area thoroughly
- Store touch-up paint for emergencies
- Install designated drawing zones to prevent future marks
Conclusion: Restore Confidence, Not Just Walls
Removing permanent marker from walls doesn’t have to mean sacrificing your paint. With patience, the right tools, and a methodical approach, most stains can be eliminated cleanly and safely. The techniques outlined here balance effectiveness with preservation, ensuring your walls look as good as new—without the time and cost of repainting.
Don’t let one mistake define your space. Take action today with confidence, knowing that even the boldest marks can fade. Share your success story or ask questions in the comments—your experience might help another homeowner breathe easier tomorrow.


 浙公网安备
33010002000092号
浙公网安备
33010002000092号 浙B2-20120091-4
Comments
No comments yet. Why don't you start the discussion?