
Bluetooth earphones are convenient, portable, and essential for many daily routines—but they’re also prone to damage from drops, moisture, or internal component failure. When your earphones stop charging, produce muffled sound, or fail to connect, the instinct might be to replace them. However, many issues can be fixed at home—especially if you have the right tools and technique. One surprisingly effective tool? A small plastic sachet, like those included in electronics packaging to absorb moisture.
This guide walks through how to use that humble sachet—not as a desiccant—but as a precision aid in safely opening tightly sealed earbuds. Combined with careful disassembly and troubleshooting, this method allows you to inspect, clean, and repair internal components without causing further damage.
Why Use a Sachet to Open Earphones?
Modern wireless earphones are built with tight seals and adhesive joints to maintain water resistance and structural integrity. Traditional tools like metal spudgers or screwdrivers often scratch housings or crack casings when prying them apart. A plastic sachet—typically made of soft, flexible polyethylene—is thin enough to slide between seams yet durable enough to gently separate glued sections without marring surfaces.
The sachet acts as a non-conductive, non-abrasive wedge that breaks the bond gradually, preserving the housing for reassembly. This is especially useful for compact models like AirPods, Galaxy Buds, or Anker Soundcore earbuds where replacement parts are costly or hard to find.
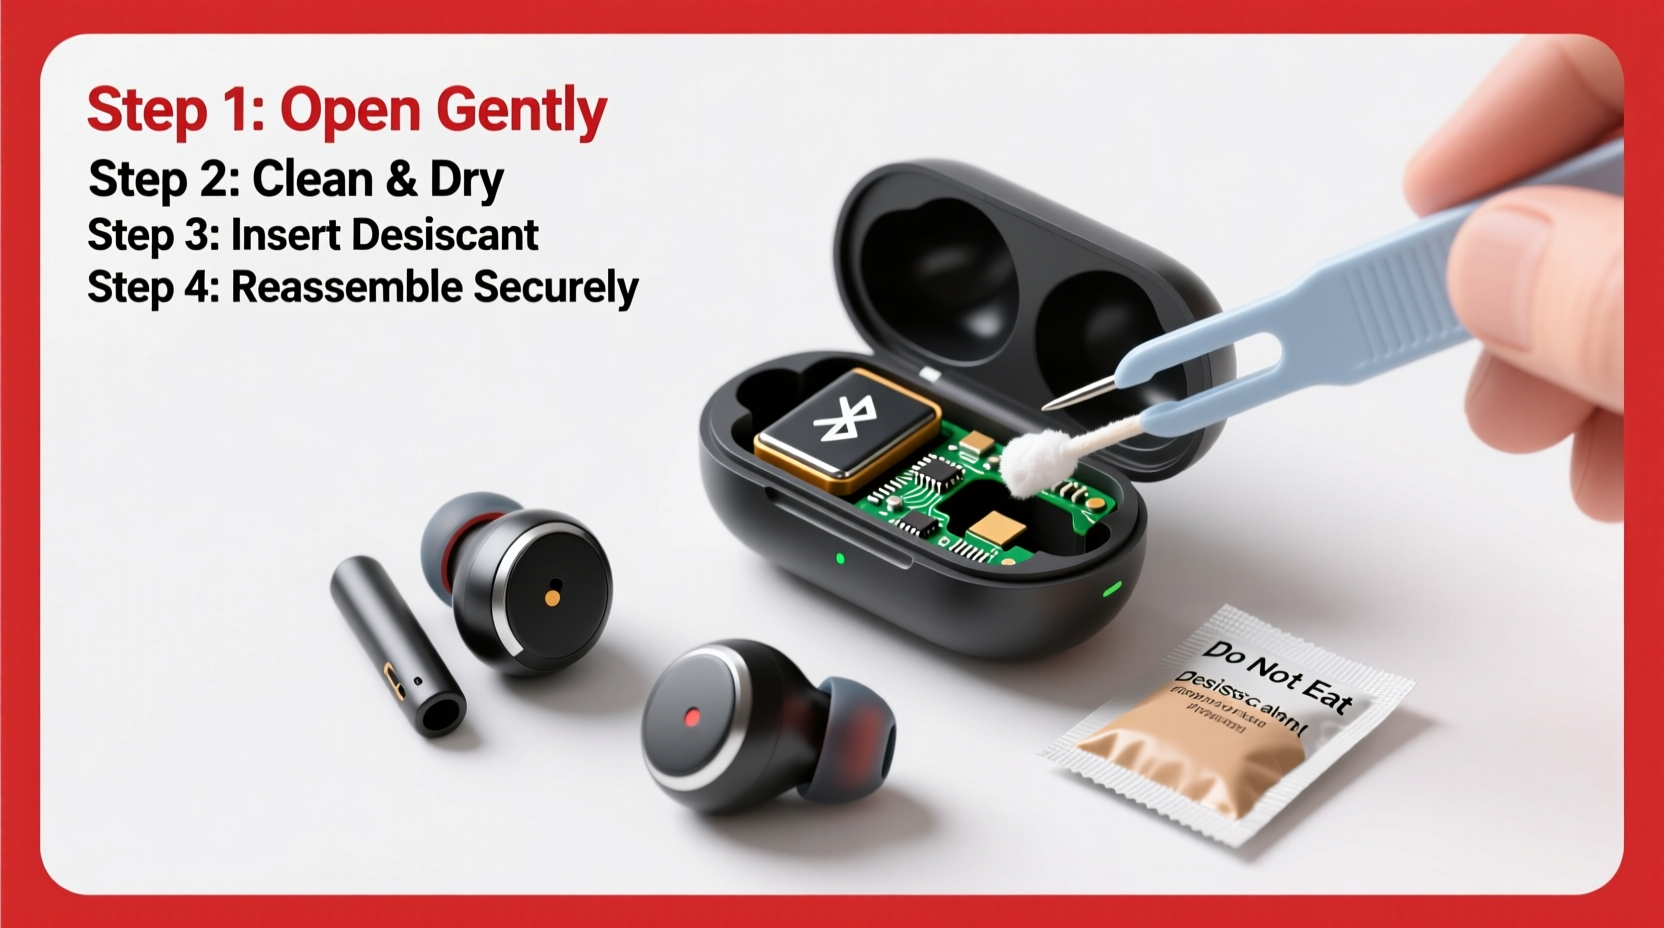
Step-by-Step Guide to Opening and Repairing Earphones
- Power off and disconnect: Turn off the earphones and remove them from any paired devices to prevent accidental activation during repair.
- Clean the exterior: Wipe down the earbuds with a dry microfiber cloth to remove dust and oils that could interfere with resealing later.
- Locate the seam: Examine the earbud casing for the natural split line where the two halves join. On most models, this runs vertically along the stem or body.
- Insert the sachet edge: Carefully slide one corner of the sachet into the seam. Use tweezers or fingernails to start the opening if needed.
- Work the sachet inward: Slowly push more of the sachet material into the gap, moving it around the perimeter like a zipper. The plastic will gradually loosen the adhesive bond.
- Separate the halves: Once the sachet has circled most of the joint, gently twist or pry with fingers to fully separate the casing. Avoid sudden force.
- Inspect internal components: Look for visible issues such as disconnected wires, corrosion on battery terminals, or debris blocking the speaker mesh.
- Clean or repair as needed: Use compressed air to remove lint, cotton swabs with isopropyl alcohol for corrosion, or a magnifier to check solder joints.
- Reassemble carefully: Align the halves precisely and press them together. For long-term durability, apply a tiny amount of waterproof adhesive (e.g., Loctite Ultra Gel) along the seam.
- Test functionality: Charge the earphones and pair them to confirm sound, connectivity, and charging work properly.
Common Issues You Can Fix This Way
- Muffled or quiet audio: Often caused by wax buildup on the speaker driver. Clean gently with a dry brush or compressed air.
- One earbud not working: Check for loose internal wiring or poor contact between the PCB and driver.
- Charging problems: Inspect the charging contacts inside the earbud and case. Corrosion or misalignment can interrupt power transfer.
- Moisture damage: If exposed to sweat or rain, drying components with silica gel (the original purpose of the sachet!) can restore function.
Essential Tools and Materials Checklist
- Small plastic sachet (from silica gel, electronics, or packaging)
- Precision tweezers
- Wooden or plastic spudger (optional backup)
- Isopropyl alcohol (90% or higher)
- Cotton swabs and microfiber cloth
- Magnifying glass or phone macro lens
- Compressed air canister
- Replacement adhesive (if resealing permanently)
Do’s and Don’ts of DIY Earphone Repair
| Do’s | Don’ts |
|---|---|
| Work in a clean, well-lit area with minimal static | Use metal tools near circuitry without insulation |
| Label or photograph each step during disassembly | Rush the process—patience prevents breakage |
| Store screws or tiny parts in a labeled container | Apply excessive pressure when prying |
| Let alcohol-dampened parts dry completely before reassembly | Ignore manufacturer warranty terms (voiding may occur) |
Real Example: Recovering a Water-Damaged Earbud
Sophie, a fitness instructor, noticed her left earbud stopped producing sound after a sweaty workout. Assuming it was dead, she nearly replaced the pair—until a technician friend suggested disassembling it. Using a sachet from a shoebox moisture absorber, she gently opened the casing and found corrosion on the driver connection point. After cleaning it with isopropyl alcohol and letting it dry overnight with a silica gel packet inside a sealed container, the earbud worked perfectly again. The entire fix took less than 20 minutes and cost nothing.
“Most earphone failures aren’t due to dead batteries or speakers—it’s physical blockages or minor corrosion. A gentle opening method preserves the unit so you can actually diagnose the real issue.” — Raj Mehta, Consumer Electronics Repair Technician with 12 years of experience
Frequently Asked Questions
Can I reuse the sachet after opening the earphones?
Yes, as long as it remains intact and clean. However, if it tears during use, discard it to avoid leaving plastic fragments inside the device.
Will opening my earphones void the warranty?
Almost always, yes. Most manufacturers seal earphones with tamper-evident adhesives. If your device is still under warranty, consider contacting support first. This method is best for out-of-warranty units.
What if the sachet doesn’t fit into the seam?
Try warming the earbud slightly with a hairdryer on low heat for 15–20 seconds. Heat softens adhesive and makes separation easier. Do not overheat—plastics can warp above 50°C (122°F).
Final Tips for Success
Success in repairing Bluetooth earphones comes down to patience, precision, and the right tools. The sachet method minimizes cosmetic damage, which is critical if you plan to resell or continue using the earphones daily. Always work slowly, document your progress, and keep track of tiny components.
Remember: even if a repair doesn’t work the first time, the knowledge gained helps refine your approach. Many experienced repair technicians started with a single broken pair and a willingness to learn.


 浙公网安备
33010002000092号
浙公网安备
33010002000092号 浙B2-20120091-4
Comments
No comments yet. Why don't you start the discussion?