
Mold in the shower is more than just an eyesore—it can pose health risks and compromise indoor air quality if left unchecked. Bathrooms, especially grout lines between tiles, are prime breeding grounds for mold due to constant moisture, poor ventilation, and organic residues like soap scum. While commercial cleaners often contain harsh chemicals like bleach and ammonia, many effective alternatives exist right in your pantry. Using simple household items, you can tackle mold safely, affordably, and without exposing yourself or your family to toxic fumes.
This guide walks through proven methods using ingredients like vinegar, baking soda, hydrogen peroxide, and tea tree oil. These natural solutions not only kill mold at its roots but also help prevent future growth when used regularly. Whether you're dealing with small patches of black mold or recurring mildew stains, this comprehensive approach offers practical steps, safety tips, and long-term prevention strategies—all achievable with everyday products.
Understanding Mold in the Bathroom
Mold thrives in damp, warm environments with limited airflow—conditions that describe most bathrooms perfectly. The porous nature of grout makes it especially vulnerable; it absorbs moisture and traps dirt, creating an ideal habitat for mold spores. The most common type found in showers is *Aspergillus*, which appears as dark spots, usually black or greenish-black, along tile edges and corners.
While not all mold is toxic, prolonged exposure can trigger allergies, respiratory issues, and irritation—particularly in individuals with asthma or weakened immune systems. According to the U.S. Environmental Protection Agency (EPA), prompt removal and moisture control are key to minimizing health risks associated with indoor mold.
“Mold doesn’t need much to grow—just moisture and a food source like dust or skin cells. In bathrooms, grout acts like a sponge, holding onto both.” — Dr. Linda Chen, Indoor Air Quality Specialist
Before diving into cleaning techniques, it’s important to distinguish between surface mold and deeply embedded infestations. If mold has penetrated deep into walls or spread over large areas (more than 10 square feet), professional remediation may be necessary. For typical household cases confined to grout lines, however, DIY methods using household supplies are both safe and effective.
Safe and Effective Household Ingredients for Mold Removal
The following natural agents have been scientifically shown to possess antifungal and antimicrobial properties, making them excellent choices for mold elimination:
- White vinegar: Acetic acid in vinegar kills about 82% of mold species, including *Aspergillus* and *Penicillium*. Its acidity breaks down mold while deodorizing surfaces.
- Baking soda (sodium bicarbonate): A mild abrasive that scrubs away mold residue without damaging grout. It also helps neutralize odors and creates an inhospitable environment for mold regrowth.
- Hydrogen peroxide (3%): A natural oxidizer that destroys mold on contact. It's particularly effective against black mold and leaves no harmful residues.
- Tea tree oil: Known for potent antifungal properties, a few drops mixed with water can eliminate mold and act as a long-lasting inhibitor.
- Citrus seed extract or grapefruit seed extract: Often used in natural disinfectants, these have broad-spectrum antimicrobial effects.
Step-by-Step Guide to Removing Mold from Grout
Follow this detailed process to thoroughly clean moldy grout using safe, non-toxic ingredients. This method combines multiple household items for maximum effectiveness.
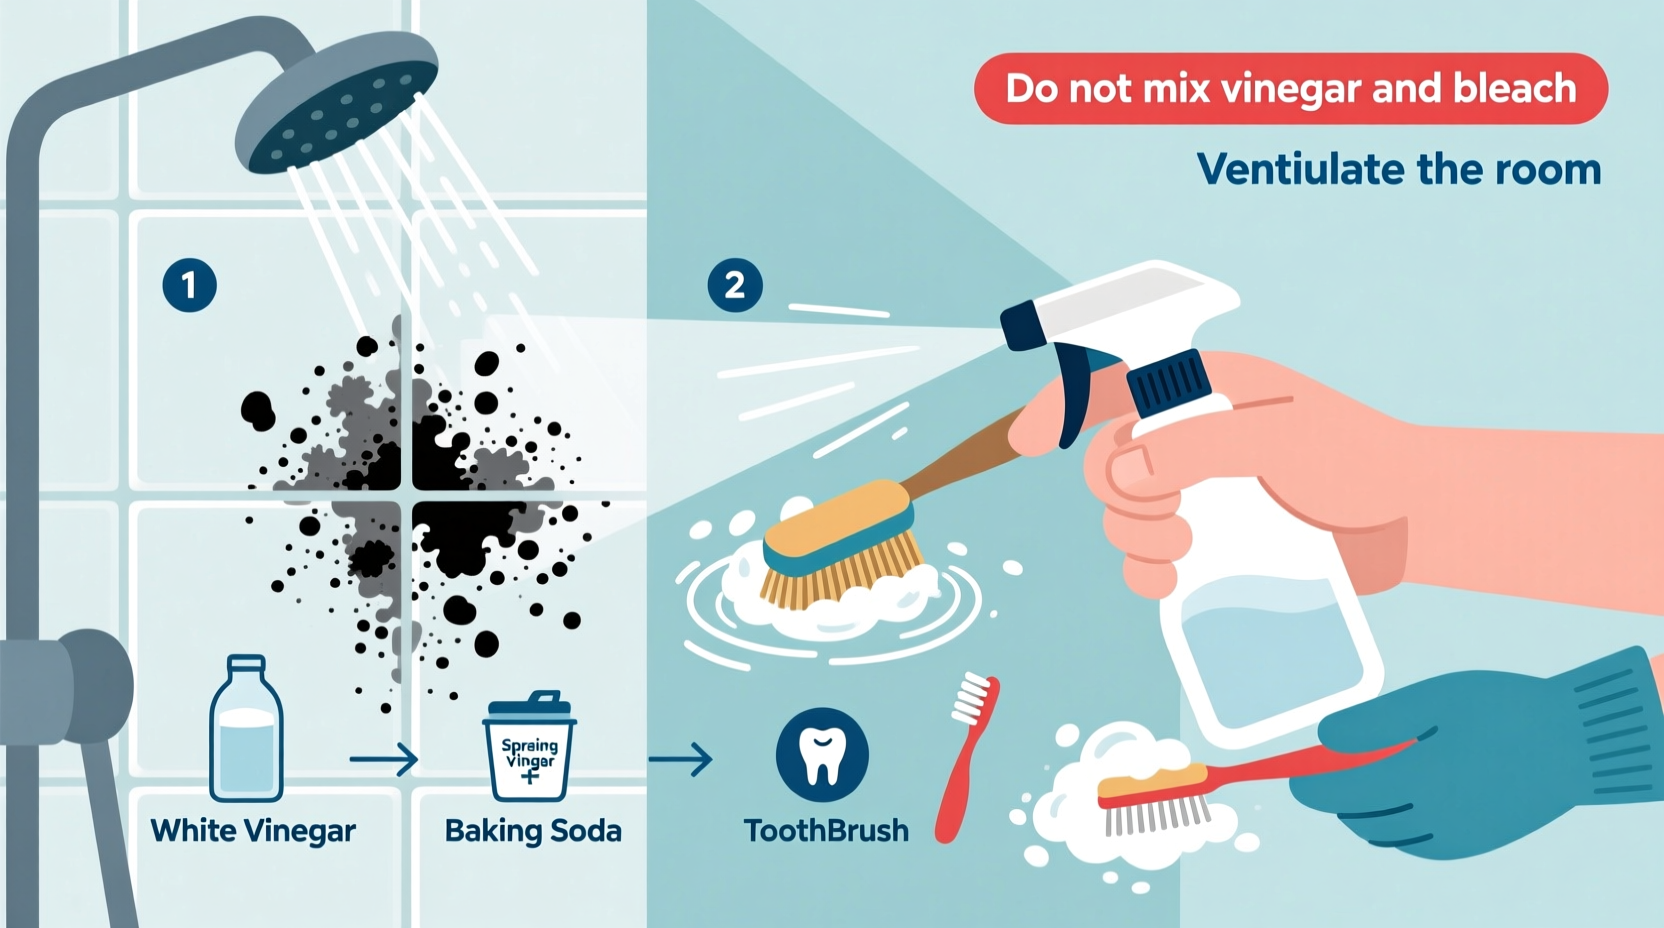
- Ventilate the bathroom: Open windows or turn on the exhaust fan to ensure proper airflow during cleaning. Never mix cleaning agents, especially vinegar and hydrogen peroxide, in the same container—they form peracetic acid, which can irritate lungs.
- Remove loose debris: Use a dry toothbrush or soft-bristle brush to gently dislodge dust and flaking mold from grout lines. Wipe down the surrounding tiles with a damp cloth.
- Apply white vinegar: Pour undiluted white vinegar into a spray bottle and saturate affected grout lines. Let sit for 1 hour. Vinegar penetrates pores and begins killing mold at the root level.
- Scrub with baking soda paste: Mix ½ cup baking soda with 2–3 tablespoons of water to form a thick paste. Apply directly to grout using an old toothbrush. Scrub vigorously along stained lines. The abrasiveness lifts mold remnants without scratching ceramic or porcelain tiles.
- Rinse and repeat with hydrogen peroxide: After rinsing with warm water, apply 3% hydrogen peroxide to the same areas using a spray bottle. Allow it to sit for 10–15 minutes before scrubbing again lightly. This step ensures complete microbial kill and brightens grout color.
- Final rinse and dry: Rinse thoroughly with clean water and wipe dry with a microfiber towel. Ensure the area dries completely to discourage new mold formation.
- Optional: Tea tree oil treatment: Mix 1 teaspoon tea tree oil with 1 cup water in a spray bottle. Spray on cleaned grout weekly as a preventive measure. Its residual effect inhibits mold spore germination.
| Ingredient | Mold-Killing Effectiveness | Safety Notes | Best For |
|---|---|---|---|
| White vinegar | High (82% kill rate) | Strong odor; avoid use on natural stone | Initial penetration and deodorizing |
| Baking soda | Moderate (mechanical + mild antifungal) | Fully non-toxic; safe for all surfaces | Scrubbing and pH balancing |
| Hydrogen peroxide (3%) | Very high (kills spores on contact) | Can bleach fabrics; store in dark bottle | Killing persistent black mold |
| Tea tree oil | Very high (long residual protection) | Potent essential oil; dilute properly | Prevention and ongoing maintenance |
Real Example: Tackling Recurring Mold in a Shared Bathroom
Sarah, a mother of two living in a 1970s-era apartment building, struggled with recurring black mold along the base of her shower wall. Despite monthly bleach cleanings, the mold returned within weeks. Concerned about her youngest child’s asthma, she decided to switch to natural methods after reading about vinegar and tea tree oil.
She followed the seven-step process outlined above, using vinegar first, then baking soda paste, followed by hydrogen peroxide. She repeated the full cycle twice over one weekend and noticed immediate improvement—dark stains lightened significantly, and the musty smell disappeared. To maintain results, she began spraying a diluted tea tree oil solution every Sunday after cleaning.
Three months later, no new mold had appeared. “I was skeptical at first,” Sarah said, “but seeing how well it worked without harsh fumes made me a believer. My kids aren’t coughing as much in the mornings either.” Her experience highlights how consistent, chemical-free care can yield lasting improvements in bathroom hygiene and air quality.
Common Mistakes to Avoid
Even with safe ingredients, improper technique can reduce effectiveness or cause damage. Be mindful of these frequent errors:
- Mixing vinegar and hydrogen peroxide in the same spray bottle: Though both are effective separately, combining them creates peracetic acid, which is corrosive and potentially harmful to breathe.
- Using too much water during cleanup: Excess moisture rehydrates the area, encouraging mold regrowth. Always dry thoroughly after rinsing.
- Skipping ventilation: Cleaning in a sealed bathroom traps humidity and volatile compounds, increasing inhalation risk and slowing drying time.
- Ignoring surrounding areas: Mold spreads easily. Clean adjacent silicone caulk, shower curtains, and drain covers to prevent cross-contamination.
- Not wearing gloves: Even natural cleaners can dry out skin or cause irritation with prolonged contact.
Prevention Checklist: Keep Mold Away Long-Term
Eliminating existing mold is only half the battle. Preventing recurrence requires consistent habits and environmental control. Use this checklist to maintain a mold-free shower:
- ✔ Run the bathroom exhaust fan during and for 20–30 minutes after each shower.
- ✔ Squeegee shower walls and doors after use to minimize standing water.
- ✔ Wash shower curtains and liners monthly in hot water with vinegar.
- ✔ Inspect grout annually for cracks; reseal if needed with a water-based sealer.
- ✔ Clean grout lines with a vinegar-water spray once a week.
- ✔ Keep bathroom temperature stable—avoid extreme fluctuations that increase condensation.
- ✔ Trim back any bathroom plants that contribute to humidity.
Frequently Asked Questions
Can I use lemon juice instead of vinegar?
Lemon juice contains citric acid, which has some antimicrobial properties, but it's less effective than acetic acid (vinegar) against mold. Additionally, citrus can stain certain surfaces and degrade grout over time. Stick with vinegar for better results and consistency.
Is baking soda alone enough to kill mold?
Baking soda is excellent for scrubbing and mildew removal but lacks strong fungicidal action on its own. It works best when combined with vinegar or hydrogen peroxide to both lift and kill mold spores.
How often should I clean my shower grout?
For optimal prevention, perform a light cleaning with vinegar weekly and a deeper scrub with baking soda and hydrogen peroxide every 4–6 weeks. High-use bathrooms may require more frequent attention.
Conclusion: Take Control of Your Bathroom Environment
Removing mold from shower grout doesn’t require dangerous chemicals or expensive products. With common household items like vinegar, baking soda, and hydrogen peroxide, you can achieve a deep, hygienic clean that protects your health and preserves your tiles. The real power lies not just in occasional deep cleaning, but in adopting daily habits that reduce moisture and inhibit mold growth.
By understanding the conditions mold needs to survive—and systematically removing them—you transform your bathroom into a cleaner, safer space. Start today: gather your supplies, follow the step-by-step method, and commit to regular upkeep. Small actions compound into lasting results. Your lungs, your home, and your peace of mind will thank you.


 浙公网安备
33010002000092号
浙公网安备
33010002000092号 浙B2-20120091-4
Comments
No comments yet. Why don't you start the discussion?