
Bathroom safety is a critical concern for households of all kinds—especially for older adults, young children, or anyone with mobility challenges. Slippery surfaces near showers, tubs, and sinks contribute to thousands of injuries each year. While traditional anti-slip mats and textured tiles offer some protection, an emerging natural solution is gaining attention: diatom mud. This porous, silica-rich material derived from fossilized algae provides excellent moisture absorption and traction. When applied correctly, it can significantly reduce the risk of slips and falls. However, improper use may compromise its effectiveness or even create new hazards. This guide explains how to safely and effectively incorporate diatom mud into your bathroom for lasting safety and comfort.
Understanding Diatom Mud and Its Anti-Slip Properties
Diatom mud, also known as diatomaceous earth plaster or diatomite wall coating, is made from the fossilized remains of marine phytoplankton called diatoms. The resulting powder or paste is highly porous, capable of absorbing up to 2–3 times its weight in moisture. In bathroom environments, this means rapid drying of wet floors and surfaces, reducing the time water remains on the floor—a key factor in slip prevention.
Unlike synthetic coatings, diatom mud creates a naturally textured surface that enhances grip underfoot. It doesn’t rely on chemical additives or abrasive particles to achieve traction, making it ideal for barefoot use. Additionally, it helps regulate humidity and inhibits mold growth, contributing to overall bathroom hygiene.
“Diatom mud’s micro-porous structure not only absorbs moisture quickly but also maintains a slightly rough texture that improves foot friction—two factors that directly reduce fall risks.” — Dr. Hiroshi Tanaka, Environmental Health Researcher at Kyoto University
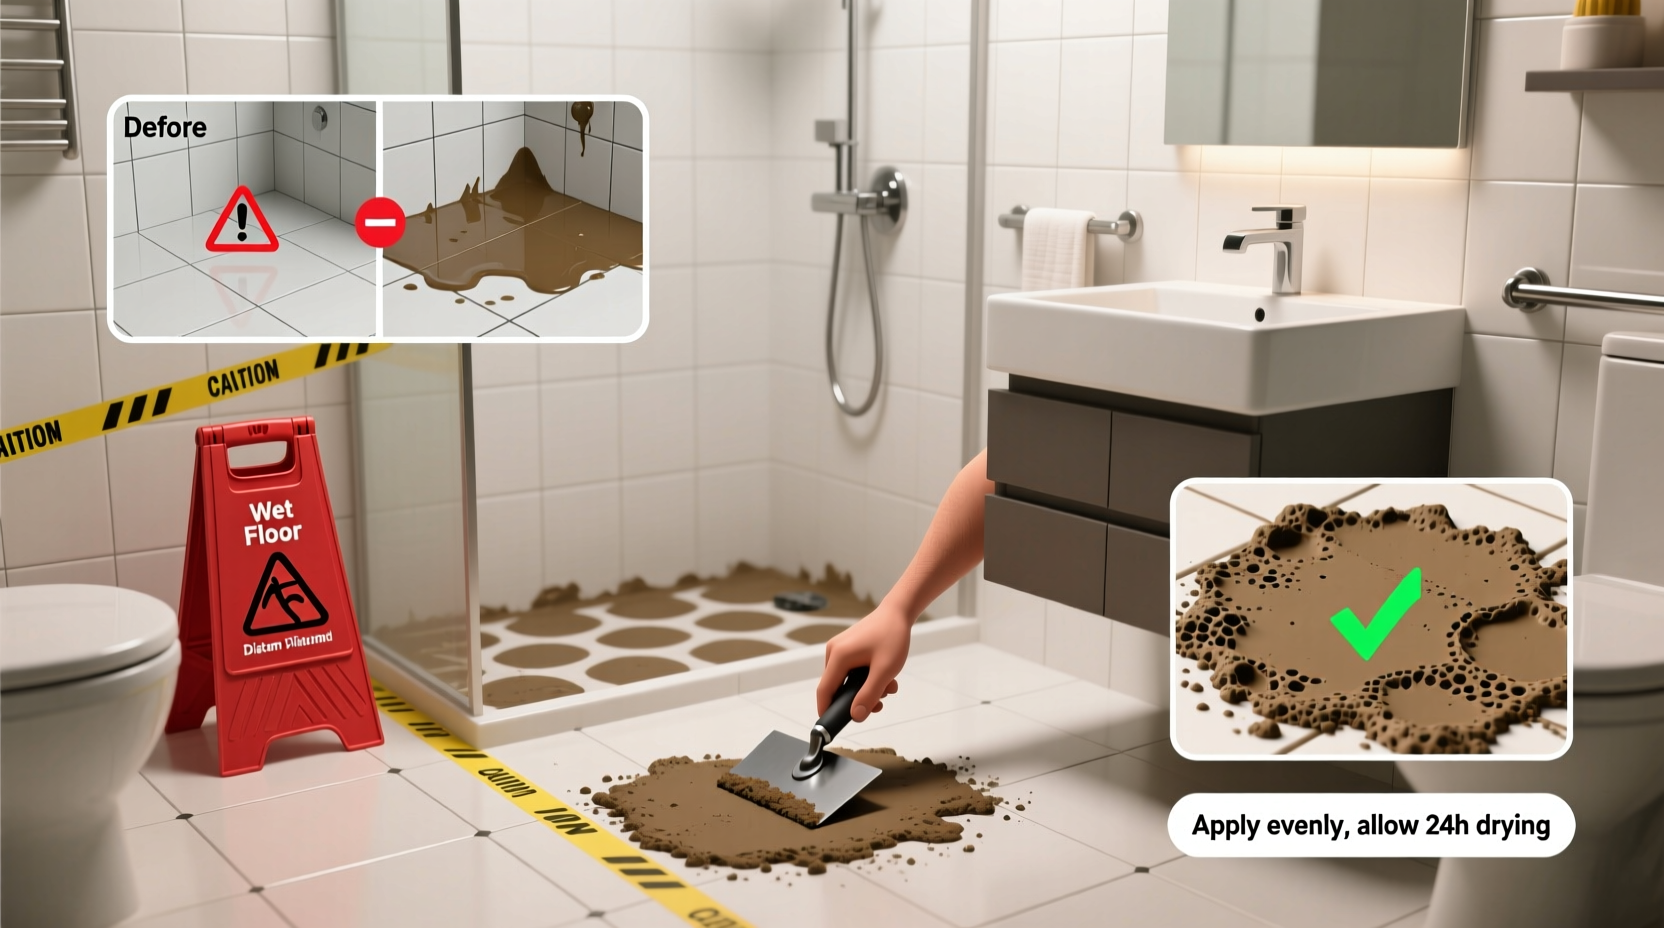
Step-by-Step Guide to Safe Application in Bathrooms
To maximize safety and performance, diatom mud must be applied properly. Follow this detailed process to ensure durability and effectiveness:
- Assess Suitability: Confirm that your bathroom has adequate ventilation and that the substrate (floor or wall) is stable, clean, and free of grease or peeling paint. Diatom mud works best on concrete, cement board, or specially prepared drywall.
- Select the Right Product: Choose a diatom mud formulation labeled for interior, high-moisture areas. Avoid industrial-grade diatomaceous earth meant for pest control—it lacks binding agents and isn’t safe for walking surfaces.
- Prepare the Surface: Sand uneven areas, fill cracks, and apply a primer designed for mineral coatings. This ensures strong adhesion and prevents flaking.
- Mix According to Instructions: Combine the diatom mud powder with water or a proprietary binder. Stir thoroughly to eliminate lumps and achieve a smooth, spreadable consistency.
- Apply in Thin Layers: Using a trowel, spread the mixture in layers no thicker than 2–3 mm. Allow each layer to dry completely (typically 24 hours) before applying the next. Two to three layers are usually sufficient.
- Texture the Final Layer: While the last coat is still damp, lightly brush or stipple the surface to enhance grip. Avoid over-smoothing, which reduces slip resistance.
- Cure and Seal (Optional): After full drying (3–5 days), consider applying a breathable, non-slip sealant to prolong lifespan without compromising traction.
Do’s and Don’ts of Using Diatom Mud in Wet Areas
To maintain both safety and longevity, follow these essential guidelines:
| Do’s | Don’ts |
|---|---|
| Use in low-traffic zones like shower bases or beside the tub where water pools | Apply on wooden floors or flexible substrates that expand with moisture |
| Ensure proper ventilation during and after application | Allow standing water to pool for extended periods without wiping |
| Reinforce edges with waterproof tape or silicone sealant | Use harsh cleaners or scrubbing pads that erode the surface |
| Inspect monthly for cracking or delamination | Install in homes with very high humidity unless paired with a dehumidifier |
| Combine with grab bars and non-slip decals for maximum safety | Walk on the surface with sharp-heeled footwear or cleats |
Real-World Example: Preventing Falls in a Senior-Friendly Bathroom
In Fukuoka, Japan, a home care provider retrofitted a client’s bathroom using diatom mud flooring alongside other accessibility upgrades. The 78-year-old resident had experienced two minor falls due to wet tiles. The team applied a three-layer diatom mud coating on the shower floor and adjacent walkway, combined with wall-mounted rails and improved exhaust fans.
Over six months, caregivers reported zero slipping incidents. The client noted the floor felt “less cold and more secure” than tile. Humidity levels dropped by 18%, and mold growth ceased around grout lines. This case illustrates how diatom mud, when integrated thoughtfully, contributes to a holistic safety strategy—particularly valuable in aging-in-place environments.
Essential Maintenance Checklist for Long-Term Safety
Diatom mud is durable but requires consistent upkeep to remain effective. Use this checklist monthly:
- ✔️ Inspect for cracks, bubbling, or loose sections
- ✔️ Wipe down with a damp cloth—never flood wash
- ✔️ Remove soap scum with a mild vinegar-water solution (1:5 ratio)
- ✔️ Ensure ventilation fans are functioning properly
- ✔️ Reapply breathable sealant every 12–18 months if used frequently
- ✔️ Keep the surface free of rugs or mats that trap moisture underneath
Frequently Asked Questions
Is diatom mud safe for bare feet?
Yes. When properly applied, diatom mud has a fine, slightly granular texture that feels comfortable underfoot while providing excellent grip. Unlike coarse anti-slip tapes or metal strips, it won’t irritate sensitive skin.
How long does diatom mud last in a bathroom?
With proper installation and maintenance, diatom mud coatings typically last 5–8 years in residential bathrooms. High-traffic or poorly ventilated areas may require reapplication sooner.
Can I install diatom mud myself?
DIY installation is possible for those experienced with plasterwork, but professional application is recommended for optimal adhesion, texture, and waterproofing—especially in wet zones like shower stalls.
Final Thoughts: Building a Safer Bathroom Environment
Safety in the bathroom shouldn’t depend solely on reactive measures like grab bars or warning signs. Proactive solutions—like integrating natural materials such as diatom mud—address the root causes of slips: moisture accumulation and low surface traction. When installed correctly and maintained diligently, diatom mud offers a sustainable, health-conscious upgrade that protects users of all ages.
The investment goes beyond accident prevention—it enhances air quality, comfort, and daily usability. Whether you're renovating for aging parents, creating a child-safe space, or simply upgrading your home, diatom mud represents a smart fusion of nature and function.


 浙公网安备
33010002000092号
浙公网安备
33010002000092号 浙B2-20120091-4
Comments
No comments yet. Why don't you start the discussion?