
Selling or donating old electronics is a smart way to declutter, earn extra cash, or support sustainability. But one critical step often gets overlooked: completely removing personal data. A smartphone, laptop, or tablet contains years of sensitive information—photos, messages, passwords, banking details, location history, and more. Simply deleting files or resetting the device isn’t enough; traces can remain recoverable with basic tools. Failing to properly wipe your device risks identity theft, financial fraud, and privacy breaches.
This guide walks through proven methods to permanently erase data across different devices, explains why standard deletion fails, and offers best practices for ensuring your digital footprint doesn’t follow your old gadgets to their next owner.
Why Factory Reset Isn’t Enough
Many people believe that performing a “factory reset” on their phone or computer erases all data. In reality, this process only removes file pointers—the system’s map to where data is stored—while leaving the actual data intact on the storage drive. Until new data overwrites it, skilled individuals can recover files using widely available recovery software.
For example, researchers at the University of Cambridge analyzed 200 second-hand smartphones purchased online and found that 85% still contained recoverable personal data, including photos, emails, and even login credentials. This highlights a widespread misconception about data security during device disposal.
“Most users think a factory reset wipes everything. It doesn’t. Data remnants are like digital fingerprints—they can be traced back to you.” — Dr. Linus Bennett, Cybersecurity Researcher, SecureTech Labs
To truly eliminate data, you need methods that overwrite or destroy the information beyond recovery. The approach varies depending on the device type, storage technology (HDD vs. SSD), and whether physical destruction is an option.
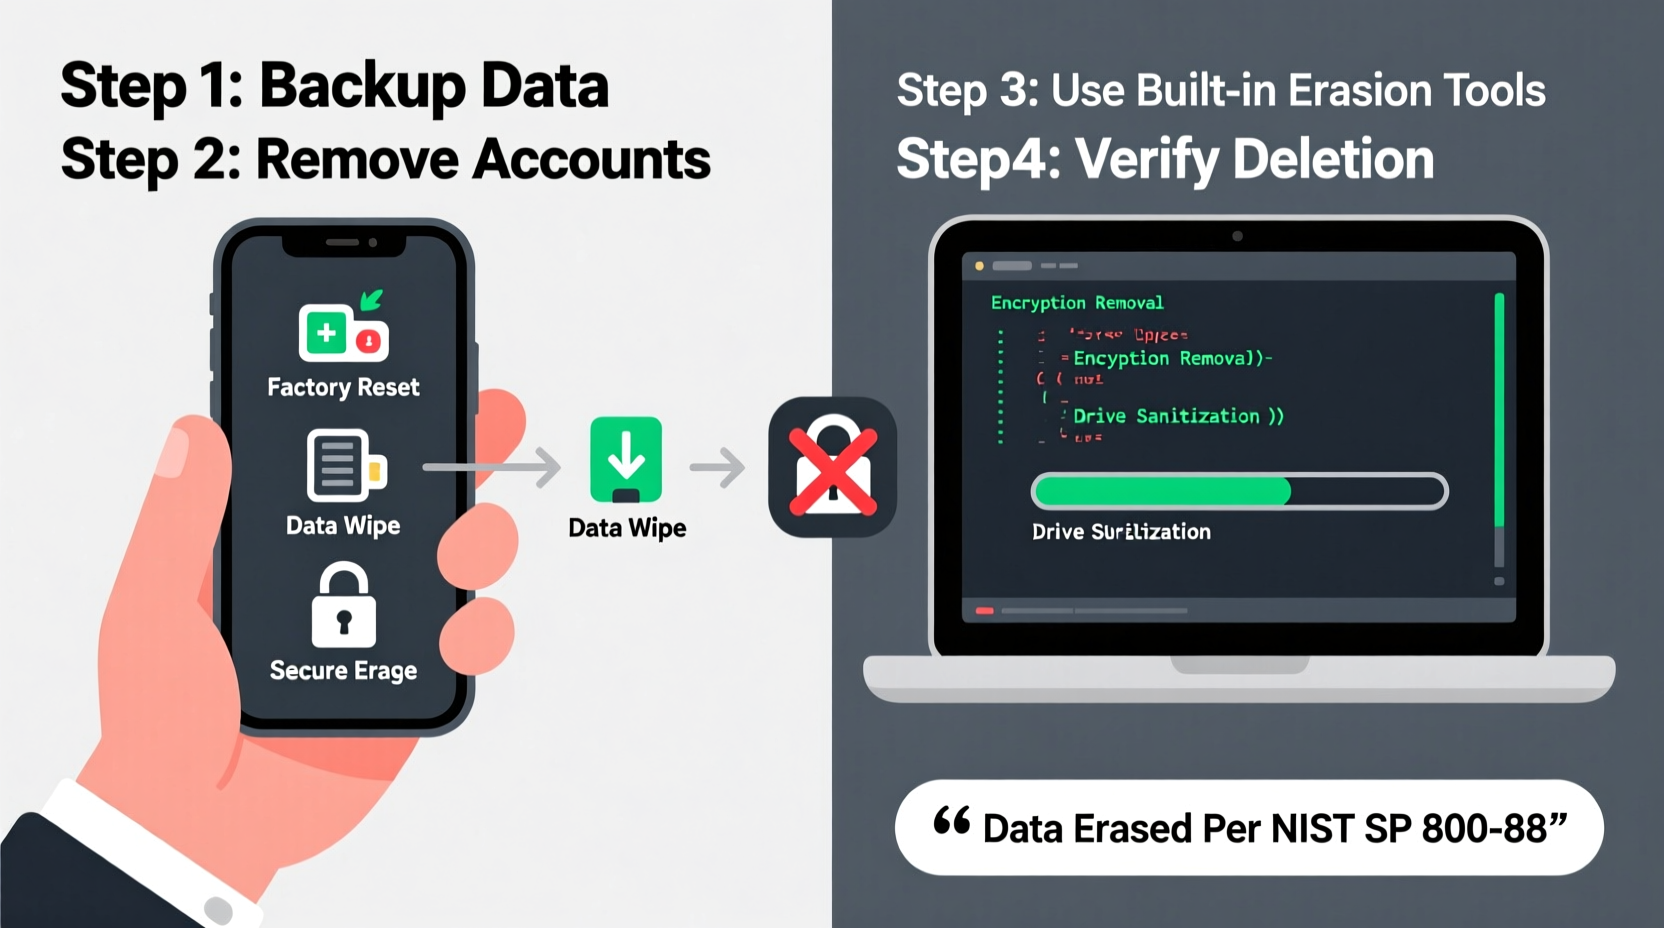
Step-by-Step Guide to Securely Erase Different Devices
Smartphones (iOS and Android)
iOS Devices (iPhone/iPad):
Apple devices use hardware encryption by default when a passcode is set. This means data is inaccessible without the passcode, but secure erasure still requires care.
- Back up essential data to iCloud or a computer.
- Go to Settings > [Your Name] > iCloud and sign out. Disable Find My [Device].
- Navigate to Settings > General > Transfer or Reset [Device] > Erase All Content and Settings.
- Enter your passcode and confirm. For added security, choose “Erase Now” rather than waiting for remote wipe.
The encryption key is destroyed during this process, rendering the data unreadable—even if physically extracted.
Android Devices:
Android behavior varies by manufacturer and OS version, but the general steps are similar.
- Back up important files via Google Drive or local transfer.
- Remove your Google account: Settings > Accounts > Google > Remove Account.
- Disable Find My Device and Smart Lock features.
- Go to Settings > System > Reset Options > Erase All Data (Factory Reset).
- Confirm and wait for the process to complete.
Modern Android phones also use full-disk or file-based encryption. As long as encryption was enabled (default on most post-2017 devices), the factory reset effectively renders data unrecoverable.
Laptops and Desktops
Computers require more thorough handling because operating systems store data in multiple locations, including temporary files, caches, and hidden partitions.
Windows PCs:
- Back up files using File History, OneDrive, or external drives.
- Sign out of Microsoft account: Settings > Accounts > Your Info.
- Deactivate software licenses (e.g., Microsoft Office, Adobe).
- Use the built-in reset tool: Settings > System > Recovery > Reset PC.
- Choose “Remove everything,” then select “Clean data?” and enable “Delete files from all drives.”
- For maximum security, use third-party tools like DBAN (Darik’s Boot and Nuke) to perform a multi-pass overwrite, especially on HDDs.
MacBooks and iMacs:
- Back up using Time Machine or iCloud.
- Sign out of iCloud, iMessage, and FaceTime.
- Reboot and hold Command+R to enter Recovery Mode.
- Open Disk Utility, select the startup disk, and click “Erase.” Choose APFS or Mac OS Extended (Journaled) format.
- Exit and choose “Reinstall macOS” to install a clean OS (optional for resale).
Note: Apple’s T2 chip and Apple Silicon (M1/M2/M3) Macs use hardware encryption. Once the drive is erased, data cannot be recovered.
External Drives and USB Sticks
These portable devices often get forgotten but can hold just as much sensitive data as internal drives.
- Use dedicated tools like Cipher (Windows), diskutil secureErase (macOS), or shred (Linux).
- For non-SSD drives, perform a 3-pass DoD-compliant overwrite.
- On SSDs, use the Secure Erase command via tools like Parted Magic or manufacturer utilities (e.g., Samsung Magician).
Data Erasure Methods Compared
| Method | Best For | Security Level | Time Required | Notes |
|---|---|---|---|---|
| Factory Reset | Phones, modern laptops | Moderate–High* | 10–30 min | *Effective only if hardware encryption is active. |
| Software Wipe (DBAN, KillDisk) | HDDs, older systems | Very High | 1–24 hours | Not recommended for SSDs due to wear leveling. |
| Secure Erase (ATA Command) | SSDs, NVMe drives | Very High | Minutes–Hours | Requires compatible firmware and tools. |
| Physical Destruction | Decommissioned devices | Absolute | Minutes | Shredding, drilling, or degaussing (HDDs only). |
| Encryption + Delete Key | Modern encrypted devices | Very High | Seconds | Fastest method when encryption was used from start. |
Checklist: Pre-Sale Data Removal Routine
Follow this checklist to ensure no data is left behind:
- ✅ Back up all important files to cloud or external storage.
- ✅ Sign out of all accounts (Google, Apple, Microsoft, social media).
- ✅ Remove SIM and SD cards—wipe or destroy them separately.
- ✅ Deauthorize software (iTunes, Adobe, streaming services).
- ✅ Perform a secure erase using device-specific methods above.
- ✅ Verify erasure by powering on and checking for clean setup screen.
- ✅ Document the process for liability or compliance purposes (if applicable).
Real-World Example: The Secondhand Laptop Leak
In 2022, a cybersecurity analyst in Austin bought a used laptop from an online marketplace. After reinstalling the OS, he ran a forensic scan out of curiosity. Within minutes, he recovered hundreds of files: tax returns, passport scans, private emails, and even saved Wi-Fi passwords from the previous owner’s home network.
He contacted the seller, who was shocked. “I did a factory reset,” they said. “I thought that was enough.” The seller had unknowingly exposed themselves to potential identity theft. The analyst reported the incident to a local news outlet, prompting a public awareness campaign on secure data disposal.
This case underscores that good intentions aren’t enough. Without proper procedures, personal data lives on—long after the device changes hands.
Frequently Asked Questions
Can data be recovered after a factory reset?
Yes, unless the device uses hardware encryption and the encryption key is destroyed during reset. On unencrypted devices or those with disabled encryption, recovery tools can often retrieve photos, messages, and documents.
Is it safe to sell an SSD after wiping it?
Yes, provided you use the correct method. Standard formatting doesn’t fully erase SSDs due to wear-leveling algorithms. Use the manufacturer’s “Secure Erase” tool or ATA Secure Erase command for guaranteed results.
Should I physically destroy my old hard drive?
If the device is damaged, outdated, or contains highly sensitive data (e.g., business records, medical info), physical destruction is the safest option. Drill through the platters (HDD) or shred the NAND chips (SSD). Consider professional data destruction services for compliance.
Final Tips for Maximum Security
Security doesn’t end with wiping. Follow these final recommendations:
- Enable encryption early: Turn on BitLocker (Windows), FileVault (Mac), or device encryption (Android/iOS) as soon as you get a new device. This simplifies future erasure.
- Avoid cloud-only reliance: While convenient, always maintain local backups before wiping. Cloud sync errors can lead to accidental data loss.
- Test before handing over: Power on the device after erasure. It should show a fresh setup screen with no user data visible.
- Keep a log: Note the date, method used, and device serial number. Useful for audits or insurance claims.
“The easiest data breach to prevent is the one caused by improper disposal. A few extra minutes today can save years of damage control tomorrow.” — Natasha Reed, CISSP, Data Privacy Consultant
Conclusion
Selling old electronics shouldn’t mean surrendering your privacy. With the right knowledge and tools, you can confidently part with your devices knowing your personal information is gone for good. Whether you’re clearing out a drawer of old phones or upgrading your laptop, take the time to do it right. Encryption, secure erasure tools, and verification steps form a powerful defense against digital exposure.


 浙公网安备
33010002000092号
浙公网安备
33010002000092号 浙B2-20120091-4
Comments
No comments yet. Why don't you start the discussion?