
For parents navigating the digital world with children, managing screen time and content access is more important than ever. The Nintendo Switch offers a robust suite of parental controls through its companion smartphone app, giving caregivers peace of mind while allowing kids to enjoy games safely. Unlike built-in console settings, Nintendo’s approach relies on a mobile app to configure restrictions — a design that can confuse new users. This guide walks you through every step clearly, explains key features, and provides practical tips to help you take control without frustration.
Why Parental Controls Matter on the Nintendo Switch
The Nintendo Switch blends entertainment, education, and social interaction in one compact device. While many games are family-friendly, unrestricted access can lead to excessive screen time, exposure to inappropriate content, or unintended purchases. Parental controls allow you to set boundaries that align with your household rules. You can limit playtime, filter game ratings, disable online communication, and even monitor activity after the fact.
Nintendo’s system is unique because it doesn’t require setting controls directly on the console. Instead, everything is managed remotely via the free Nintendo Switch Parental Controls app, available for iOS and Android. This means you can adjust settings anytime, even when you’re not near the console.
“Digital parenting isn’t about restriction — it’s about guidance. Tools like Nintendo’s parental controls help families establish healthy tech habits early.” — Dr. Lisa Mann, Child Development & Technology Specialist
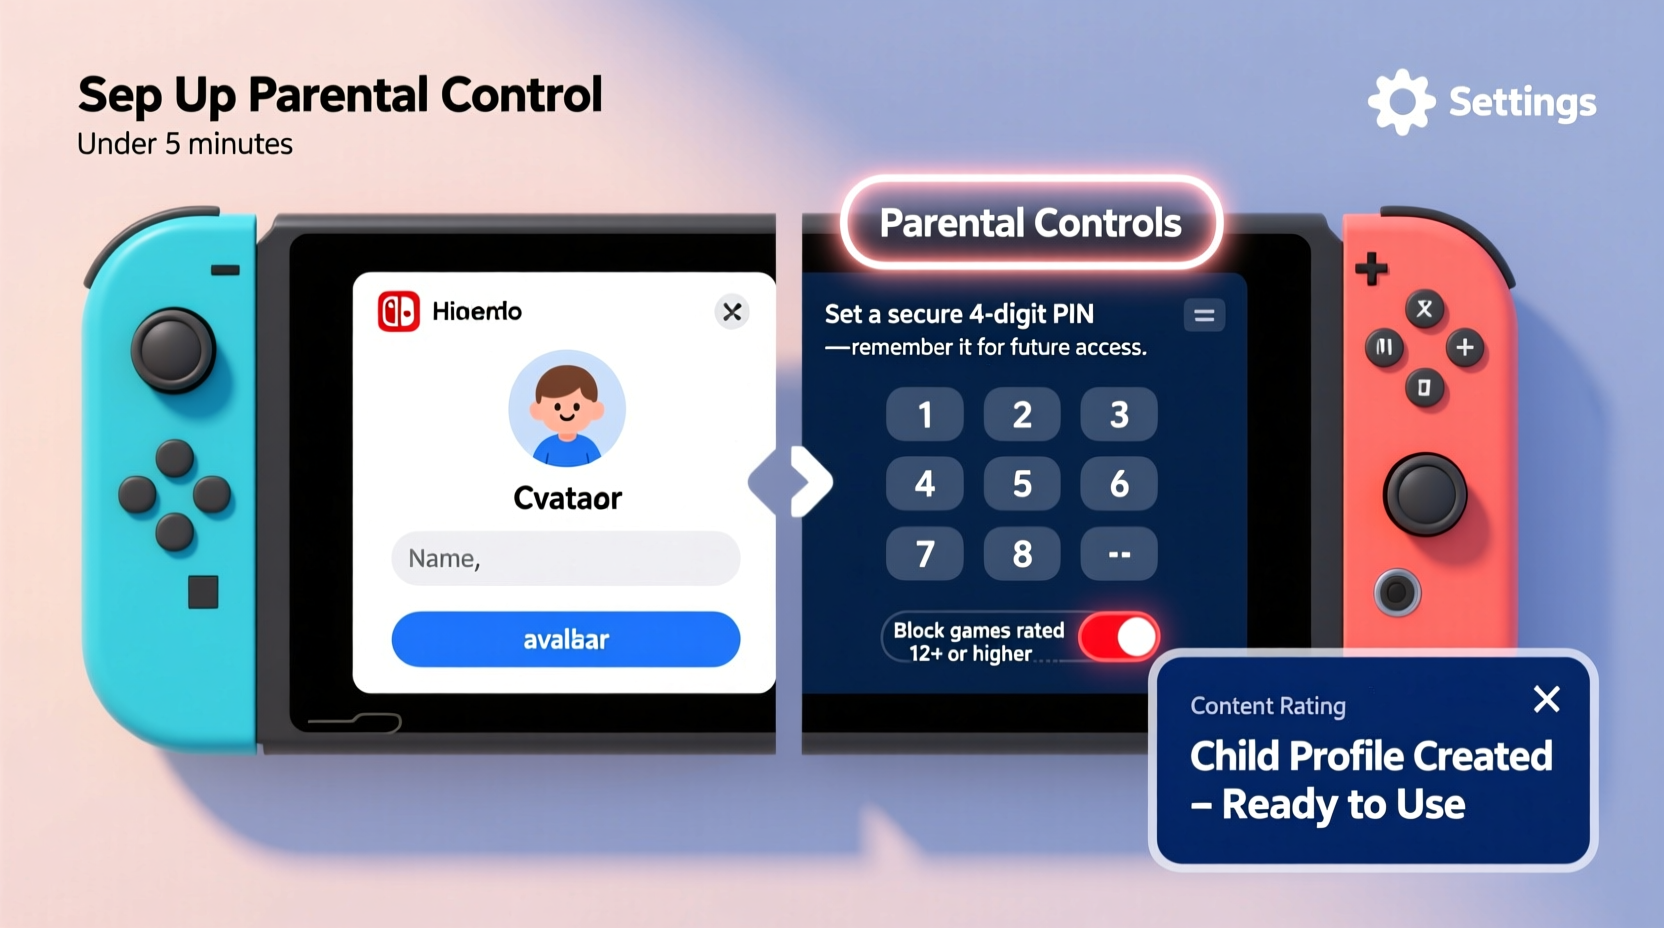
Step-by-Step: Setting Up Parental Controls
Setting up parental controls requires coordination between your smartphone and the Nintendo Switch. Follow this timeline to get everything running smoothly within 10 minutes.
- Download the App: Install “Nintendo Switch Parental Controls” from the Apple App Store or Google Play Store.
- Create or Sign In to a Nintendo Account: Use the email associated with the primary user on the Switch (usually the parent or guardian).
- Link Your Console: Open the app and tap “Register Console.” On your Nintendo Switch, go to System Settings > Parental Controls > Start Setup. A QR code will appear.
- Scan the QR Code: Use your phone’s camera in the app to scan the QR code displayed on the TV or handheld screen.
- Confirm Connection: Once scanned, the app will sync with your console. You’ll see the console name and the primary user listed.
- Set Daily Playtime Limits (Optional): Tap “Play Timer” to define how long your child can play each day.
- Configure Content Restrictions: Go to “Restrictions” to filter games by age rating, block specific titles, or disable internet features.
- Enable Notifications: Turn on alerts to receive updates when gameplay starts, ends, or exceeds limits.
Managing Screen Time with the Play Timer
One of the most effective tools in the app is the Play Timer, which lets you set a daily maximum for gameplay. When time runs out, the console locks until the next day or until you manually approve additional playtime through the app.
You can customize different timers for weekdays and weekends, or apply a uniform limit across all days. For example:
- Weekdays: 60 minutes
- Weekends: 120 minutes
The timer applies per user profile, so if multiple children use the same console, each can have individual limits. The app sends a five-minute warning before shutdown, helping avoid meltdowns.
Controlling Game Access by Age Rating
Nintendo uses the ESRB (Entertainment Software Rating Board) system to classify games. You can restrict which ratings your child can play based on age appropriateness.
| ESRB Rating | Description | Recommended Minimum Age |
|---|---|---|
| EC (Early Childhood) | Designed for very young children | 3+ |
| E (Everyone) | General audience, mild cartoon violence | 6+ |
| E10+ (Everyone 10+) | Some fantasy violence or mild language | 10+ |
| T (Teen) | Violence, suggestive themes, crude humor | 13+ |
| M (Mature) | Intense violence, blood, strong language | 17+ |
In the app, under “Restrictions,” select “Allowed Games” and choose the highest ESRB rating permitted. Any game above that level will be blocked unless you override it temporarily using the app.
Blocking Online Features and Communication
Online interactions are a major concern for parents. The Switch allows players to chat via voice or text in certain games, which can expose younger users to strangers or inappropriate language.
To enhance safety:
- Disable voice chat globally by going to Restriction Settings > Internet Communications.
- Turn off “Add Friends” to prevent your child from connecting with unknown users.
- Limit multiplayer access to local play only.
Note: These settings don’t eliminate risk entirely. Some games have in-game text prompts or community-driven content. Supervision remains essential, especially for children under 10.
Real Example: The Thompson Family’s Experience
The Thompsons, a family of four in Portland, struggled with their 9-year-old spending hours on Super Smash Bros. Ultimate after school. Without structure, bedtime routines suffered and homework was delayed. After learning about the Nintendo Switch Parental Controls app, they implemented a 45-minute weekday timer and restricted online multiplayer until weekends.
Within two weeks, their son adapted to the new limits. He began choosing creative games like Super Mario Maker 2 during his allowed time and started asking for permission to extend play for special occasions — teaching responsibility along the way. The parents appreciated receiving real-time notifications and the ability to pause gameplay remotely during dinner.
“It wasn’t about taking away fun,” said Mark Thompson. “It was about balance. The app gave us a tool to enforce our values without constant nagging.”
Do’s and Don’ts of Nintendo Switch Parental Controls
| Do’s | Don’ts |
|---|---|
| Set up controls before handing the console to your child | Assume the console is automatically locked down out of the box |
| Use individual user profiles for each child | Share your personal Nintendo account with your kids |
| Review weekly activity reports in the app | Ignore notification alerts about extended play sessions |
| Explain the rules and involve your child in setting limits | Use controls as punishment or secrecy |
| Update the app regularly for security and feature improvements | Leave the app logged in on shared or public devices |
Frequently Asked Questions
Can I change parental control settings without my phone?
No. All changes must be made through the Nintendo Switch Parental Controls app. If you don’t have access to your phone, you won’t be able to adjust timers, lift restrictions, or approve new games. Keep your phone charged and accessible during family gaming hours.
What happens if my child tries to play a blocked game?
The console will display a message stating the game is restricted. They cannot bypass it without a PIN — but note: there is no PIN required on the console itself. Only the app can override restrictions, meaning remote approval is necessary.
Are downloaded games also controlled by these settings?
Yes. Whether a game is physical or digital, the parental controls apply universally. Even free demos and apps like YouTube (if installed) are subject to the same filters and timers.
Checklist: Secure Your Nintendo Switch in 7 Steps
Use this checklist to ensure full protection:
- ✅ Download the Nintendo Switch Parental Controls app
- ✅ Sign in with the primary user’s Nintendo Account
- ✅ Link the app to your console via QR code
- ✅ Create separate user profiles for each child
- ✅ Set daily playtime limits using the Play Timer
- ✅ Restrict game access by ESRB rating
- ✅ Disable online communication and friend requests as needed
Final Tips for Long-Term Success
Parental controls are most effective when combined with open conversations about digital responsibility. Sit down with your child and explain why limits exist. Frame them as part of a balanced lifestyle, not punishment.
Regularly review the weekly activity summary in the app. Look for patterns — is your child consistently hitting their limit? Are they exploring creative games or stuck in repetitive loops? Use insights to adjust settings and encourage healthier choices.
As your child grows, revisit restrictions. A 7-year-old might need tight controls, but a 13-year-old can earn more freedom through demonstrated responsibility. Think of parental controls as training wheels — temporary supports that foster independence over time.
“The best tech rules are transparent, consistent, and flexible. The goal isn’t surveillance — it’s mentorship.” — Dr. Alan Chen, Digital Wellness Researcher at Stanford University
Take Action Today
Setting up parental controls on a Nintendo Switch takes less time than watching a single episode of a cartoon. Yet the impact on your family’s digital well-being can last for years. You don’t need to be tech-savvy — just committed to creating a safer, more balanced gaming environment.
Open the app store, download the Nintendo Switch Parental Controls app, and complete the setup tonight. Your future self — and your child — will thank you.


 浙公网安备
33010002000092号
浙公网安备
33010002000092号 浙B2-20120091-4
Comments
No comments yet. Why don't you start the discussion?