
Stringing Christmas lights is a beloved holiday tradition, but achieving a professional-looking display requires more than just plugging in strands and draping them haphazardly. One of the most common mistakes homeowners make is failing to stagger light strands properly, leading to uneven brightness, visible gaps, or unsightly clumps. A well-staggered layout ensures consistent illumination, maximizes visual impact, and gives your home a polished, festive appearance. Whether you're outlining eaves, wrapping trees, or covering railings, understanding how to stagger strands effectively can transform an average display into a neighborhood standout.
Why staggering matters for even lighting
When multiple strands of Christmas lights are connected end-to-end without staggering, the points where one strand ends and another begins often create noticeable breaks in brightness. These junctions may appear dimmer due to voltage drop, connector shadows, or slight misalignment. Additionally, if every strand starts at the same point—such as the beginning of a roofline—the repeating pattern of bulbs aligns uniformly, which draws attention to the structure rather than creating a smooth glow.
Staggering disrupts this repetition by offsetting the start and end points of each strand across different locations. This technique distributes light more evenly and minimizes the visibility of connectors, power sources, and dead zones. It also helps manage electrical load distribution when using multiple circuits, reducing strain on individual outlets and minimizing flickering or dimming.
“Proper staggering isn’t just about aesthetics—it’s about optical continuity. The human eye detects patterns instantly, so breaking alignment creates a more natural, immersive glow.” — Daniel Reeves, Professional Holiday Lighting Designer
Step-by-step guide to staggering light strands
Follow this systematic approach to stagger your Christmas lights for maximum coverage and minimal visual disruption.
- Plan your layout before installation
Sketch out the areas you intend to light—rooflines, gutters, windows, porches—and divide them into manageable sections. Estimate how many strands you’ll need based on length and bulb density (e.g., 50 bulbs per 25 feet). - Determine strand overlap zones
Select locations where one strand will end and another will begin—not at corners or edges, but in less conspicuous areas like mid-span sections of straight runs. These overlap zones should be spaced irregularly to prevent rhythmic patterns. - Start each new strand at a different elevation or offset point
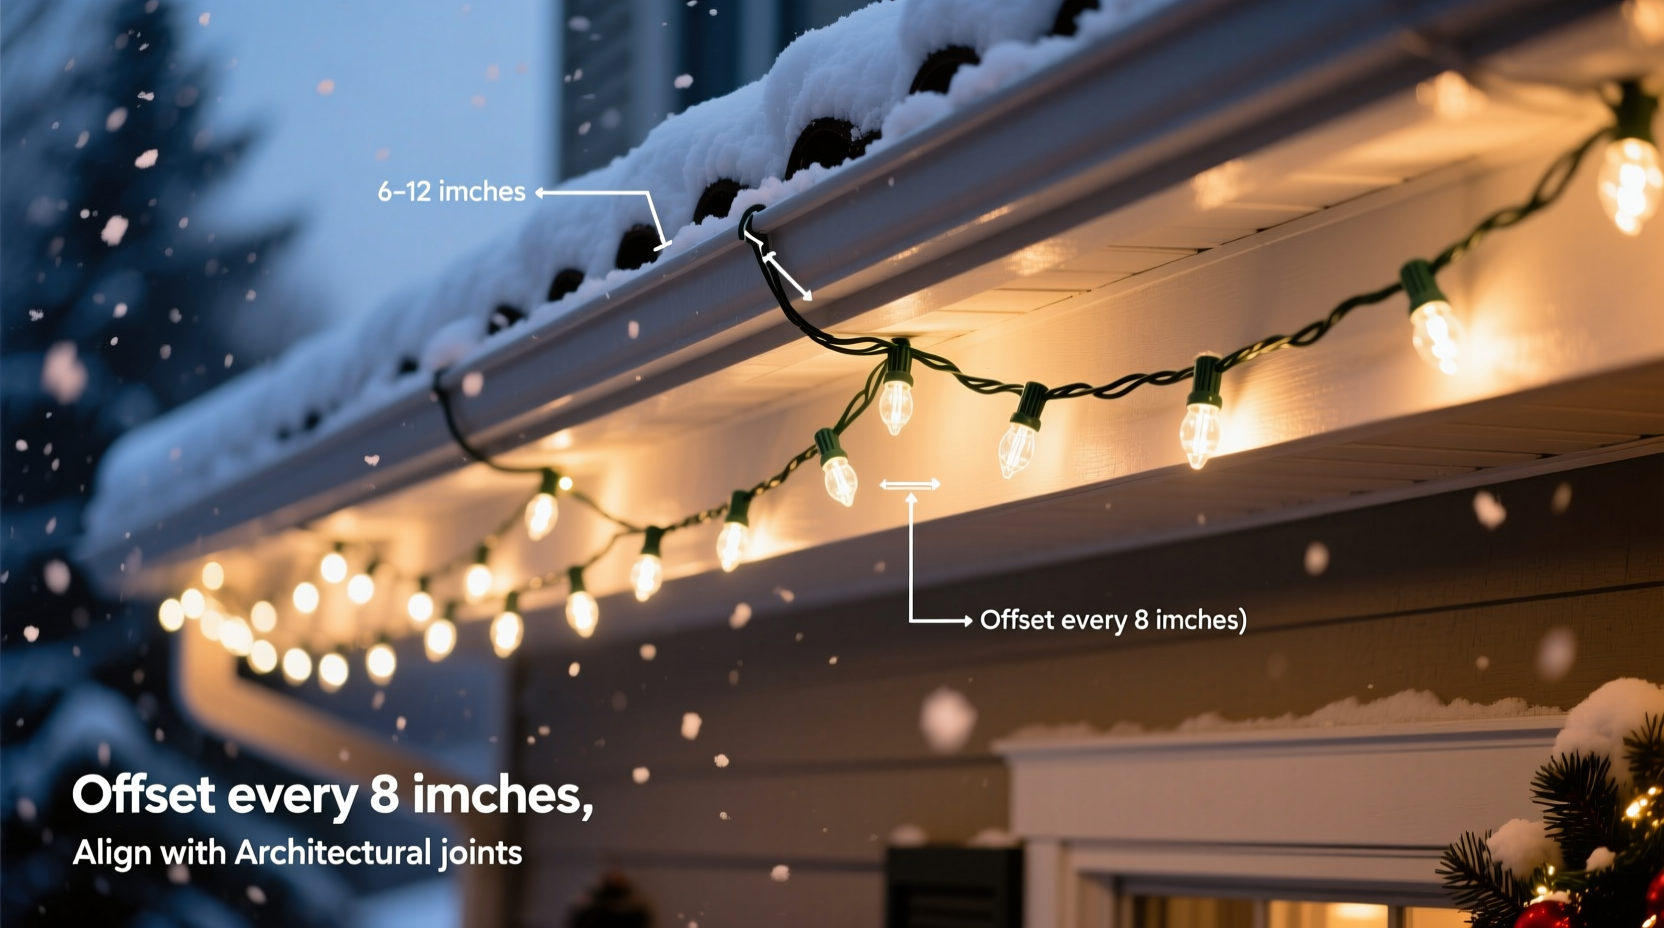
If installing along horizontal eaves, begin the next strand several inches above or below the previous one. For vertical drops (like from eave to fascia), shift the starting position left or right by 6–12 inches. - Use varied connection angles
Instead of connecting all male-to-female plugs in a straight line, angle connectors upward, downward, or behind trim boards to hide them from street view. This also reduces stress on sockets and prevents water ingress. - Alternate strand directions when wrapping columns or trees
For cylindrical features, wrap one strand clockwise and the next counterclockwise, beginning at opposite sides. This avoids creating a “seam” of overlapping wires and spreads light symmetrically. - Test illumination before finalizing
Turn on all strands during dusk or darkness to evaluate coverage. Walk around the house and note any dark patches or overly bright clusters. Adjust spacing or add supplemental mini-strands as needed.
Best practices for different surfaces and structures
The method of staggering varies depending on architectural elements. Applying tailored techniques ensures optimal results across diverse surfaces.
Eaves and Rooflines
Horizontal runs along eaves benefit most from vertical staggering. Install the first strand flush against the shingle edge. For the second strand, lower it 3–6 inches using longer clips, positioning it closer to the fascia board. Repeat this alternating height pattern across parallel runs. This creates depth and mimics the layered effect seen in commercial displays.
Windows and Doors
Frame these features with perimeter lighting, but stagger entry points on adjacent sides. For example, start one strand at the top-left corner of a window and the next at the bottom-right. This avoids clustering plugs in one spot and balances visual weight.
Trees and Shrubs
Wrap trunks and major branches with care. Begin one strand at ground level on the north side, spiral upward, and terminate near the crown. Start the next strand at mid-trunk on the south side, spiraling in the opposite direction. Fill interior gaps with short net lights or pixel strings to eliminate shadow pockets.
Railings and Balconies
On stair railings, stagger strands between balusters rather than aligning them across each post. Offset every other strand by one baluster gap to distribute connections evenly. For continuous handrails, alternate between attaching lights on top, underneath, or along the inner face.
Do’s and Don’ts: Staggering comparison table
| Action | Do | Don’t |
|---|---|---|
| Starting new strands | Begin at offset positions (vertically or horizontally) | Line up all starting points at corners or outlets |
| Connecting strands | Use staggered connection zones spaced irregularly | Chain all strands in a single straight line |
| Managing voltage drop | Limit runs to 3–4 strands max; use separate circuits | Daisy-chain more than 5 standard incandescent strands |
| Hiding connectors | Tuck plugs behind trim or foliage | Leave connectors exposed along visible edges |
| Spacing consistency | Maintain 2–3 inch gaps between parallel strands | Allow strands to bunch or cross randomly |
Real-world example: The suburban split-level makeover
The Thompson family had struggled for years with their front-facing Christmas display. Despite using over 1,000 bulbs, neighbors often remarked that parts of the house looked “patchy” while others were “too bright.” In year one, they ran five identical 25-foot strands along the roofline, all starting at the garage corner and ending at the porch. The result was a visible cluster of connectors and a gradual dimming toward the far end.
In year two, they applied staggering principles. They divided the eave into three zones and began each pair of strands at different heights and offsets. One strand started high near the shingles; its companion began lower, aligned with the soffit. Connection points were rotated across zones—some near downspouts, others midway between windows. They also introduced LED mini-lights with constant voltage drivers to reduce drop-off.
The transformation was immediate. Passersby commented on the “smooth glow,” and the home won the neighborhood’s annual lighting contest. More importantly, energy consumption dropped by 40% due to efficient LEDs and better circuit management—all enabled by thoughtful staggering.
Checklist: Pre-installation preparation for staggered lighting
- ☐ Measure total linear footage of target areas
- ☐ Calculate number of light strands required (account for 10–15% extra for overlaps)
- ☐ Group strands by color, type, and brightness for consistent output
- ☐ Identify primary power sources and plan extension cord routes
- ☐ Mark stagger points on sketch or digitally (use photos with annotations)
- ☐ Gather offset-compatible clips (e.g., adjustable gutter clips, hook-and-loop ties)
- ☐ Test all strands for functionality and color temperature match
- ☐ Confirm maximum daisy-chain limits per manufacturer specs
Frequently asked questions
Can I stagger different types of lights together?
Yes, but with caution. Mixing bulb sizes (C7 vs. mini) or colors (warm white vs. cool white) can undermine the uniformity achieved through physical staggering. If combining types, limit variation to accent areas (e.g., use larger bulbs on columns, mini-lights on eaves). Always test combinations at night before full installation.
How much overlap should I leave between staggered strands?
Aim for 6 to 12 inches of intentional overlap in transition zones. This ensures no dark gaps appear due to connector shadows or minor measurement errors. However, avoid excessive overlapping (more than 18 inches), as it can cause localized brightness spikes and increase heat buildup, especially with incandescent bulbs.
Do LED lights need to be staggered like incandescent ones?
Absolutely. While LEDs suffer less from voltage drop and generate less heat, they still have defined start/end points and connector hardware. Staggering enhances evenness and conceals technical components. Moreover, because LEDs are more energy-efficient, you can safely run more staggered circuits without overloading outlets.
Expert insight: Design philosophy behind seamless lighting
“The goal isn’t to see the lights themselves, but to experience the atmosphere they create. Staggering is one of the simplest yet most overlooked tools for dissolving the artificial grid of manufactured strings into something that feels organic and magical.” — Lena Park, Architectural Lighting Consultant
This principle applies beyond holidays. High-end landscape and facade lighting in luxury developments rely on similar offset techniques to blend fixtures into the environment. By adopting professional methods, homeowners can achieve comparable elegance without specialized equipment.
Final tips for long-term success
Staggering isn’t just a one-time setup strategy—it supports ongoing maintenance and seasonal reuse. When removing lights after the holidays, label each strand with its original placement (e.g., “Front Eave – Stagger 2”) and store them coiled separately. This makes reinstallation faster and preserves your design intent year after year.
Consider investing in programmable smart strands that allow dynamic control. Even with perfect staggering, you may want to adjust brightness or animate sequences. Smart systems let you fine-tune output remotely, compensating for environmental changes like snow cover or tree growth.
Conclusion: Illuminate with intention
Staggering Christmas light strands is not merely a technical detail—it's a design discipline that elevates your entire holiday presentation. By thoughtfully distributing start points, managing connections, and varying alignment across surfaces, you create a display that feels cohesive, balanced, and professionally executed. The effort invested in planning pays off in lasting curb appeal and joyful reactions from visitors and neighbors alike.
As you prepare for this season’s installation, remember that even small adjustments in spacing and sequencing can produce dramatic improvements in visual quality. Apply these strategies with confidence, document your results, and refine your approach each year. With practice, your home can become a beacon of festive cheer—lit not just with bulbs, but with purpose.


 浙公网安备
33010002000092号
浙公网安备
33010002000092号 浙B2-20120091-4
Comments
No comments yet. Why don't you start the discussion?