
For many, the holiday season isn’t complete without dazzling Christmas lights. But what if your lights could do more than just blink or fade? Imagine them pulsing to the beat of Mariah Carey’s “All I Want for Christmas Is You” or gently shimmering during a soft piano ballad from your favorite winter playlist. Thanks to advancements in DIY electronics and open-source software, syncing RGB Christmas lights with music—especially Spotify—is now not only possible but accessible on a budget.
This guide walks you through setting up an affordable, reliable system that transforms your home into a rhythm-reactive light show powered by real-time audio analysis from your Spotify playlists. No expensive commercial kits required—just smart planning, a few key components, and a little technical confidence.
Why Sync Lights with Music?
Synchronized lighting elevates ambiance. Whether you're hosting a neighborhood gathering or simply enjoying quiet evenings at home, lights that respond to music create an immersive experience. Unlike pre-programmed sequences, real-time audio syncing ensures every song gets a unique visual interpretation based on its tempo, volume, and frequency profile.
Spotify is ideal for this because it offers vast, personalized playlists, seamless cross-device streaming, and consistent audio output—critical for stable signal processing. By tapping into your existing subscription, you eliminate the need for additional media sources.
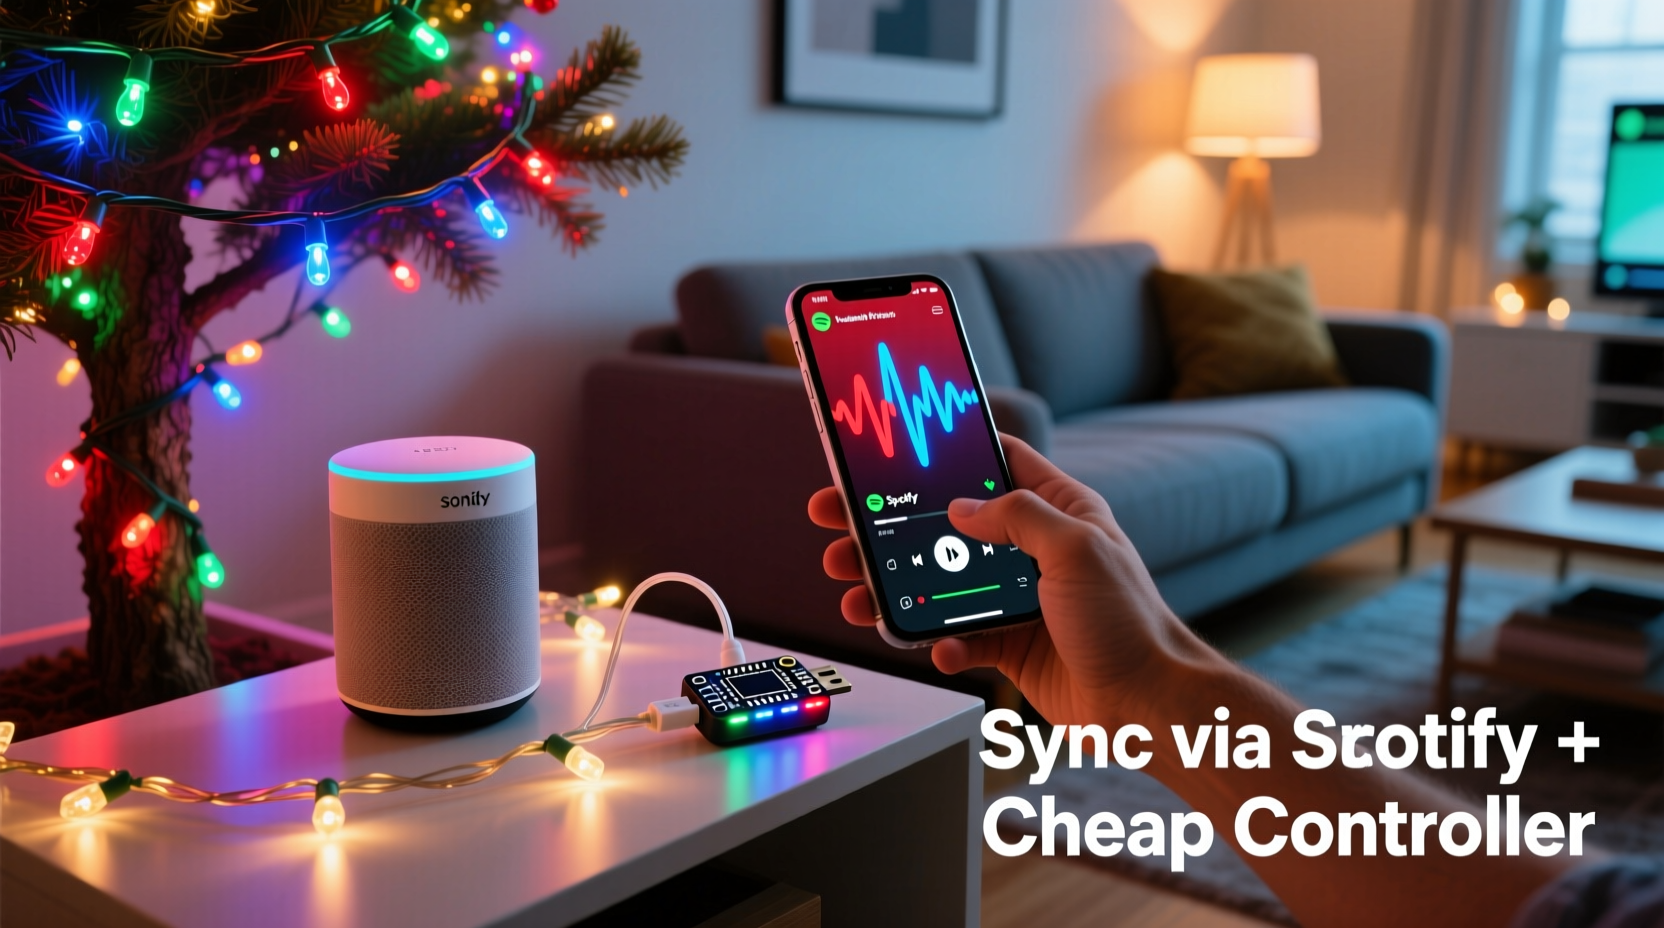
Choosing the Right RGB Controller (On a Budget)
The heart of any synchronized lighting system is the controller. It interprets audio signals and translates them into color and brightness changes across your LED strips or nodes. While high-end systems like Philips Hue or Nanoleaf offer built-in music modes, they come at a premium and often lack fine-grained control.
Instead, consider open-source, Wi-Fi-enabled controllers such as:
- WLED-compatible boards (e.g., ESP8266 or ESP32 microcontrollers)
- DIY Pixel Controllers running Jinx! or xLights
- NodeMCU-based setups with FastLED firmware
Among these, WLED stands out for its balance of affordability, community support, and compatibility with third-party tools. A basic ESP8266 board costs under $5, and when paired with WS2812B addressable LEDs (~$10–$15 per 5-meter strip), you can build a powerful setup for under $50.
“Open-source lighting platforms like WLED have democratized dynamic light shows. What used to require thousands now fits in a hobbyist’s weekend project.” — Derek Lin, Embedded Systems Developer & Smart Lighting Enthusiast
Required Components and Setup Overview
Before diving into configuration, gather the following essentials:
| Component | Purpose | Affordable Option |
|---|---|---|
| Microcontroller | Runs lighting logic and connects to network | ESP8266 ($3–$7) |
| Addressable RGB LEDs | Light output with individual pixel control | WS2812B strip (5m, ~$12) |
| Logic Level Shifter (optional) | Protects ESP from voltage mismatch | 4-channel bidirectional module (~$2) |
| Power Supply | Provides stable 5V DC for LEDs | 5V 10A adapter (~$15) |
| Computer or Raspberry Pi | Processes audio and sends data to controller | Raspberry Pi Zero W (~$15) or old laptop |
Once assembled, connect the data pin of the LED strip to GPIO2 (or designated pin) on the ESP8266, ensuring common ground with the power supply. Flash the device with WLED firmware via Arduino IDE or pre-built binaries available from the official GitHub repository.
Step-by-Step: Syncing Your Lights with Spotify Audio
The magic happens not on the controller itself, but on a companion device that captures audio and converts it into lighting commands. Here's how to set it up:
- Install WLED on your ESP device
Download the latest WLED release and flash it using a USB-to-TTL adapter. Once flashed, power the board and connect to its access point to configure Wi-Fi settings. - Set up an audio capture machine
Use a Raspberry Pi, old PC, or Mac mini. Install ArduinoFFT or Live Music Control (LMC), both capable of real-time frequency analysis. Alternatively, use VidFX or MuseliX, which integrate directly with Spotify via desktop capture. - Route Spotify audio to the analyzer
On Windows, use Stereo Mix or VoiceMeeter to loopback system audio. On macOS, use BlackHole or Soundflower. Ensure the analyzer app receives the correct input source. - Link analyzer to WLED via UDP or HTTP
Most analyzers allow you to specify a target IP address (your ESP’s local IP) and port (usually 19446 for E1.31/UDP or HTTP POST). Configure the effect type—common choices include \"Beat Detection,\" \"Frequency Bars,\" or \"Spectrum Flow.\" - Test and calibrate
Play a dynamic track from Spotify (e.g., “Uptown Funk” by Bruno Mars) and observe light response. Adjust sensitivity, gamma correction, and smoothing values until beats trigger clear flashes without over-saturation. - Automate playback detection (optional)
Use scripts (Python or Node-RED) to detect when Spotify is active and automatically enable the light mode. When paused, revert to ambient colors or turn off.
Real Example: A Backyard Holiday Display on a $60 Budget
Take Mark, a DIY enthusiast from Portland, who wanted to impress his kids without spending hundreds. He purchased two 5-meter WS2812B strips ($12 each), an ESP8266 ($6), a 5V 10A power supply ($14), and used an old Raspberry Pi 3B+ he had lying around.
He installed WLED and configured it to appear as a single segmented strip wrapped around his porch railing. Using MuseliX on the Pi, he captured desktop audio routed from Spotify. After tuning the frequency bands—emphasizing bass for drum hits and mid-range for vocals—he created a responsive display that danced with every song.
During a neighborhood walk, kids stopped to watch “Last Christmas” play out in waves of red and green pulses. Neighbors asked where he bought the “smart kit.” Mark smiled—he built it himself for less than a single strand of premium smart lights.
Optimizing Performance and Avoiding Common Pitfalls
Even well-planned projects stumble without attention to detail. Below are common issues and how to solve them:
- Lights flicker or reset: Caused by insufficient power. Always calculate total current draw (e.g., 60 LEDs/m × 5m = 300 LEDs; at full white, ~60mA each = 18A). Use multiple power injection points for long runs.
- No response to music: Check firewall settings blocking UDP traffic. Ensure the analyzer outputs to the correct IP and port. Test with a simple sine wave generator first.
- Colors look washed out: Adjust gamma settings in WLED (Settings > LED Preferences). Enable color correction for more vibrant reds and blues.
- High CPU usage on analyzer: Lower FFT sample rate or reduce update frequency. Consider dedicated hardware like a second Pi solely for audio processing.
“Reliability comes from simplicity. Focus on clean wiring, stable power, and minimal software layers. The fewer points of failure, the longer your show runs.” — Lena Park, IoT Hobbyist & Light Show Curator
Checklist: Build Your Spotify-Synced Light System
- Acquire ESP8266/ESP32 and flash with WLED firmware
- Connect and test LED strip with bench power supply
- Confirm stable Wi-Fi signal at installation site
- Install audio analysis software on host machine
- Set up audio loopback (Stereo Mix / BlackHole)
- Configure WLED effects and segment layout
- Map analyzer output to WLED IP via UDP/E1.31
- Test with various Spotify tracks across genres
- Adjust thresholds for bass, mids, and treble sensitivity
- Deploy permanently with weatherproof enclosures (if outdoors)
Frequently Asked Questions
Can I sync lights without a computer always running?
Not easily. Real-time audio analysis requires continuous processing. However, you can use a low-cost Raspberry Pi Zero W (under $15) dedicated solely to this task. Once configured, it boots automatically and runs headlessly, eliminating the need for a full PC.
Do I need internet access for the lights to work?
The controller needs local network access to receive commands, but Spotify playback can be done offline. If your audio analyzer runs on a device with cached songs, synchronization works even without external internet—only the local Wi-Fi matters.
Can I control multiple light zones independently?
Yes. Use multiple ESP controllers (each with a unique IP) or a single ESP32 with dual cores managing separate LED segments. Tools like xLights support multi-universe output, allowing different effects per zone based on audio channels or frequency bands.
Conclusion: Turn Music into Magic This Holiday Season
Synchronizing RGB Christmas lights with Spotify isn’t reserved for tech wizards or big budgets. With affordable microcontrollers, open-source software, and a bit of patience, anyone can create a professional-grade light show that dances to their personal soundtrack.
The holidays are about joy, creativity, and shared moments. By blending music and light, you’re not just decorating—you’re crafting experiences. Whether it’s a subtle glow behind the tree or a full-frontal symphony across your roofline, your home becomes a canvas for emotion and rhythm.


 浙公网安备
33010002000092号
浙公网安备
33010002000092号 浙B2-20120091-4
Comments
No comments yet. Why don't you start the discussion?