
Every year, millions of households pull out stored holiday lights only to discover flickering strands, dead sections, or worse—burnt insulation, melted plugs, or faint ozone smells. Old Christmas lights aren’t just inconvenient when faulty; they’re a leading cause of seasonal home fires. According to the U.S. Fire Administration, an average of 790 home fires per year are attributed to decorative lighting—nearly half involving lights older than 10 years. Yet most people skip proper pre-installation testing, plugging in strands without verification and relying on luck instead of diligence. This isn’t about nostalgia or frugality—it’s about preventing electrical hazards, protecting your home, and ensuring your holiday display is both beautiful and safe.
Why Testing Old Lights Is Non-Negotiable
Christmas light strands degrade silently. Insulation becomes brittle from UV exposure, temperature cycling, and moisture absorption—even in storage. Internal wire strands fatigue and break. Solder joints oxidize. Miniature bulbs develop high-resistance contacts that overheat under load. And LED replacements often use cheaper drivers and substandard capacitors that fail unpredictably. Unlike modern UL-certified smart lights with built-in surge protection and thermal cutoffs, vintage incandescent sets (especially pre-1995) lack ground-fault circuit interrupters (GFCIs), overload protection, or even basic polarity awareness. A single compromised section can elevate surface temperatures beyond 140°F—enough to ignite nearby pine boughs, drapery, or dry attic insulation.
The National Electrical Manufacturers Association (NEMA) reports that 63% of decorative lighting failures occur within the first 90 minutes of operation—precisely when homeowners are least likely to be monitoring closely. That’s why “test before you hang” isn’t a suggestion—it’s the first line of defense.
Step-by-Step Pre-Installation Testing Protocol
Follow this verified, electrician-approved sequence before connecting any strand to power. Perform each step in order—skipping ahead invites risk.
- Uncoil & visually inspect: Lay the entire strand flat on a clean, dry surface. Examine every inch for cracked, brittle, or discolored insulation; exposed copper; bent or corroded bulb sockets; melted plastic near the plug or connectors; and kinks or crushing marks.
- Check the plug and cord base: Look for scorch marks, warping, or a persistent burnt odor. Wiggle the prongs gently—loose connections indicate internal damage. Verify the plug bears a UL or ETL certification mark (not just “UL Listed” stamped on packaging).
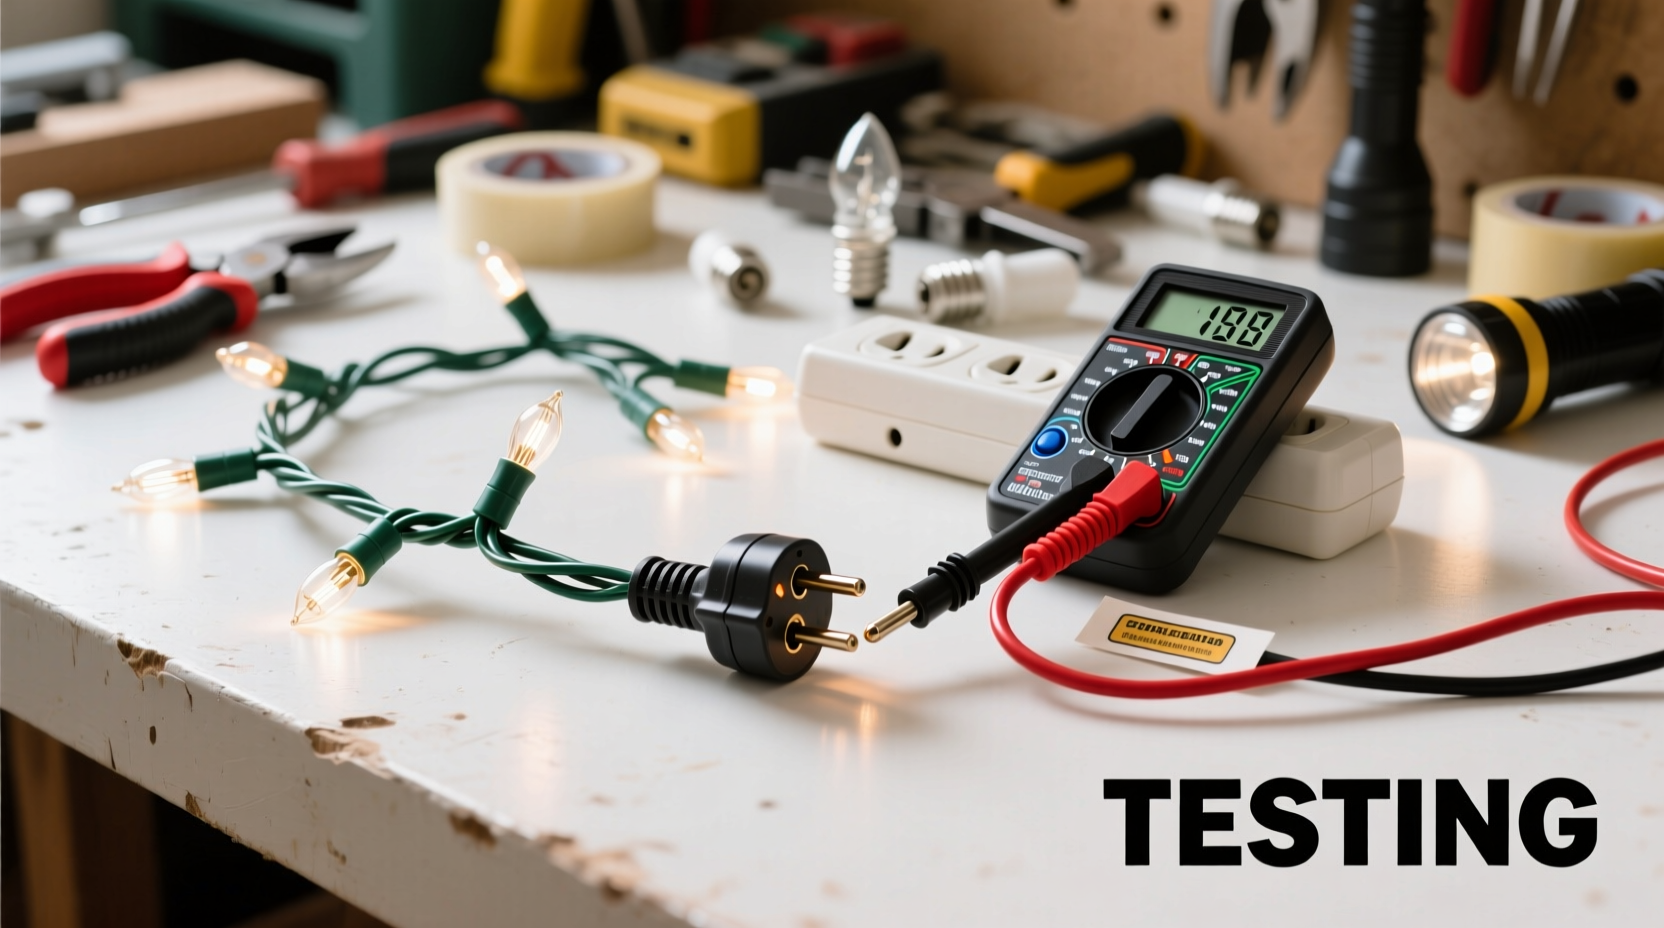
- Test continuity with a multimeter: Set your multimeter to continuity or Ω (ohms) mode. Touch one probe to the wide (neutral) blade of the plug and the other to the narrow (hot) blade. A reading of “OL” (open loop) or infinity means the circuit is intact and unshorted. Any low resistance (<10Ω) indicates a dangerous short.
- Verify bulb seating and socket integrity: Gently rotate each bulb ¼ turn clockwise. If it spins freely or feels loose, the socket’s internal contact spring has fatigued. Remove and replace any bulb that doesn’t seat firmly or shows darkened filament ends.
- Perform a controlled power test: Plug the strand into a GFCI-protected outlet *only after all prior steps pass*. Use a timer: leave powered for exactly 2 minutes, then unplug and immediately feel along the cord and plug. Any warmth above ambient room temperature warrants retirement. No flickering, buzzing, or intermittent dimming should occur.
Do’s and Don’ts: Critical Safety Boundaries
These aren’t preferences—they’re evidence-based boundaries established by the Electrical Safety Foundation International (ESFI) and NFPA 101 Life Safety Code.
| Action | Do | Don’t |
|---|---|---|
| Storage Handling | Store coiled loosely on cardboard reels or in ventilated plastic bins—not in vacuum-sealed bags or damp garages. | Wrap tightly around metal hangers or stack under heavy boxes; compressing wires accelerates insulation cracking. |
| Bulb Replacement | Use only manufacturer-specified replacement bulbs (voltage/wattage matched). For LEDs, verify compatibility with original controller circuitry. | Insert higher-wattage bulbs or mix incandescent/LED bulbs in the same strand—this overloads current pathways and overheats sockets. |
| Outdoor Use | Confirm outdoor-rated labeling (look for “UL Outdoor” or “ETL Wet Location”) and inspect for weatherproof gaskets at plug junctions. | Use indoor-only lights outside—even under eaves—where condensation or dew creates conductive paths across degraded insulation. |
| Extension Cords | Select 14-gauge or heavier outdoor-rated cords rated for continuous load; never exceed 80% of cord’s ampacity. | Daisy-chain more than three light strands or connect to undersized (16-gauge) extension cords—the cumulative amperage causes dangerous heating. |
Real-World Example: The Anderson Family Incident
In December 2022, the Anderson family in Portland, Oregon, retrieved their 1987 vintage C7 incandescent strand—stored in a sealed plastic tub in their attic for 14 years. They skipped visual inspection, plugged it directly into a non-GFCI outlet behind their tree, and left for dinner. Upon returning, they noticed a sharp acrid smell and discovered the plug housing had partially melted, with adjacent pine needles singed black. Their insurance adjuster later confirmed the insulation had become so brittle that microscopic cracks allowed arcing between conductors inside the plug—a failure invisible to the naked eye. The strand passed no step of the protocol above. Had they performed even the basic continuity test, the short would have been detected instantly. Their $27 replacement LED strand cost less than their $1,200 deductible—and spared them potential smoke inhalation injury.
Expert Insight: What Electricians See Behind the Scenes
Master electrician and holiday lighting safety consultant Rafael Mendoza, who inspects over 200 residential lighting setups annually, emphasizes prevention over reaction:
“Most people think ‘if it lights up, it’s fine.’ But I’ve measured 180°F surface temps on cords that looked pristine—and found carbon tracking inside plugs that hadn’t tripped a breaker in 12 years. Heat is the enemy, and old lights generate it invisibly. Test every strand like it’s handling life-critical wiring—because during the holidays, it often is.” — Rafael Mendoza, Certified Electrical Inspector, NECA Holiday Safety Task Force
Essential Testing Tools You Already Own (or Should)
You don’t need professional gear—but you do need reliable tools. Here’s what actually works versus what creates false confidence:
- Digital multimeter ($15–$30): Essential for continuity, voltage drop, and resistance checks. Analog meters lack the precision needed for modern LED driver diagnostics.
- GFCI outlet tester ($8–$12): Verifies your outlet’s ground-fault protection is active—non-negotiable for any outdoor or high-moisture-area testing.
- Infrared thermometer ($35–$60): Detects hotspots before they ignite. Anything above 104°F (40°C) on cord surfaces or 122°F (50°C) on plugs requires immediate retirement.
- Non-contact voltage detector ($12–$25): Confirms no stray voltage exists on exposed metal parts before handling—critical if insulation is compromised.
- Avoid: “Christmas light testers” with single-LED indicators. These only confirm basic circuit closure—not short circuits, grounding faults, or thermal instability.
When to Retire—Not Repair—Old Lights
Some lights shouldn’t be tested at all. Retirement isn’t about age alone—it’s about irreversible degradation. Replace immediately if you observe any of these:
- Insulation that crumbles, powders, or flakes when lightly rubbed with a fingernail
- Plug housings with visible hairline cracks, discoloration (amber or brown), or warping
- Bulbs with blackened ends, bulging glass, or visible filament sagging
- Any history of previous overheating—e.g., “it got warm last year but worked fine”
- Strands manufactured before 1992 (pre-UL 588 revision), which lack mandatory current-limiting fuses
Note: Repairing old strands is rarely advisable. Soldering brittle wires risks breaking conductors. Replacing sockets demands precise crimping tools and insulation matching. Even certified repair shops charge $25–$45 per strand—more than the cost of a new, safer, energy-efficient LED alternative.
FAQ: Practical Questions Answered
Can I use a power strip to test multiple strands at once?
No. Power strips are not designed for continuous load testing. Their internal circuitry lacks thermal protection for sustained current draw. Test one strand at a time on a dedicated GFCI outlet to isolate faults and prevent cascading failures.
My lights work fine when cold—but get warm after 10 minutes. Is that normal?
No. Incandescent strands may run warm, but surface temperatures must remain below 104°F (40°C) after 15 minutes of operation. LED strands should feel cool to the touch. Warmth indicates excessive resistance—often from corroded contacts or undersized wiring—and dramatically increases fire risk over time.
How long do modern LED Christmas lights really last?
Properly maintained, quality LED strands last 25,000–50,000 hours—roughly 15–25 seasons at 6 hours/day. Their longevity hinges on stable voltage input and thermal management. Avoid using them with incompatible dimmers or controllers, which cause driver stress and premature capacitor failure.
Conclusion: Your Home Deserves Safer Holidays
Testing old Christmas lights isn’t tedious—it’s thoughtful. It’s the quiet act of care that separates joyful tradition from avoidable tragedy. Every strand you verify, every plug you inspect, every temperature you measure adds resilience to your home and peace to your season. You don’t need special training—just methodical attention, the right tools, and the willingness to retire what no longer serves safety. This year, make “test before you hang” your non-negotiable ritual. Not because lights are expensive to replace, but because your family’s well-being is irreplaceable. Start tonight: unbox one strand, follow the five-step protocol, and feel the confidence that comes from knowing—truly knowing—that your holiday glow is secure.


 浙公网安备
33010002000092号
浙公网安备
33010002000092号 浙B2-20120091-4
Comments
No comments yet. Why don't you start the discussion?