
Disney-branded earphones, especially those designed for kids or themed around popular characters, are more than just stylish accessories—they’re built for durability, fun, and reliable audio performance. But like any wireless device, keeping them charged is essential. Whether you're using Disney-themed Bluetooth earbuds or wired models with charging cases, knowing how to verify their charging status ensures uninterrupted music, storytelling, and entertainment. This guide walks you through practical methods, visual indicators, and expert-backed strategies to monitor and maintain your earphones’ battery health.
Understanding Your Disney Earphones Model
Before checking the charging status, it's important to identify your specific model. Disney partners with various tech manufacturers—such as JBL, Anker, or Hasbro—to produce licensed audio products. These may include:
- Kid-safe wireless earbuds with volume limiters
- Themed charging cases featuring Mickey Mouse, Frozen, or Star Wars designs
- Wired earphones with USB-C or Lightning charging ports
Most modern Disney earphones come with LED indicators on either the earbuds themselves or the charging case. The behavior of these lights—color, blinking pattern, duration—provides real-time feedback about charge levels. Always refer to the user manual included in your packaging, but if that’s unavailable, the following universal principles apply across most models.
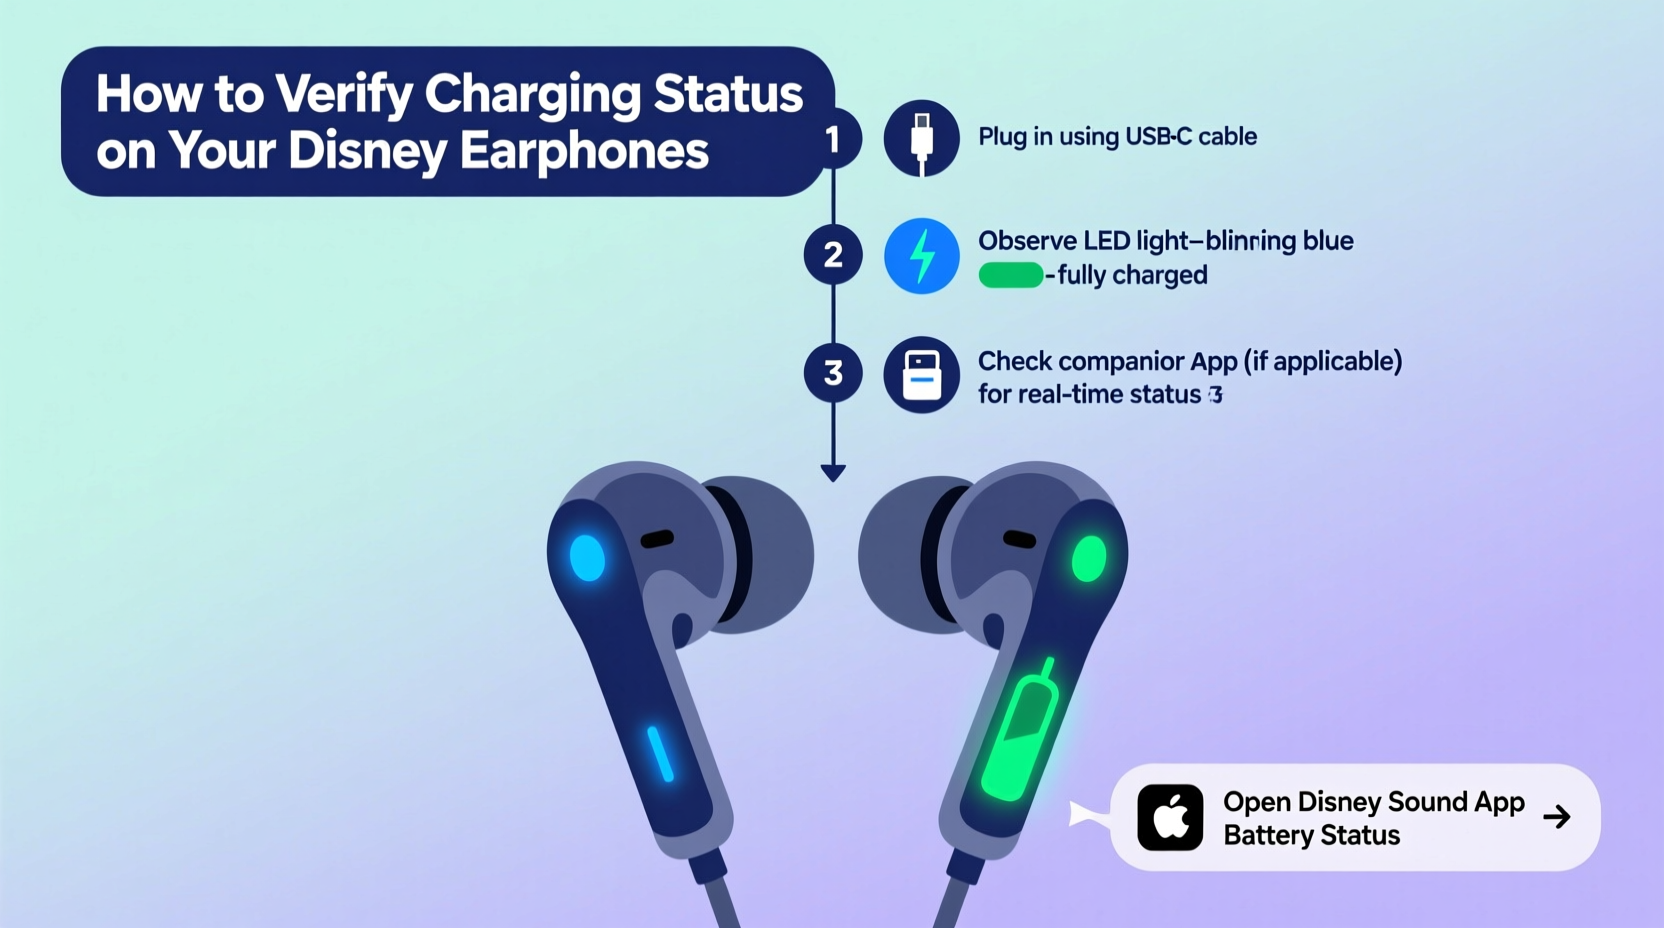
Step-by-Step Guide to Checking Charging Status
Follow this clear sequence to confirm whether your Disney earphones are charging properly:
- Connect the Charger: Plug the correct cable (usually USB-A to USB-C or Lightning) into a power source—this could be a wall adapter, computer port, or power bank.
- Attach the Earphones: Place the earbuds inside the charging case and close the lid, or connect the charging cable directly to the earphone if it lacks a case.
- Observe the Indicator Light: Look for an LED near the charging port or on the front of the case. A solid red or amber light typically means charging is in progress.
- Wait a Few Minutes: Some models take up to two minutes to register a connection. Avoid opening the case repeatedly during this time.
- Check for Full Charge Sign: Once fully charged, the light will turn green or switch off entirely depending on the model.
Interpreting LED Indicators by Color and Pattern
The meaning of LED signals can vary slightly between brands, but general patterns hold true. Use the table below as a quick reference:
| Light Behavior | Meaning | Action Required |
|---|---|---|
| Red / Amber (steady) | Charging in progress | Leave connected until full |
| Green / Blue (steady) | Battery full | Unplug to preserve battery life |
| Red / Amber (blinking) | Low battery or connection issue | Ensure proper seating in case; clean contacts |
| No light | No power or hardware fault | Test cable, outlet, or reset device |
| Alternating colors (e.g., red/blue) | Pairing mode or firmware update | Refer to manual for context |
This system allows users—especially children and parents managing multiple devices—to quickly assess battery status without needing a smartphone app.
Using Companion Apps for Advanced Monitoring
Some Disney-linked earphones, particularly higher-end models from partnered brands like JBL JR series or Hasbro Pulse Audio, support companion apps via iOS or Android. These apps offer enhanced visibility into battery percentage, usage history, and even parental controls.
To use an app:
- Download the official brand app (e.g., “JBL Headphones” or “Hasbro Play”)
- Enable Bluetooth on your phone
- Open the case near your device to trigger pairing mode
- Follow in-app prompts to connect
- View real-time battery stats for each earbud and the case
While not all Disney-themed models support app integration, when available, this feature provides unmatched precision compared to relying solely on LED cues.
“Battery awareness starts with consistent monitoring. Even basic LED systems give users enough data to prevent unexpected shutdowns—if they know what to look for.” — Lena Torres, Consumer Electronics Technician at KidsTech Labs
Troubleshooting Common Charging Issues
Even with careful handling, problems can arise. Here’s how to address frequent charging challenges:
Problem: No Light Appears When Plugged In
First, test the power source with another device. Then inspect the charging cable for fraying or stiffness. Try a different cable known to work with similar devices. If still unresponsive, gently clean the charging port on the case or earphones using a dry cotton swab or soft brush to remove lint or debris.
Problem: Light Stays On Indefinitely
If the indicator remains red after several hours, the battery might be faulty or over-discharged. Try resetting the earphones by pressing and holding the button on the case (if present) for 15 seconds. After resetting, recharge again and observe changes.
Problem: One Earbud Isn’t Charging
Place each earbud individually in the case and check alignment. Misplaced buds won’t make contact with charging pins. Wipe the metal connectors on both the earbud and inside the case with a dry cloth. Oxidation or dirt can block conductivity.
Mini Case Study: Emma and Her Daughter’s Frozen Earbuds
Emma, a mother of two from Portland, noticed her daughter’s Disney Frozen-themed earbuds weren’t lasting through daily car rides. Initially assuming poor battery life, she discovered the real issue: the charging case showed no light despite being plugged in. After trying three cables unsuccessfully, she inspected the micro-USB port and found packed dust. Using a toothpick wrapped in tape (sticky side out), she carefully removed the debris. Upon recharging, the amber light illuminated—confirming the fix. Since then, Emma performs a weekly cleaning ritual and keeps a backup cable in her purse. The earbuds now last a full week on a single charge.
Best Practices Checklist
Maximize reliability and lifespan with this actionable checklist:
- ✅ Charge before the battery drops below 20%
- ✅ Use only manufacturer-recommended cables and adapters
- ✅ Clean charging ports monthly with a dry tool
- ✅ Avoid leaving earphones in hot environments (e.g., cars in summer)
- ✅ Store in original case when idle
- ✅ Monitor LED behavior weekly for early warning signs
- ✅ Replace worn cables promptly to prevent inconsistent charging
Frequently Asked Questions
How long does it take for Disney earphones to fully charge?
Most models require 1.5 to 2 hours for a full charge from zero. Some fast-charging variants offer one hour of playback after just 10 minutes of charging. Refer to your product manual for exact specifications.
Can I use my Disney earphones while they’re charging?
It depends on the model. Wired versions often allow simultaneous use and charging. However, most wireless earbuds cannot be worn while charging since they must remain seated in the case. Doing so may interrupt the charging process or cause overheating.
Why do my earphones lose charge overnight?
Passive battery drain occurs naturally, but excessive loss suggests background processes or poor storage. Ensure the earbuds are powered off when stored. Also, keep them away from Wi-Fi routers or other RF-emitting devices that may interfere with Bluetooth modules, causing unnecessary wake cycles.
Conclusion: Stay Powered, Stay Entertained
Verifying the charging status of your Disney earphones doesn’t require technical expertise—just attention to detail and consistency. By understanding LED signals, maintaining clean connections, and adopting smart charging habits, you ensure that favorite songs, audiobooks, and movie soundtracks are always ready to go. Whether it’s a road trip with Pixar playlists or bedtime stories from Moana, keeping your earphones powered enhances every moment of magic.


 浙公网安备
33010002000092号
浙公网安备
33010002000092号 浙B2-20120091-4
Comments
No comments yet. Why don't you start the discussion?