
Bold eyeshadow can transform a face—adding depth, personality, and a touch of drama. But when worn during daylight hours, it risks appearing too intense or out of place in professional or casual settings. The key isn’t avoiding bold color altogether, but mastering how to integrate it with subtlety and sophistication. With thoughtful application techniques, strategic color choices, and balanced blending, you can enjoy vibrant hues while maintaining a polished, wearable look.
The goal is not to mute your expression, but to refine it—ensuring your eyes remain striking without dominating your entire appearance. Whether you're heading to the office, meeting friends for brunch, or attending a daytime event, these strategies will help you wear bold eyeshadow with confidence and grace.
Choose the Right Shade for Daylight
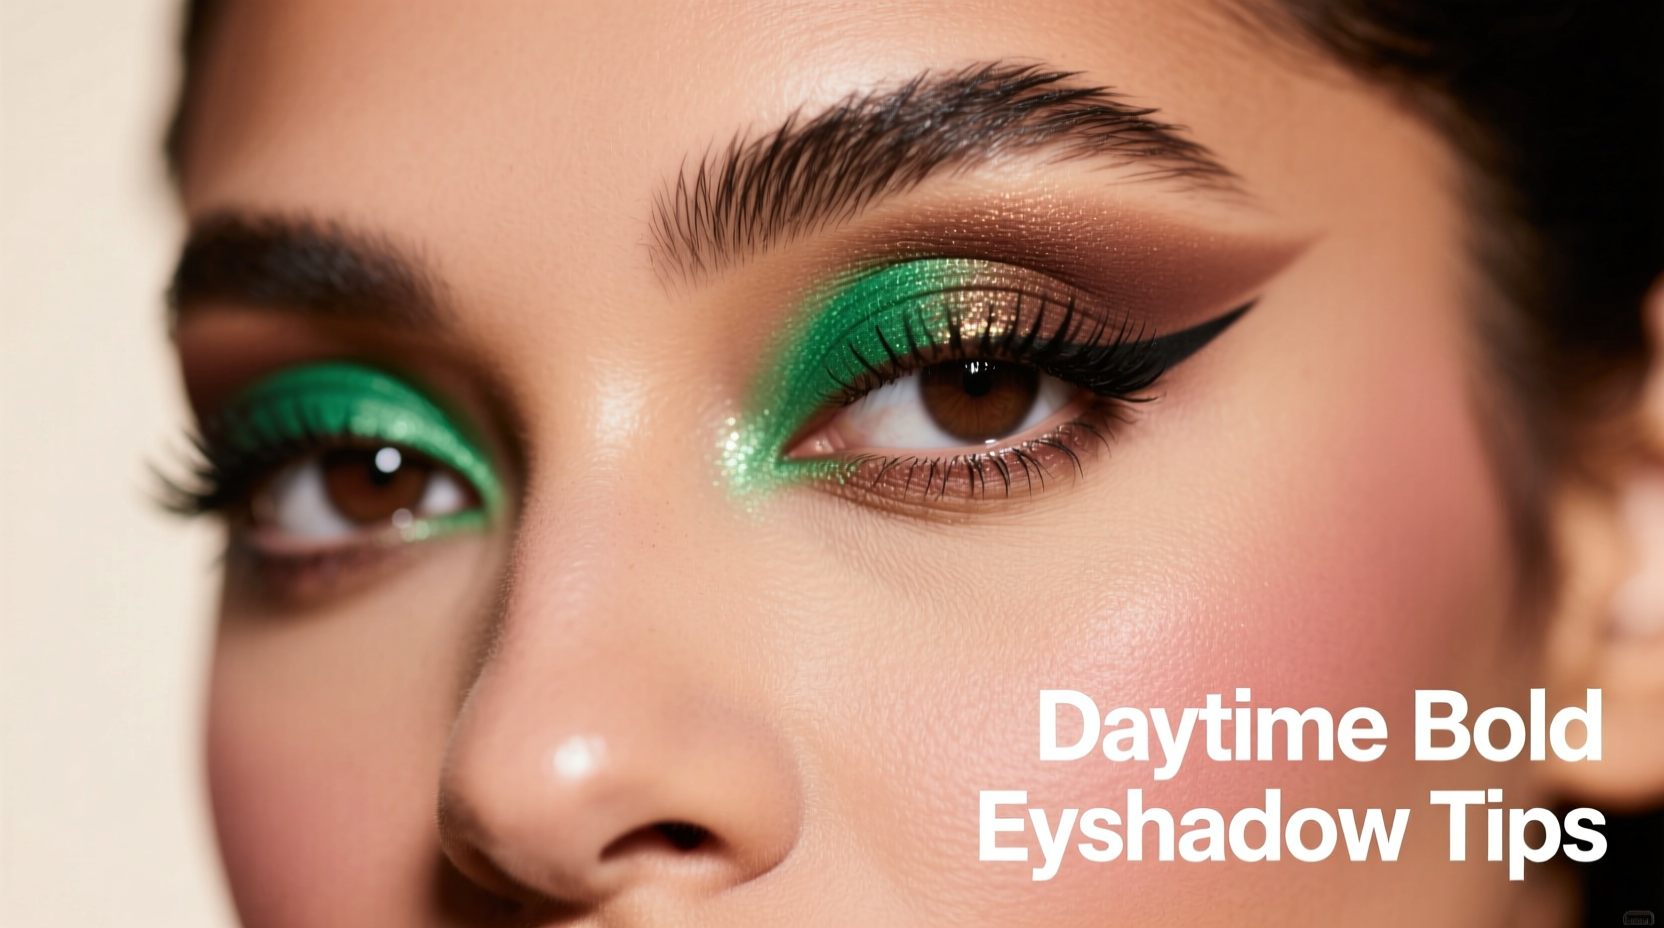
Not all bold colors behave the same under natural light. Some pigments amplify in sunlight, becoming harsh or overly saturated, while others soften beautifully. Selecting the right shade means understanding both tone and undertone—and how they interact with your skin’s natural warmth or coolness.
Creamy jewel tones like emerald green, sapphire blue, or deep plum offer richness without aggression. Warm terracottas, burnt oranges, and spiced corals also translate well into daytime looks because they echo natural sunset hues, making them feel organic rather than theatrical.
Avoid matte black or intensely metallic shades during the day—they tend to read as dramatic unless carefully diffused. Instead, opt for satin or semi-matte finishes that reflect just enough light to catch attention without glaring.
Build Intensity Gradually
One of the most common mistakes with bold eyeshadow is applying too much pigment too quickly. A heavy hand at the start makes correction difficult and often leads to an overblended, muddy result. The solution lies in layering—building color slowly until you reach the desired impact.
- Start with a neutral base (like beige or taupe) to prime the lid and create dimension.
- Dip your brush lightly into the bold shade—tap off excess to prevent fallout.
- Apply the color to the center of the lid first, then blend outward using small windshield-wiper motions.
- Evaluate after each pass. Stop once the color feels present but not overwhelming.
This incremental method gives you control and prevents patchiness. It also allows you to preserve the integrity of the pigment, which remains truer when applied in thin layers rather than thick globs.
“Makeup should enhance, not mask. With bold shadows, less initial application creates more room for refinement.” — Lena Patel, Celebrity Makeup Artist
Balance Your Eye Makeup
A bold eyeshadow look demands equilibrium elsewhere on the face. If your eyes are the focal point, other features should remain understated to avoid visual competition.
Keep brows defined but natural—over-groomed or heavily filled brows can clash with colorful lids. Use a tinted gel instead of pencil for soft definition. Similarly, skip heavy eyeliner along the upper lash line; a thin brown or gray liner only on the outer third of the eye maintains structure without intensifying further.
Mascara should be applied lightly. Two coats of lengthening formula are sufficient. Avoid volumizing mascaras that clump or extend beyond the natural lash line, as they add unnecessary weight to the overall effect.
| Feature | Do | Don't |
|---|---|---|
| Eyeliner | Thin brown line on outer half of lash line | Thick black wing or tightlining |
| Brows | Groomed with clear or tinted gel | Drawn-in hairs or sharp arches |
| Mascara | Light-to-medium coat, no clumps | Volumizing layers or false lashes |
| Lips | Nude, sheer gloss, or muted rose | Bright red or dark berry |
| Blush | Soft wash of color, blended well | Heavy contour or stark contrast |
Focus on Placement, Not Coverage
You don’t need to cover your entire lid in bold color to make a statement. Strategic placement draws attention where you want it—without shouting.
Try the “inner pop” technique: apply a bright or deep hue only to the inner third of the lid, fading it softly toward the center. This creates a surprise element when you blink or turn your head, adding intrigue without overt drama.
Another effective approach is the “halo cut crease,” where bold color is sandwiched between lighter shades above and below. For example, use a champagne shade on the inner corner and mobile lid, press a rich violet into the center, then blend a warm brown into the outer crease. The bold tone becomes a highlight rather than a blanket.
For those hesitant about full-lid color, try a “reverse cat-eye” with bold shadow. Apply the pigment only to the outer V and lower lash line, connecting it subtly beneath the eye. Keep the inner lid bare or highlighted. This elongates the eye and adds flair while feeling modern and intentional.
Blend Like a Pro
Blending separates amateur application from expert finish. A sharply defined block of color reads as costume-like, while seamless transitions mimic the way light naturally plays across the eye.
Use fluffy blending brushes in dome or tapered shapes. These distribute pigment evenly and soften edges without removing color entirely. Work in circular motions at the edges of the bold shade, gradually diffusing it into adjacent neutrals.
If blending becomes difficult due to pigment density, spritz your brush lightly with setting spray or use a clean dry brush to shear away excess. Never over-blend—a little visible transition is better than vanishing all impact.
Remember: blending isn’t about erasing; it’s about smoothing. The bold color should still be identifiable, just not abrupt.
Step-by-Step Guide: Soft Bold Daytime Eye Look
Follow this routine to achieve a wearable bold eyeshadow look suitable for daylight:
- Prime the lids: Apply an eyeshadow primer or dab a bit of concealer to ensure longevity and even tone.
- Set the base: Press a soft beige or ivory shade across the entire lid and up to the brow bone.
- Define the crease: Use a warm brown in the outer crease with a small blending brush to create depth.
- Add the bold hue: Take a jewel-toned shadow (e.g., teal or magenta) and press it onto the center of the lid using a flat shader brush.
- Diffuse the edges: Switch to a clean fluffy brush and blend the edges into the crease color using back-and-forth motions.
- Highlight: Dab a pearly shade on the inner corner and just below the brow arch to lift the eye.
- Finish subtly: Line the upper lash line with brown pencil, smudge slightly, then apply one coat of mascara.
This sequence ensures vibrancy stays controlled and harmonious with your overall look.
Real-Life Example: Office Meeting Makeover
Sarah, a marketing executive in her early 30s, wanted to express more creativity through her makeup but feared bold colors would seem unprofessional. During a product launch week, she experimented with a deep peacock green shadow applied only to the center of her lids, blended softly into a walnut brown crease.
She paired it with groomed brows, a hint of brown liner, and a sheer peach lip. Colleagues complimented her “fresh” and “awake” appearance—no one mentioned the color directly, but several asked what eyeshadow she was wearing.
The lesson? When bold shadow is placed thoughtfully and balanced correctly, it enhances presence without distracting. Sarah now wears color weekly, adjusting intensity based on her schedule—bolder for client calls, softer for internal meetings.
Frequently Asked Questions
Can I wear bold eyeshadow if I have hooded eyes?
Absolutely. Focus the color slightly above the natural crease so it remains visible when your eyes are open. Use matte or satin finishes to avoid emphasizing folds. Avoid shimmer directly on the mobile lid, as it can accentuate sagging.
What if my bold shadow starts to crease?
Creping often happens when too much product builds in the socket line. Use less pressure when applying to the crease area, and always set your primer with a translucent powder before shadow. A setting spray at the end also helps lock everything in place.
Is it okay to mix multiple bold colors during the day?
Yes, but limit the combination to two shades max, and ensure they’re tonally related—like cobalt and navy, or coral and tangerine. Blend them seamlessly and keep the rest of the face minimal. Overlapping contrasting hues (e.g., purple and orange) can look chaotic in daylight.
Final Checklist: Wear Bold Shadow Confidently by Day
- ✔ Choose a bold shade with a satin or semi-matte finish
- ✔ Prime your lids before application
- ✔ Build color gradually in thin layers
- ✔ Limit bold pigment to the center or outer lid
- ✔ Blend edges thoroughly with a clean brush
- ✔ Pair with neutral lips and soft brows
- ✔ Check your look in natural light before finalizing
- ✔ Finish with setting spray to prolong wear
Conclusion: Own Your Color, Own Your Day
Wearing bold eyeshadow during the day isn’t about compromise—it’s about intention. You don’t have to choose between self-expression and appropriateness. With smart techniques and mindful balance, vibrant color can become part of your daily signature.
Start small. Try one new shade. Experiment with placement. Learn how light affects your chosen hue. Over time, you’ll develop an instinct for what works with your features, lifestyle, and environment. Makeup is personal evolution, not rigid rules.


 浙公网安备
33010002000092号
浙公网安备
33010002000092号 浙B2-20120091-4
Comments
No comments yet. Why don't you start the discussion?