
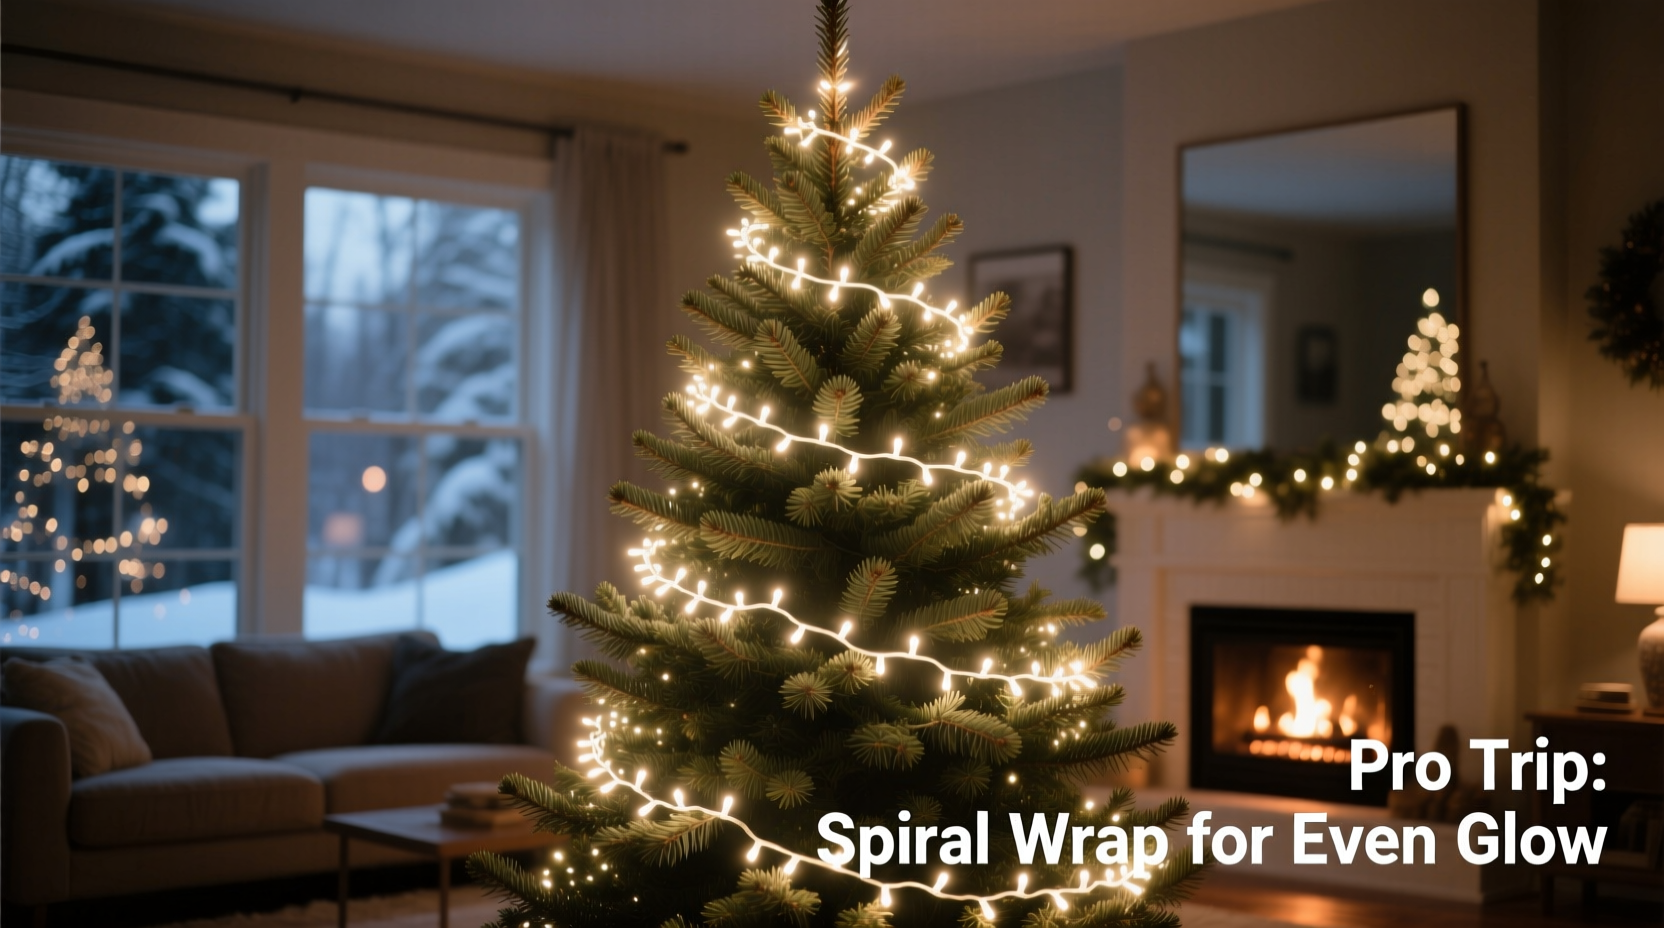
A beautifully lit Christmas tree is the centerpiece of any holiday display. Yet many people struggle with uneven lighting—glaring hotspots here, frustrating dark voids there. The secret isn’t more lights; it’s smarter wrapping. Achieving that full, radiant glow requires strategy, patience, and a few insider techniques used by professional decorators. Whether you're working with a real fir or an artificial pre-lit model, this guide reveals how to wrap your tree with lights so every branch sparkles evenly from base to tip.
The Science Behind Even Tree Lighting
Light distribution on a Christmas tree follows simple principles of depth, layering, and perspective. Trees are three-dimensional conical structures, but most people treat them like flat walls, draping lights in horizontal loops that only illuminate the outer shell. This creates shadows deep within the canopy and leaves the inner branches in darkness.
To achieve true uniformity, light must penetrate inward and upward. Each bulb should serve as both a surface highlight and a depth enhancer. The goal is not just coverage but volumetric illumination—light that fills the space, not just outlines it.
“Most people under-light their trees by at least 30%. But even with enough bulbs, poor technique leads to patchiness. It’s about placement, not quantity.” — Daniel Reeves, Lead Holiday Decorator at Evergreen Displays Inc.
Professional decorators use a “layered fill” method: starting deep, working outward, and maintaining consistent spacing. This mimics natural light diffusion and prevents the “ring-around-the-turkey” effect common in amateur setups.
Step-by-Step Guide to Wrapping Your Tree for Maximum Glow
Follow this proven sequence to ensure no corner of your tree remains in shadow. This method works for trees between 6 and 9 feet tall—the most common household sizes—but can be scaled up or down.
- Start with a well-fluffed tree. If using an artificial tree, spend time separating each branch layer. Fluffing increases volume and creates space for light to travel through. For real trees, ensure branches are flexible and not compressed.
- Begin at the trunk, not the perimeter. Plug the string into an extension cord laid near the base. Feed the first bulb into the innermost section of the top third of the tree, securing it with a twist tie or floral wire to the central pole.
- Work downward and inward in a spiral. Instead of looping around the outside, angle each pass diagonally from the back-top to the front-bottom. Think of winding a cone from apex to base, moving inward slightly with each turn.
- Maintain consistent spacing. Keep bulbs 3 to 4 inches apart along the string. Avoid clumping. If your string has 100 bulbs, plan for approximately 25–30 vertical passes per tree tier (top, middle, bottom).
- Layer multiple strings if needed. One strand rarely suffices. Use two or three identical sets staggered out of phase—one starting at the back, another at the side, a third at the front—to eliminate blind spots.
- Double-fill dense areas. Thick sections, especially mid-level where garlands or heavy ornaments will go, may need extra attention. Wrap a secondary string vertically through the core of these zones before adding decor.
- Test before finalizing. Step back and turn on the lights after each major section. View from multiple angles—especially from seating height—and adjust any dim zones immediately.
Pro Technique: The \"Fill-and-Frame\" Method
After completing the primary wrap, add a second, lighter string dedicated to outlining. This “frame” string runs strictly along the outermost tips of the branches, enhancing silhouette definition. Use cool white or twinkle-mode LEDs here to create contrast without overpowering the warm base glow.
Choosing the Right Lights and Tools
Not all string lights are created equal. The type you choose impacts both ease of installation and final appearance.
| Light Type | Glow Quality | Best For | Avoid If |
|---|---|---|---|
| Mini LED (Warm White) | Soft, even spread | All-over wrapping, large trees | You want high sparkle |
| Bubble or C7 Incandescent | Bright, directional | Retro looks, sparse trees | Seeking energy efficiency |
| Fairy Wire LEDs | Delicate, diffused | Filling gaps, accent layers | Need primary illumination |
| Twinkle or Fade LEDs | Dramatic, dynamic | Outer framing, focal points | Desire steady ambient light |
For wrapping, mini LEDs are ideal. They’re lightweight, cool-running, and produce minimal glare. Choose strings with 100 bulbs and a 25-foot length—this gives optimal spacing without excessive bundling.
Essential Tools Checklist
- At least two 100-bulb warm white LED strings (three for trees over 7.5 ft)
- Insulated twist ties or clear plastic hook clips
- Sturdy step ladder with stable platform
- Extension cords rated for indoor use (preferably with surge protection)
- Flashlight or headlamp for viewing inner branches
- Measuring tape (to track spacing consistency)
Real Example: Transforming a Problem Tree
Sarah from Portland had a 7-foot pre-lit artificial tree she’d used for years. Despite having 600 built-in lights, guests always commented that it looked “flat” and “dim in the center.” She followed standard horizontal wrapping but never ventured deep into the trunk zone.
During a redesign, she removed the old layout and applied the inward-spiral technique. She added two new 100-bulb warm white LED strands, starting each at the core and spiraling outward. She also installed a single fairy wire string along the outer edge for dimension.
The result? A dramatic transformation. The tree now glowed from within, casting a soft halo across her living room. “It finally looks like the trees I see in magazines,” she said. “I didn’t need more lights—I needed better placement.”
Common Mistakes That Create Dark Spots
Even experienced decorators fall into traps that compromise lighting quality. Avoid these pitfalls:
- Horizontal-only wrapping: Creates ring-like bands that leave vertical gaps between layers.
- Starting from the outside: Forces lights to sit on the surface, failing to illuminate interior volume.
- Overlapping too tightly: Causes clusters of brightness while adjacent areas remain unlit.
- Ignoring the base: The lower third is often neglected, making the tree look top-heavy.
- Using mismatched color temperatures: Mixing warm and cool whites disrupts visual harmony and highlights inconsistencies.
“The biggest mistake is treating the tree like a cylinder. It’s a cone with depth. Light needs to travel through it, not just around it.” — Lena Torres, Interior Stylist & Holiday Design Consultant
FAQ: Frequently Asked Questions
How many strings of lights do I need for my tree?
A good rule of thumb is 100 bulbs per foot of tree height. A 7-foot tree needs about 700 bulbs, or seven 100-light strands. If using pre-lit lights, supplement with at least two additional strings for fullness and depth.
Should I wrap clockwise or counterclockwise?
Direction doesn’t matter as much as consistency. Choose one direction and stick with it across all strings. However, if layering multiple strands, alternate directions slightly to prevent visible patterns and improve dispersion.
Can I use clip-on lights instead of wrapping?
Clip-ons are convenient but rarely provide even coverage. They tend to concentrate light on branch tips and leave the trunk area dark. For maximum glow, hand-wrapping is superior. Reserve clip-ons for temporary displays or outdoor trees.
Final Checklist Before Turning On the Lights
Before you admire your finished work, run through this final verification list:
- All strings are securely fastened and not hanging loosely.
- No exposed wires or frayed insulation near heat sources.
- Each major quadrant (front, back, left, right) has been visually inspected.
- Power strips and outlets are not overloaded (max 875 watts per standard outlet).
- A fire extinguisher is accessible and smoke detectors are functional.
- The tree stand is filled with water (for real trees) and the base is stable.
Conclusion: Shine Brighter This Season
A perfectly lit Christmas tree isn’t magic—it’s method. By shifting from casual draping to intentional wrapping, you transform a simple decoration into a luminous centerpiece. Focus on depth, maintain spacing, and layer thoughtfully. With the right technique, every branch becomes a canvas for light, and every room feels warmer because of it.
This holiday season, don’t settle for patches of glow and pockets of shadow. Apply these strategies, test as you go, and create a display that radiates cheer from every angle. Your family, guests, and even passing neighbors will notice the difference.


 浙公网安备
33010002000092号
浙公网安备
33010002000092号 浙B2-20120091-4
Comments
No comments yet. Why don't you start the discussion?