
Drawing doesn’t require natural talent—just curiosity, patience, and the right approach. Many beginners hesitate to pick up a pencil because they believe art is reserved for the gifted few. In reality, sketching is a skill anyone can develop with consistent practice and foundational techniques. This guide breaks down essential drawing methods into manageable, enjoyable steps that build confidence and creativity from day one.
Start with the Basics: Lines, Shapes, and Forms
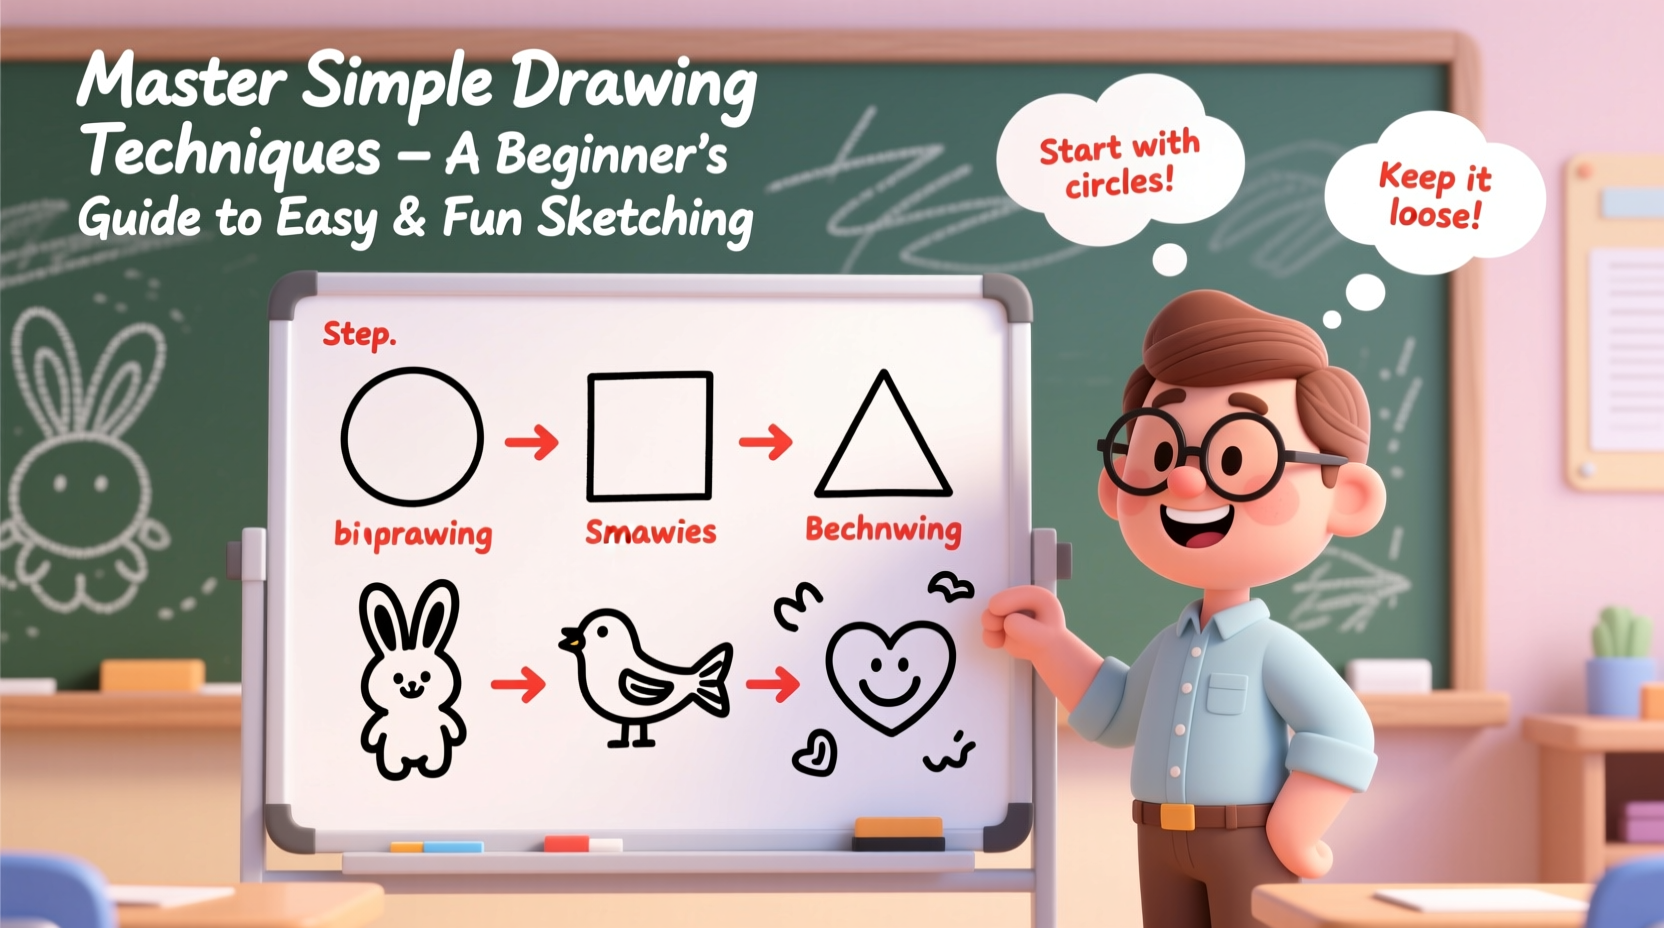
Every complex drawing begins with simple elements. Before attempting portraits or landscapes, train your hand and eye by mastering basic shapes and lines. Circles, squares, triangles, and ovals serve as building blocks for more intricate subjects. Practice drawing these shapes freehand, focusing on smoothness and proportion rather than perfection.
Next, explore lines. Vary pressure, length, and direction to understand how lines define edges, texture, and movement. Try exercises like:
- Drawing straight lines across a page without lifting your pencil
- Creating overlapping circles to form spheres
- Connecting geometric shapes to build abstract compositions
Understanding Form Through 3D Shapes
Once you’re comfortable with flat shapes, add depth by transforming them into forms. A circle becomes a sphere, a square turns into a cube, and a triangle evolves into a cone. Shading helps convey volume. Apply gradual pressure with your pencil to create gradients that suggest light source and dimension.
Beginners often overlook perspective, but even a basic understanding improves realism. Objects appear smaller as they recede into space. Try drawing cubes at different angles using vanishing points—one or two—on the horizon line.
Build Confidence with Daily Sketching Habits
Consistency matters more than duration. Ten focused minutes of daily sketching yields better results than an occasional three-hour session. Set a routine: keep a small sketchbook on your desk, in your bag, or by your bed. Whenever you have a spare moment, draw something nearby—a coffee mug, your hand, a plant.
The goal isn’t to produce masterpieces but to observe and translate what you see. Over time, your brain learns to interpret shapes, proportions, and spatial relationships more accurately.
“Drawing is not what you see, but what you can make others see.” — Edgar Whitney, watercolorist and educator
Step-by-Step Guide: Your First 7-Day Sketch Challenge
- Day 1: Draw 20 circles and 20 squares. Focus on consistency.
- Day 2: Sketch five household objects using only basic shapes.
- Day 3: Add shading to three simple forms (sphere, cube, cylinder).
- Day 4: Copy a still life photo using light construction lines.
- Day 5: Draw your hand in three different positions.
- Day 6: Attempt a full-page composition combining multiple objects.
- Day 7: Freestyle sketch—draw anything that inspires you.
Avoid Common Beginner Mistakes
New artists often fall into predictable traps that hinder growth. Recognizing these early saves frustration and accelerates learning.
| Mistake | Why It’s Problematic | How to Fix It |
|---|---|---|
| Pressing too hard | Leaves deep grooves, limits corrections | Use HB or 2H pencils for light sketching |
| Focusing on details first | Leads to disproportionate structures | Start with rough outlines and big shapes |
| Not stepping back | Loses overall composition balance | Pause every few minutes to assess the whole |
| Erasing too much | Creates holes in paper, increases anxiety | Embrace “mistakes” as part of the process |
The Myth of Perfection
Many beginners abandon drawing after a few attempts because their sketches don’t match professional work. But even skilled artists produce imperfect drafts. The key is persistence, not precision. Every line teaches muscle memory and visual judgment.
Essential Tools for Simple, Effective Sketching
You don’t need an expensive toolkit to begin. A few affordable items provide everything required for meaningful practice.
📋 **Beginner Sketching Checklist**- HB and 2B pencils (versatile for light and dark lines)
- Rubber eraser (avoid harsh plastic types)
- Pencil sharpener or sandpaper block
- Sketchbook with medium-weight paper (90–120 gsm)
- Soft cloth or blending stump (optional for shading)
As you advance, experiment with charcoal, ink, or colored pencils—but resist over-investing early. Mastery comes from repetition, not materials.
Real Example: From Stick Figures to Confident Sketches
Sophie, a 34-year-old office worker with no prior art experience, started sketching during her lunch breaks. At first, she struggled to draw a realistic cup. After two weeks of daily shape drills and light shading, she began capturing subtle curves and reflections. By week six, she sketched a full kitchen scene with accurate proportions. Her secret? She didn’t aim for gallery-worthy art—she celebrated small wins, like drawing a convincing shadow or balanced symmetry.
Within three months, Sophie filled two sketchbooks and hosted a mini-exhibition at her local café. Her journey proves that consistent, mindful practice transforms uncertainty into confidence.
Developing Observation Skills for Better Accuracy
Great sketching isn’t about imagination alone—it’s about seeing clearly. Most people draw symbols (e.g., a heart-shaped face, dot eyes) instead of what’s actually there. To improve, shift from “symbolic thinking” to “observational drawing.”
Try this exercise: Draw a chair from life, not memory. Measure angles by holding your pencil at arm’s length and comparing its tilt to the object. Notice negative spaces—the gaps between legs or arms. These unseen areas anchor your drawing in reality.
Another powerful technique is blind contour drawing: draw an object without looking at your paper. Keep your eyes locked on the subject and move your hand slowly. The result will be messy, but it trains hand-eye coordination and forces deeper observation.
“The purpose of drawing is to wake up the eye, not just record what it sees.” — Kimon Nicolaïdes, author of *The Natural Way to Draw*
FAQ
How long does it take to get good at drawing?
“Good” is subjective, but noticeable improvement typically occurs within 4–6 weeks of regular practice. Realistic rendering may take several months. Progress depends more on quality of practice than hours logged.
I can’t draw people—should I give up?
No. Human figures are among the most complex subjects. Start with gesture drawings—quick 30-second sketches that capture motion and posture. Build anatomy knowledge gradually through simplified models like mannequins or comic-style figures.
Do I need to learn digital drawing tools?
Not at all. Traditional sketching builds fundamental skills that transfer to digital platforms. Master pencil and paper first. Tablets and software can enhance your workflow later, but they won’t replace core drawing principles.
Conclusion: Start Today, Keep It Fun
Drawing is less about producing perfect images and more about developing a new way of seeing the world. With simple techniques—basic shapes, daily habits, observational training—you’ll unlock creative expression that grows richer over time. Don’t wait for inspiration. Pick up a pencil now, make a mark, and let curiosity guide you.


 浙公网安备
33010002000092号
浙公网安备
33010002000092号 浙B2-20120091-4
Comments
No comments yet. Why don't you start the discussion?